Beginners who are starting to take their first steps in video production almost always have one question. How to learn to shoot video at low cost and of fairly good quality?
With the right approach and planning for the entire video production process, you can achieve very good results.
Here's what you need to know in order to shoot video like a professional at minimal cost:
Video Planning
Write a full-fledged script, prepare text, make a storyboard. Take shots from different angles, zoom in, zoom out, change focus, so that the frame is full and expressive.
In addition to writing the text and script, you need to write out the entire plan for the video clip frame by frame.
When everything is sorted out, you can shoot a video following a clear plan worked out in advance. Shoot frame by frame, edit and combine frames into a video in the editor. Also add transition effects between frames, graphics, titles, etc.
Video file format for uploading to YouTube
- file format: MPEG-4, H.264 codec;
- resolution: 720p or 1080p;
- aspect ratio: 16:9 widescreen
Try to shoot video in the highest resolution possible for your camera (720p or 1080p HD), use the most common video formats. YouTube automatically converts the files you upload to FLV format and converts them into viewer-friendly viewing options based on device or internet speed.
Video equipment
Accessories
A few basic tips to use when shooting a video.
- Keep an eye on the background so that it does not stand out in the frame, is not too overloaded, and the viewer’s attention is concentrated on the main subject.
- Create in the frame slight dynamics– the subject can walk around a little, stand up, and gesticulate at the board. Using a tripod, follow the movements of the subject and do not make sudden movements or jolts.
- It is necessary to shoot video from different angles. Bring static video to life by editing footage taken from different points and distances. Experiment, use multiple cameras.
- Use variations with a separate close-up. A person points to a certain selected small object (a phone on a table), it is quite difficult to see it from afar, and with the help of a close-up you will show a clear frame, thereby embellishing the video.
- Try not to center your subject, use the rule of thirds when the screen is visually divided into nine equal parts, three columns horizontally and three vertically. Try to place the objects you are shooting proportionally at the intersection of these lines.
- Avoid direct sunlight; shadows should look soft and diffused. Favorable times for outdoor photography are early in the morning and the second half of the day closer to sunset.
In order to make videos for YouTube, you don’t have to buy any expensive equipment, to be a film director and professional cameraman. All you need is an inexpensive video camera and a few simple accessories, which, by the way, can be made from improvised materials.
In a rather short article it is quite difficult to highlight and describe the basic rules and requirements for shooting YouTube video. I hope these simple strategies will give you a basic understanding and help you navigate the labyrinths of semi-professional filmmaking.
I rarely shoot with a video camera myself, and I do it mediocrely, I mostly do editing, and therefore, how No need shoot, I understand very well.
Often, when editing a film, you have to spend a lot of time and effort to cut out unsuccessful scenes and remove various “jambs” of the videographer.
Therefore, based on my experience, I want to give tips on video shooting and warn against common mistakes when shooting video.
Handheld shooting
The first and main problem of a novice videographer is Camera shaking and jerking when shooting.
The definitive treatment for this phenomenon is the use of a tripod. But we all understand perfectly well that this is not always possible or justified.
Handheld video shooting requires some experience and knowledge of basic rules.
So, when shooting handheld video, keep in mind Basic Rules:
You cannot hold the camera at arm's length;
Hold the camera with both hands (one covering the camera, the other supporting the first);
It is advisable to press your elbows to your body or even rest them on your stomach;
If possible, use additional support - railings, door frame, wall, etc.).
For the same reason, try not to shoot while moving; you will get shaking and shaking of the frame.
Although experienced operators master the so-called “cat walk”, which is very soft, without jolts, and successfully shoot on the move.
Using the zoom
ZOOM- this is a sore spot for novice videographers. The zoom button attracts like a magnet, and people start using it without any measure.
In addition to the fact that numerous “arrivals” and “departures” are completely inappropriate, you will also get a deterioration in quality. When an object is enlarged, the jitter increases significantly; this is a physical law.
If you are using zoom, zoom in or out should be smooth. I strongly advise against using digital zoom (as opposed to optical zoom) - the video quality suffers greatly. It's better to turn it off right away.
Camera movement
You need to be especially careful when removing panorama- camera movement right, left, up, down. An inexperienced operator, in addition to jerks and jumps in the frame, can “fly out of the frame,” lose orientation, and shoot something completely different from what is needed.
When shooting panoramas, the camera must be moved smoothly, slowly, otherwise you will get continuous flickering. Moving the lens quickly is one of the common mistakes.
At the beginning and end of the panorama, it is advisable to stop the camera for at least a couple of seconds. Experts advise making the panorama duration no more than 8 seconds.
If you need to shoot objects in different directions, you can use a sharp camera shift from one object to another. These jerks can be easily cut out when editing the film, but there is no need to pause (time is wasted) or take poor-quality panoramic shooting.
Another of the main mistakes of inexperienced videographers: the camera falls over, and the horizon becomes slanted. Need to keep vertical, focusing on pillars, walls, etc.
Long shot
Often the operator, having turned on the camera, walks for a long time, moving it from object to object, in addition, using the zoom lens. It is called "long shot". This kind of video makes a depressing impression and is boring to watch.
Please note that in any film the frame changes after about 5 seconds, or even more often. Today, when you watch TV, count how long a single frame lasts, count on average 5 seconds.
A 12-second shot is considered super-long and is not common, although it is used in some films if that is the director's intention. Some famous directors - Hitchcock, Scorsese, Tarkovsky - are masters of the long take. (About using a long shot.)
We continue to talk about the standard rules of video filming.
If the cameraman shot a “long shot,” the editor will have to cut it up, change shots and angles, insert interruptions to make the film look good. And it happens that there is nothing to choose from.
Therefore, when shooting video, do not take very long frames, change positions, change angles, shoot in pieces. For example, first we shoot a general shot, a pause, a medium shot, a pause, a close-up.
Be sure to shoot details (eyes, hands, interior, close-up of some object, etc.), alternate different plans and angles, so that during editing you have plenty to choose from.
Lighting
At artificial lighting be sure to set it up white balance manually, otherwise you may end up with unnatural colors. This is especially true for people’s faces (yellowish or bluish tints).
It can be treated manual installation white balance using a regular white sheet of paper (see the instructions for the camera).
Errors in color rendering They can also occur during a sharp transition, for example, from bright sun to shade or when shooting against a window. The camera does not have time to quickly react to the changed lighting, and an interesting shot may be ruined.
Other common mistakes
Do not remove small children or animals from your height. This is an extremely unfortunate angle.
It is better to sit down, and in some cases, even place the camera on a chair or floor. The rotating screen will give you the opportunity to shoot without bending over, and the frame will look much more interesting.
I would like to mention another common blunder of an inexperienced operator. Often, when shooting, a person switches from recording to pausing and gets confused.
As a result, it thinks that it is filming while the camera is paused. Usually, the shooter quickly catches on, although it is possible that a valuable frame will be missed.
Make it a habit to constantly check the recording indication on the screen.
An even more common situation is when an amateur cameraman thinks he has paused the camera, but it continues to shoot.
This is my personal problem, I do this regularly. True, I shoot infrequently and only home video, so I can’t be considered an experienced cameraman.
The result is whole pieces of the removed road, walking legs and other nonsense, which you yourself have to cut out during installation.
We monitor the condition of the camera.
In addition, it is important to know the rules for placing objects in the frame -
If you watch with interest what is happening on the screen, listen carefully to what is being told to you, and do not want to be distracted, then the video is well made. The secret of a high-quality video consists of several different points: a good idea, its competent implementation, directorial work, cinematography, and the charm and attractiveness (in every sense) of those in the frame.
However, if you are your own screenwriter, director, and cameraman without much filming experience, then first you need to study and understand how to film high quality video. We will talk about this further.
The question is how to remove good video, is wide enough. Certain types and genres of videos have their own rules. As an example, we will look in a little more detail at how to shoot a video for your YouTube channel and how television journalists make their videos. Even if you don't intend to film something like this, check it out anyway because you might learn useful tips, which are useful for any type of video.
A few words about the equipment
50% of success depends on what technique you use for shooting. This issue requires detailed study, so if you are looking for suitable equipment, take the time to study the characteristics of the necessary equipment in order to choose the best. We'll just go over the basics a little:
- It’s better to shoot with at least a semi-professional video camera with a high-quality video lens. In principle, for home video you can, at worst, shoot with a good professional camera or webcam.
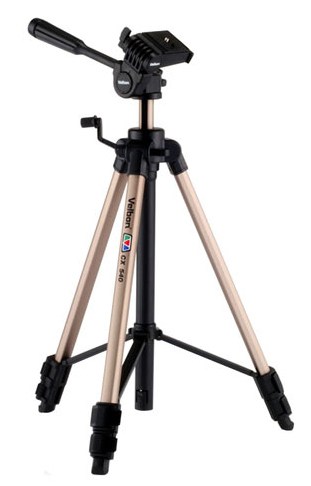
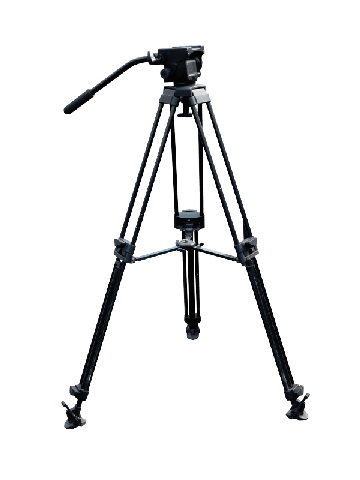
- A prerequisite for a good video is the use of a tripod if the shooting is stationary. Any unintentional camera shake or twitching will ruin the video.
- Provide good light.
- Choose a quality microphone. You can use a buttonhole.
How to make a good video for a YouTube channel
The appearance of a large number of personal channels on YouTube is a tribute to fashion, new way make yourself known, as well as one of the modern types of income. If you decide to start your own channel, then first study the work of other bloggers, identify their mistakes and never repeat them. Thanks to this, the videos will be much higher quality and more popular. Here are some tips on this matter:
- If you do not fully understand what you want to talk about, it is better to study the issue in more detail, read something, watch something and combine the information received with what you know. This video should be useful and informative.
- Many bloggers like to ramble on and on, and the viewer gets bored. In the process of filming, he remembers something, goes beyond the scope of the issue under consideration, etc. This is tiring. In advance, sketch out on a piece of paper a rough logical plan for what you will talk about, and stick to it.
- Follow your appearance. At a minimum, you must be neat. If you have style or a striking appearance, don’t be afraid to highlight it—people are attracted to attractive and vibrant personalities.
- It's how you speak that matters. If you mutter under your breath, look with a sour expression, monotonously say the same thing, the user will close your video without regret and will never return to your channel. Smile sincerely, speak in a lively voice, do not be afraid to joke where appropriate, make your speech bright: use different vocabulary, speech patterns whenever possible, make accents, ask rhetorical questions, etc. The user should have the feeling that he is communicating with a living person who understands him - then there is trust and a desire to return to your channel.
- Never shoot online. You may accidentally blurt out something stupid, something else may happen - all this spoils the impression. Shoot the video in a calm environment, then edit it correctly and watch it again.
- When the video is ready, there are no complaints about it, you can upload it to the site. To attract users to watch, you need to choose a bright, but attractive and simple cover for the video; understandable, but you can also have a slightly intriguing and provocative name. In the video description, you should briefly highlight the main points of the video.
How to make a good video for a novice journalist
Preparing a report for broadcast is the result of joint work between a correspondent and a videographer, and how well-coordinated and harmonious the work of these two people was determines how high-quality the video will ultimately be.
- If it is possible to prepare for filming, then the correspondent needs to study the topic of the report in advance, read and watch other similar materials. If not, then a little preparation is made directly at the shooting site: shooting objects are outlined, questions for respondents, etc.
- A professional cameraman already knows what to shoot. However, if the correspondent needs some special plans, photographed objects that he will talk about, then he explains in advance what and how to shoot. There are three main types of filming shots: close-up, medium shot and wide shot. Close-ups are usually taken of individuals while they are being interviewed (in television journalism, these interviews are called synchronized interviews). A medium shot is necessary for shooting multiple objects or multiple people. The general plan is the most ambitious of the three considered. They film large spaces; it is necessary to show the whole picture of what is happening. In addition to the usual frames and synchronizations, one can also distinguish the “life” type, when plans for an event with sound are recorded (for example, a march to music).
- While the cameraman is filming footage for the report, the correspondent is looking for people to synchronize, collecting material for the story, and asking the organizers and participants of the event. When filming synchronized action, the operator first sets up the camera, selects the most favorable angle for shooting, then gives a sign to the correspondent, who asks questions to the respondent through a microphone. Having filmed and collected the necessary material, the film crew returns to work.
- Next, the correspondent draws up a consistent plot plan, where he writes down the entire text behind the scenes, the words of the respondents, and indicates where all these elements are located. In addition, he looks at the filmed material, notes from what time point to what time the necessary frames, synchronizations, and live shots are located. The more footage you have, the more choice and easier the work. At this stage, you need not only to write a plot plan, but also to determine where which frames will be located. It’s very good when words are tied to frames. For example, a journalist says: “This poplar...”, and a frame with the very poplar he is talking about is selected. If, for example, there is some defect in the frame during synchronization, but it cannot be removed because the person is saying important things, interruption frames are used—neutral frames of the scene of the event. Also, interruptions are often needed when there is not enough variety of shots, for example, when shooting in a small room. For interruptions in this case, use frames with hands, frames where interesting objects in the room are captured in close-up, etc.
- The last moment before the final preparation of the plot is its editing, speaking the text and arranging the video sequence with sound. When the plot is completely edited, all that remains is to add the necessary elements - titles, geotitles, etc.
You may get something useful from the above, even if you're working on a different type of video. These tips will help you shoot quality and interesting videos. The most important thing, perhaps, is interesting idea, which is served non-standard. Therefore, listen to the advice of others, but do not forget to use your own “tricks” - and then your video will arouse interest and people will want to watch it again.
Have you already tried recording video on a camera or video camera, or are you just planning to make your own amateur films? To make your videos high-quality and interesting, you don’t have to complete editing or camera work courses. It is enough to remember the basic techniques and rules of shooting, as well as acquire the appropriate equipment.
Before you pick up a camera and create your first serious project, we advise you to read our instructions for shooting video. In this article, we will briefly tell you how to and how not to shoot a video, what common mistakes novice operators make, and what to do to make your video easy and convenient to edit.
Suitable equipment
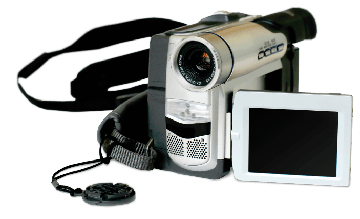
Select video camera, suitable for your purposes. Generally, home video does not require expensive professional camera, especially if you are going to record videos for publication on the Internet or viewing on mobile devices, such as iPhone and iPad, as well as Android tablets. In any case, you should pay attention to the camera resolution and some other parameters. Find out more about choosing a video camera from our instructions.
If you have the opportunity, purchase tripod. Using a good video tripod can significantly reduce or completely eliminate camera shake during recording. It is advisable that the tripod has floating head, allowing you not only to rotate it, but also to change the angle of inclination. It is also ideal to have a built-in level, which will help you level the camera and avoid “rolling over” the frame when shooting a panorama. You can read more about how to avoid frame shake in our article on image stabilization.
If possible, you should also use external microphone for audio recording, as the built-in microphone tends to produce lower quality audio and may pick up extraneous noise from button presses or wind. Additionally, you can aim or move the external microphone closer to the sound source to achieve clearer recordings. When shooting outdoors or in nature, it is also recommended to use wind protection to reduce noise.
Take care in advance lighting. If part of the recording will take place in the dark, you may also need to get on-camera lamps, provide good production lighting and adjust the shutter speed manually.
If you plan to shoot in a studio, you can also prepare green background for shooting, and then placing objects on any other background when editing in a video editor. Learn how to do this using the Movavi Video Editor in the instructions for using the Chroma Key effect.
Preparing for shooting
Even before you go to the shooting location, it is advisable think over the idea and format of the clip. Are you going to shoot a beautiful wedding video, a video chronicle from a vacation, a party or a birthday? Do you want the video to be funny, romantic or serious? Are you planning a short sketch or a whole film? Even if you cannot formulate a specific plot or write a script, such preparation will help you more easily decide on the choice of plans and subjects for shooting.
Make sure your camera battery is fully charged and that you will be able to charge your camera while shooting. If you plan to record for a long time without recharging, it is advisable to have spare storage media and batteries for your devices. If you are using a tripod or other accessories, be sure to check that they are in good working order.
If you are using a tripod, use a level to check that the camera does not fall over. The smoothness of camera movement on a tripod depends directly on how you hold it. The farther your hand is from the camera, the less jerky the movement will be. If you're using a viewfinder, resting your other hand on top of the camera will also reduce shake. In addition, you will find it easier to control camera settings with your left hand if you move it with your right. For example, turn recording on and off or “run into” objects.

In some cases, shooting with a tripod may be inconvenient, or you may not even have one at hand. However, you can achieve good results when shooting handheld with a little practice. To shoot well without a tripod, you need to follow several rules. If the shot is static, it's best to put the camera somewhere. Typically, video cameras are designed in such a way that they can be placed vertically on a flat surface.
If there are no suitable surfaces at the shooting location or the camera will need to be moved:
- Hold the camera with both hands, resting your elbows on your torso.
- When shooting a panorama, shoot from a turn, gradually returning to your normal position. A common mistake among beginners is to start shooting a panorama while standing full-face and “twist” to the side. Since the final pose is awkward, the camera may shake a lot.
- Try not to shoot while moving - you won't be able to avoid shaking when shooting handheld.
- Take your time when moving the camera, otherwise the panorama will be unfocused and the image will be “jerky.”
- Shoot children and animals from their height; the material will be much more interesting.
- Hold the camera loosely in your hand, using two fingers, so that it is leveled by gravity and does not fall over when you shoot at floor level.
- Holding the camera at arm's length, rather than bent, if you need to shoot from a height higher than you are, will reduce arm fatigue and prevent too much shaking.
How to choose the right shots (plans) for shooting

A “shot” or “shot” refers to one scene filmed from the start to the stop of recording. Your video, whether it's a baby shower, a corporate party, or a travel report, will most likely consist of a splice of multiple shots or shots.
Among new camera operators, one of the most common mistakes when choosing a shot is moving the camera too often. After choosing a frame, it is advisable to linger on it for at least 10 Seconds, before moving on to another subject, so that during editing it is possible to combine different plans well. Of course, this rule does not work in all cases: sometimes you need to quickly change the subject, for example, if you are recording a performance or concert.
You should not remove the so-called "long shot"(scenes longer than 12 seconds): it cannot be used completely during editing and will have to be redone for a long time. Therefore, when shooting video, do not take very long frames, change angles, shoot in small sections. For example, first we shoot a general shot, a pause, a medium shot, a pause, a close-up. If you are shooting a panorama, be sure to shoot at least a second of static video at the beginning and end, so that it can be conveniently edited later.
It is also important to write down the so-called “interruptions”. Interruption- this is a frame that is pasted between two other frames, interconnected by the unity of objects and scene. For example, you are recording a lecture. Before the lecture, you can take a few shots in the audience, with the audience. During editing, if you need to cut out part of the lecturer's speech, you can insert interruptions to disguise the junction between the frames. If done correctly, the viewer won't even notice where the material was cut.
In conclusion, I would like to note that this is only a brief introduction to the principles of high-quality video filming. The best way to improve your skills is to start filming. This way, you will not only learn to apply our tips in practice, but also master other camera techniques on your own.
Surely you have wondered why some videos on YouTube are so popular? How to shoot a video correctly so that they rise to the TOP and are pleasant to watch?
And it very often happens that such popular videos are no different in value from other similar videos that are not popular.
The reason is simple - some people know how to shoot a video, design it and how to promote it on YouTube, while others do it incorrectly. In this article, we will look at the 7 main disastrous mistakes that should not be made when shooting video.
The good news is that you can get great results, simply by following the recommendations in this article. They work the same for all types of videos. Another thing is that it depends only on you how competently you can implement them.
Also, there are a number of factors that also affect the results, but which we will not consider in this article. For example, how do you choose a topic for a video, sound and picture quality, video promotion on YouTube, etc.
Attention! In this article, you will also receive a valuable bonus - the correct video structure, with which you can make “correct” videos. So read to the end! But first, about the mistakes...
Mistake #1. There is no introduction at the beginning of the video
Very often you can see a video with a completely incorrect introduction, when the content goes straight to the head.
Imagine the following situation. You are walking down the street and a stranger runs up to you and starts telling you something. Most likely, you will not be pleased to have a dialogue with him.
You don’t know who he is and what he wants from you, so the level of trust in him will be zero.
Really, why should you listen to him, waste your time on him, if he doesn’t even bother to introduce himself?
The same thing happens with video. If you don't introduce yourself, then most likely they won't want to listen to you. This works on a subconscious level.
A lot of work needs to be done on the presentation so that it sounds beautiful and is concise. Nothing superfluous, but so that it is self-sufficient.
For example, in my videos I not only introduce myself, but also insert a special graphic:
Remember, how you introduce yourself is how you will continue to be perceived.
Mistake #2. There is no short announcement (what the video is about)
Another big mistake when shooting a video is not telling the audience what it will be about and immediately start posting content. Why is this wrong?
Look, you only have a few seconds to capture the viewer's interest. A few seconds so they know whether they should continue watching or not.
Believe me, they will thank you even if the announcement turns out that the video is not for them. It's okay if the viewer opened the wrong video, but at least you won't keep him waiting. The viewer will not feel deceived.
Therefore, you should always make a brief announcement and say a few words about what you will share.
Mistake #3. No value in video
Even if you make the beginning of the video attractive (introduce yourself nicely and make an announcement), but then don’t give what the audience expects - this is a complete failure.
You won’t just lose a viewer who won’t watch the video and subscribe, you’ll lose much more.
A satisfied fan is what will make your YouTube channel really popular!
People will only share, like, comment and subscribe your videos if you provide GREAT VALUE.
Don’t repeat the mistakes of many, when the video is heavily promoted, but there is no value in it. It’s easy to get views, but getting fans (community) is a task on a completely different level.
And especially, NEVER use loud titles that are completely inconsistent with the content of the video, in order to get views. Respect the audience!
See what kind of reaction such videos can cause :)
Therefore, the value in the video must fully correspond to its title and the stated announcement. Better yet, exceed all expectations. They said it and they did it!
Mistake #4. No summing up (conclusion)
It would seem that you have already said everything. They gave the value and we can finish. No, in many cases this is not enough.
This is especially true when the video is long and you have given a lot of content. People tend to forget most of the information while watching it.
Some people even need to see/hear/read several times to “get it.” By the way, I am partly like that :)
I watch the video superficially first to make sure it has the necessary value. And if there is no conclusion at the end, I have to rewind and waste my time again. This of course depends on the type of video, but in most cases this is what happens.
It’s another matter when the video is shot correctly, that is, when the results are summed up after the content is submitted. It’s just a brief point-by-point enumeration of the essence.
Remember that YouTube is primarily a visual community. That's why briefly repeat the most important At least it won't be out of place!

Another blunder is not telling what to do with the information received.
It may seem to you that people themselves should know what to do next. But that's not true.
Giving content is not enough. Many people simply need to be given a “task.” Tell them to take your recommendations and implement them. Tell me how this applies to different situations, what will happen if they don’t do this, etc.
There is no need to say much here, a little recommendation will suffice.
Mistake #6. No call to action

What is the main purpose of your videos? Number of views?
A few words about this have already been said in error No. 3. You have to be honest – you won’t be satisfied just by watching. You need fans, subscriptions, comments and traffic to the site.
In our case, we use YouTube to build our community of entrepreneurs and marketers, and to generate traffic to the site. And of course we provide value.
By the way, We get the most visitors to the site from YouTube(meaning free traffic), and this is only due to the proper use of video marketing strategy.
It must be said in plain text, or even give instructions, what they need to do right now.
For example, if the video suggests an invitation to your webinar, say that there is a link under the video, follow it and register!
But, at a minimum, in each video, ask your viewers to subscribe to your channel, like the video, comment and ask your questions. This works!
Develop your own style, bring it to automaticity and apply it.
When we started using a call to action in all(!) videos, the performance immediately improved several times.
Mistake #7. No announcement of other videos
Maybe, last mistake No. 7 from this list is not entirely related to the process of shooting a video, but that doesn’t make it any less important.
Think about it, why do most TV channels make an announcement at the end of a particular program?
The answer is to keep the viewer. The fact is that after seeing the announcement, there is a high probability that the viewer will be interested, and he will NOT switch to another channel. Thus, will continue to watch their channel.
You need to do the same. Instead of leaving the viewer to their own devices (even if you managed to give them exactly the value they were looking for), offer them your other videos.
Give the opportunity to continue to stay on your channel, and not on the channel of your competitors.
In addition, this little trick will trigger an interesting promotion effect - the videos themselves will promote each other! A nice bonus, don't you agree?
What does it look like? Here is one of the options how we implemented it:
So, what to offer at the end of the video. One of best solutions will provide similar content on the same topic.
But if there is no such video, offer any other one that you consider the most suitable or most important.
CLUE. This step is usually done during the installation stage. You can make a separate video, which you will “stick” to the very end each time. Save it as a template, it will save you a lot of time later!
Important! Just try to insert an announcement on a different video into each video so that you get proper linking.
Conclusion
Now you understand why some videos are pleasant to watch, while others you want to turn off within the first 10 seconds. Why some videos “work” effectively, while others are completely useless, although they may have even more value.
And now the promised bonus - correct structure video. You just need to follow all the above recommendations in exactly the order they are described.
Here's a structure that will work for most videos:
- Greeting and branding
- Say what the video is about
- Give value (solution)
- Summing up (conclusion)
- Give recommendations (what they should do next with the information received)
- Call to action (if you need to register, download something, read, etc.)
- Correct ending of the video (show other videos on the channel)
Apply this strategy and your videos will be a pleasure to watch. They will bring you more views, more subscribers and more traffic to your website.