We will explain why the laptop does not see Wi-Fi and how to solve the problem in the article, since no one is immune from faults in the wireless connection to the Internet. The WiFi connection may not be functional for a number of reasons. And it is not necessary that these reasons will be somehow related to each other.
Content:
You can easily check why your laptop does not see the Wi-Fi network. To do this, we first check the access point or router, as well as the laptop itself, for functionality. It is important to know which device is causing the problem.
Let's start with the router. A fairly common cause of malfunction is the banal “freezing” of the equipment. The first sign of this is an atypical indication, that is, the LEDs on the router blink in an unusual mode. To correct the situation, restart the device or unplug it, wait a couple of minutes, and then turn it on again. If it's a minor internal glitch, restarting solves the problem. The laptop, in turn, will quickly pick up the signal.
Voltage fluctuations can cause parameters to be reset. The router stops transmitting the signal. In some cases, the Internet connection also gets lost. If this happens, the settings must be re-entered using the device’s web interface. Addresses to enter: 192.168.1.1 or 192.168.0.1. The choice will depend on the router model. You can access the interface from any browser. If after this the connection works, then everything is fine with the device.

Helpful advice: The cause of router inoperability is often an involuntary reset of the router to its original settings. To set up the configuration again, it is better to use the services of specialists from the provider company.
If each method of checking the router does not bring results, you need to check why the laptop does not see Wi-Fi. First of all, we check the activity of the network equipment. Most modern laptop models have LEDs on their bodies. We will be interested in the one marked with an antenna icon or directly with the inscription “Wi-Fi”. If the diode is lit, then the built-in adapter is functioning. Otherwise, the adapter must be started. Press the “Fn” key and another one where there is an antenna icon.
The cause of temporary inoperability may be a malfunction of the operating system software. The connection activity will be checked through the Windows Control Panel. If it does not work, then launch it using the context menu.
The network element may be completely absent from the list of available connections. We check the “Network adapters” section, and more specifically, “Wireless” devices. We enable the adapter using the context menu. Then we restart the computer.
Why doesn't my laptop see wifi? Typical reasons
There are several simple reasons why the laptop does not see Wi-Fi. For example:
- The router is not turned on - turn on the router;
- There is no Wi-Fi coverage – we come closer to the source;
- Your router is “buggy” - reboot it;
- The Wi-Fi receiver is not turned on - turn it on.
However, there are also more serious disruptions to the connection. These include:
Wi-Fi is slow, why?
In addition to the fact that the computer does not see Wi-Fi, the problem of a slow connection is also relevant. There are several reasons:

There are no eternal electronic devices; sooner or later, any technology begins to act up and eventually fails. But if you detect the onset of problems in time and deal with them competently, you can increase the lifespan of your equipment significantly.
Let's try to do just that if suddenly the computer suddenly does not see the router, or uncharacteristic aspects of its operation begin to appear.
Before starting to restore the router to normal operation, the user must have direct access to the router, and must know the IP address of the device, username and password to enter the settings menu to search for errors in the “lost” settings.
Let's start with physical manipulations.
Indicator LEDs
The first thing to do when the computer stops seeing the router is to look at the router's display panel.
Router display panel
The indicators responsible for powering the router and network interfaces should be lit. If your computer and router are connected via a wired connection using a patch cord, then the corresponding LAN indicator should light up (if the wire is connected to the 1st port, then the 1st port indicator should light up). If they are connected via Wi-Fi, the wireless network indicator should be on.
If no indicator lights up, check the power supply; the power supply may have come loose from the socket, or the plug in the router may have come loose. Also, use a multimeter to check the functionality of the power supply, it may have burned out.

Multimeter
If the power supply is working, but the router indicators are not lit, then, most likely, it has served its purpose, and it’s time to go to the store for a new purchase.
If the indicators tell us that all interfaces are working, but there is still no connection with the computer, then we will try to ping it, that is, send the computer a special request to which the router must respond, thereby confirming that it is “alive.”
To ping, launch the command line, in which we write the command “ping 192.168.1.1.”.

Router ping
Address 192.168.1.1. is indicated as an example, you must enter the current address of your router. If the answer is as in the figure, then the router and computer are connected, and there are no problems at the physical level. You need to look at the settings that will be discussed in the second part of the article.
Wi-Fi connection
Also, the connection between the router and the computer often disappears during a wireless Wi-Fi connection.
This can happen as a result of many reasons:
- Some routers are equipped with a button to turn on/off the wireless module. Perhaps someone simply turned off Wi-Fi on the router;
- Also, Wi-Fi could turn off spontaneously without human intervention, simply a firmware glitch;
- The antenna or the wire transmitting the signal from the antenna to the router board has come loose.

Button to turn on the wireless module of the router
For the first two options, just look at the Wi-Fi indicator LED - it will not light up. If it is on, twist the antenna; if it is removable, try tightening the nut at the point of attachment to the router body.
Also, during wireless communication, as a result of a firmware failure, the network IP address of the router could be lost. Try connecting to it using a network cable to be able to go into the settings, which will be discussed further.
Router settings menu
Now let's try to dig into the device settings. Let's consider the above case with a lack of communication with a computer via Wi-Fi. The only way to enter the settings is using a network cable.

Network wire patch cord
We connect it to the LAN port of the router and the computer’s network card. In any web browser on your computer, log into the router’s web interface using the router’s IP address.

Logging into router settings
Enter your username, password, and get into the settings. Next we move towards the Wi-Fi settings.
Wi-Fi setup
Select the “Wireless” menu, the “Wireless Setting” submenu.

Setting up Wi-Fi
If the indicator on the front panel responsible for the wireless network is not lit, then look at the “Enable Wireless Router Radio” parameter. There is a check mark - the wireless module is turned on, Wi-Fi is active. If the checkbox is unchecked, Wi-Fi is turned off. Make sure the checkbox is checked.
Let's also look at the settings - channel, standard, maximum speed. Also check the region - Russia should be selected.
If there are no problems with the settings of the wireless part, the firmware is probably malfunctioning. We simply try to reboot the router by unplugging it from the power supply. If the problem persists, try updating the firmware.
Firmware update
First of all, go to the router manufacturer’s website and download the latest firmware. We remember the folder where we saved the file (the most convenient is the desktop, after flashing it you can delete it).

Updating Router Firmware
In the software update window, click the “Browse...” button, and then show the explorer the folder where the file with the firmware from the site was saved.
Attention! While the update process is in progress, the router must not be disconnected from the network!
In general, it is better not to touch it until the indicator bar reaches 100%.

Software update progress bar
After a successful update, the router will reboot itself. Of course, all settings will be factory settings, and the connection to the provider and everything else will have to be configured from scratch. But there is a high probability that Wi-Fi will work after the update.
Finally, I would like to note that the problem may not be in the router at all, but in the computer.
If Android does not see the WiFi network, the first thing you need to do is understand which side the problem is on: on the device that distributes the wireless network (modem/router), or on your Android phone/tablet.
This article is suitable for all brands that produce phones on Android 10/9/8/7: Samsung, HTC, Lenovo, LG, Sony, ZTE, Huawei, Meizu, Fly, Alcatel, Xiaomi, Nokia and others. We are not responsible for your actions.
Attention! You can ask your question to a specialist at the end of the article.
Determining the Source of the Problem
First of all, determine whether Android sees other Wi-Fi networks. Try sharing the network from a laptop, iPhone or other phone, go to a public place with free Wi-Fi.
If there are no problems detecting other points, the problem is clearly in the network, which . If the device does not catch any points, although other phones show their presence, then look for problems in the system and hardware.
Android doesn't see any Wi-Fi networks
If the device does not detect wireless points, although it previously saw them without problems, make sure that there are no errors in the system and that the module is working properly.
- Open settings.
- In the “Wireless Networks” field, slide the Wi-FI switch to the “On” position.
- Start a network search.
- Open advanced features and check “Always search for networks.”
In the settings of the latest versions of Android there is an option to reset network settings. Using it, you can fix system failures without resetting other device settings or deleting information from memory.
- Settings
- User and archiving
- Archive and reset
- Resetting network settings
If problems with connecting to Wi-Fi occur after updating or flashing the device, then you need to roll back to the latest stable version of Android. Use official or proven custom assemblies for firmware, then the question of what to do with the next system error will arise much less often.
The worst thing that can happen to a phone or tablet is hardware failure. If you suspect that the wireless module has failed, contact a service center to diagnose and replace the component.
Troubleshooting
Before you begin serious hardware diagnostics, follow a few simple steps:
- Make sure that the network you want to connect to actually exists. To do this, see if other devices detect it.
- Go to Android settings. Disable and enable Wi-Fi.
- Reboot your phone/tablet.
- Reboot your router if you have access to it. Unplug it, wait 10-20 seconds and plug it back in.
- Bring the device closer to the router. The signal may be obstructed by obstacles or the distance is too great.
- Check your saved password again. If you changed the password in the router settings, it could be saved in the connection settings on Android.
That's all you can do on your Android device. If after performing these steps the network does not appear, proceed to checking and configuring the signal source.
Setting up the router
If you have access to a router, check its settings. What can help:
- Enable Wi-Fi in settings.
- Change the network name (SSID).
- Change Wi-Fi channel.
- Checking the network operating mode.
- Removing restrictions on the number of connected devices.
- Configuring the built-in firewall.
Router settings differ, but all have a Wi-Fi section. Look again at how to set up Wi-Fi on a specific router model and make sure you have the correct settings.
 Increase
 If, when you try to establish a connection, the message “ ” appears, but nothing else happens, try:
- Reboot your router.
- Rename the Wi-Fi network. Use only Latin letters in the name.
- Enable the DHCP server.
- Change the network encryption type.
- Manually enter the DNS and IP address in the settings of the point on Android.
These methods are also relevant for other devices from which Wi-Fi is distributed. If you use third-party software to create a wireless connection from a laptop or phone, make sure that the mobile hotspot is configured correctly. Try connecting to it from another phone, and if you cannot establish a connection, create the point again.
Problems with the Internet are always unpleasant. They can interfere with work or entertainment, or limit other online experiences. If we are talking about a cable connection, there may not be many possible causes for this problem.
The laptop detects an available Wi-Fi network, but does not connect
One fairly common network problem is when your computer sees a network available to connect to, but for one reason or another cannot connect to it. This problem may occur for one of the following reasons:
- a problem with the hardware drivers on the laptop - for this reason, the connection may not work or may be interrupted immediately after a successful connection to the network;
- communication interference - there should not be too many devices connected to Wi-Fi, and you should also make sure that nothing can create interference between your laptop and the router;
- the password for connecting to this network was entered incorrectly - if you entered the security key incorrectly, the connection will not be completed;
- network mismatch - if the connection settings on your computer and the network settings do not match, the connection will not succeed;
- failure of the operating system - in case of some problems with the operating system, the connection will not be made correctly.
Solutions to problems with connecting to a wi-fi network
Let's look at the solution to each of the problems mentioned above one by one, and also study general recommendations for those who have encountered this problem in their system.
Error “Windows could not connect to Wi-Fi” and how to solve it
When you try to connect, you may see the message “Windows could not connect to the Wi-Fi network.” This error can have several causes. You can determine the source of the problem as follows:
Video: fixing internet connection problems
Security key mismatch when connecting to a Wi-Fi network
A security key is a security code for your Wi-Fi network. The user sets it independently so that strangers cannot connect to the network. And if you encounter an error about entering the wrong password, then it is likely that it was indeed entered incorrectly. Do the following to be sure to correct the situation:
- Do not enter characters blindly - when you enter characters, they are automatically replaced with hidden characters. Uncheck "Hide Characters" to display normal text. This way, before sending, you can make sure that the password is entered correctly;
Check the “Display characters entered” checkbox to ensure you entered the correct password
- check the input layout - with hidden characters, you might not have noticed that you entered the password in the wrong language. Change the language and try entering the password again;
On Windows 10, you can change the language using the Win+Space key combination.
- Make sure that the Caps Lock key does not enable you to enter in capital characters - the security key is case sensitive. Therefore, it is important when entering to pay attention to the Caps Lock key, which locks the input in capital letters;
Pressing the Caps Lock key changes the case of the characters you type
- check your password - if your password is written down somewhere, then you should check these records. Human memory can sometimes fail. And also to compare your information, you can ask for help from another person who knows the password.
You should not tell your security key to strangers - this will lead to additional connections, which in turn will slow down your Internet speed.
Inconsistency between saved network parameters
After creating a new connection, you may often see an error with the text “The network settings saved on this computer do not meet the requirements of this network.” This problem often occurs after setting up the router yourself. To fix this situation, all you have to do is delete the connection and then create it again. This will update all settings and establish a connection again. This is done as follows:
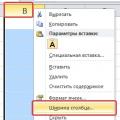
- Click on the Internet icon in the lower right corner using the right mouse button and select the “Network and Sharing Center” section.
Select "Network and Sharing Center" from the context menu of network connections
- After this, you need to open the management menu for wireless networks. This is done using the corresponding button on the left side of the screen.
Go to the "Wireless Network Management" section
- Call the context menu for the network that is generating the error and select “Delete network”.
Right-click on the connection and click “Delete Network”
- And then try to connect to the network again. Now that there is no data stored about this network, the connection should work fine unless the network is password protected.
In Windows 10, this problem is solved a little differently:

The problem may arise, for example, due to a careless change in the data in the connection settings.
Other ways that can help you connect
And now let's look at a few general solutions that can help you with various connection problems. In our case, when it is not possible to connect via Wi-Fi, these methods will also help.
Reboot the router
The simplest method, which is recommended by all providers first of all. Of course, this will not help with serious problems, but it can eliminate one-time connection problems. The best way to reboot is as follows:

Checking and installing network drivers
Updating network drivers is no more difficult than updating drivers for any other equipment. You can do this using the automatic driver download system as follows:
- Press the Win+X key combination to open the quick access menu and select the “Device Manager” section there. Another way to get to this menu is to right-click on the Start icon.
Select the "Device Manager" section from the quick access menu
- In Device Manager, find the Network Adapters section. Expand this tab and you will see your network devices. And then right-click on the available equipment. After the context menu opens, select the “Update drivers...” action. In order to determine whether a device needs to update its drivers, pay attention to its name and the presence or absence of an icon indicating the need to update drivers.
Open the "Network adapters" section and click "Update drivers" on the desired device
- You will be asked for an update method. If you have an Internet connection (for example, using a cable, since a Wi-Fi connection is not available), then just click on the “Automatically search for updated drivers” button.
Select "Automatically search for updated drivers" if you have a network connection
- Wait until the search, download and installation of drivers is complete.
Wait for the drivers to be searched on the network and installed
- If there is no network access, you must download the driver for your network adapter from another device and select “Browse for drivers on this computer.”
To search for drivers yourself, select “Search for drivers on this computer”
- Specify the location of the folder with drivers for further installation.
Specify the location of the drivers on your computer and click on the “Next” button
- After the installation is completed in one way or another, restart your computer.
- Try connecting to the Wi-Fi network again to see if your problem is resolved.
If a simple update does not help, try completely uninstalling the driver and installing it again using the same method.
Resetting the router
If problems with the Internet do not go away and you still cannot connect to Wi-Fi, you should resort to a more radical way to fix this problem. Namely, reset the router settings and configure it from scratch. You should not do this if you are unsure of your own knowledge and attentiveness - you risk being left without access to the Internet.
- You can reset the router in the following way:
Open any browser and enter the numbers of your local address into its address bar. Try the numbers: 192.168.1.1; 192.168.0.1; 192.168.0.254. One of these addresses will be correct.
- Enter the local address of your computer in the browser to open the router settings
To log into your account, enter the word admin as both your password and login.
- Use the word admin as your login and password
Go to the Factory Defaults section and click on the Restore button to completely reset your router.
- Click on the Restore button to completely reset the router settings
Another way to reset the settings is to find the RESET button on the back of the device and press it for a few seconds.
After performing the reset, the device will return to factory settings. Most likely, you will not have to configure anything manually after this and your Internet problems will already be resolved. But in case you still have to make the settings yourself, this is done as follows:
- Enter the settings of your router in the manner indicated in the previous instructions.
- Go to the network section using the left panel of the router settings.
(5
votes, average: 4,20
out of 5)

Very often, laptop users encounter troubles when turning on or setting up Wi-Fi. The procedure itself seems quite simple, but difficulties and snags often arise due to which the laptop does not connect to wi-fi. What to do if the Internet suddenly stops working? To answer this question, here are recommendations on how to deal with troubles when your laptop does not see WiFi.
To turn on wifi, you need to do two simple steps. And these actions will depend on the manufacturer and model of the laptop. First, we present the inclusion options for the most popular manufacturers.
How to enable WiFi on a laptop
- If laptop ASUS does not connect to wifi, you will have to press the key combination FN + F2.
- Same settings on laptop Packard bell And Acer can be called by the keyboard shortcut FN + F3.
- Laptop HP contains a special button with a symbolic antenna on it. But there are models in which wi-fi can be easily turned on by pressing FN + F12. There are also options for HP laptops that have a regular button with an antenna design.
- Chinese manufacturer Lenovo provided an option where the connection is connected using the FN + F5 key combination. But there may also be models that have a special switch for wireless networks.
- Depending on the model on a Samsung laptop, you can connect to a wireless network using the FN, F9, or F12 keys.
To connect a laptop to wi-fi, each manufacturer came up with its own original methods. To view this procedure in detail, you should use the user manual included with the laptop. Almost every modern laptop is equipped with an FN button. It allows you to perform a variety of functions to connect the device with other devices. If, for some reason, such a button is missing, then instead there is a switch or another special button. All of them are easily recognized by their characteristic antenna pattern.
Reboot the router
Before you start troubleshooting the problem of lack of Internet. Reboot your router by turning it off and on. In this case, all router settings are saved.
Checking and setting up drivers
When making settings on a laptop, you need to check whether the necessary drivers for this are present and their functionality. The purpose of this check is that the drivers must be present and active at the moment. To do this, you will have to enter the “Control Panel”, then select “Network and Internet” and here open the “Network and Sharing Center” item, in the left column select “Change adapter settings”


A window will open showing two items, Wi-Fi and Ethernet. In the screenshot below you can see that the laptop is connected to the network via WiFi, but the network cable is not connected.
If the entry is not displayed in the wi-fi adapter, then this is a clear sign of a problem with the drivers. In addition, a yellow icon with an exclamation mark can be a sign of driver failure.
There are times when there is no entry for the adapter at all. This means that the drivers are not installed and the system does not see the adapter. Drivers can be installed from the disk that came with the laptop or found on the manufacturer's website.
If a yellow exclamation mark is displayed, click on it with the mouse and select “Enable” in the window that appears.
Also, the reason that wi-fi stopped working could be the power saving mode that is currently in use. To disable it you need:
- enter the “Control Panel”;
- find the item “Power supply”;
- select "High performance";

Having dealt with all these simple manipulations, you can put things in order with the wi-fi drivers.
Turn on the wi-fi adapter
To connect the wi-fi adapter we also perform a number of steps. Open the “Control Panel”, then select “Network and Internet” and here open the “Network and Sharing Center” item, in the left column select “Change adapter settings”. There is a “Wireless Network Connection”, which is a wi-fi adapter. In order to connect to wi-fi, you need to open the dialog box with the right mouse button and here use the “Enable” item.

Connecting to the access point
All that's left to do is connect to the access point. But first of all, you should make sure that it is active. In the right corner at the bottom of the screen you need to find the wi-fi shortcut on the taskbar. If you click on it, a dialog box for managing networks will appear. To connect, you need to select a network and then click “Connect”.
There are times when the system is password protected and asks you to enter it. The system will not be able to connect to the access point until the password is entered. If there is an open access point, the system connects automatically.
The entire process of setting up wi-fi on a laptop is covered.
Once you have carried out all these manipulations, you will not have to do them constantly. But there were cases that for some reason wi-fi did not want to connect. Often, solving connection problems comes down to pressing a hotkey and enabling the desired option. Therefore, if the laptop stops connecting to the Internet, the first thing you need to do is check whether it is turned on.
The laptop uses a lot of energy to maintain an Internet connection. Therefore, it often happens that wi-fi stops working due to the use of economy mode.
External obstacles
It is worth remembering that if the Internet suddenly stops working, the reason may not only be present in the laptop. Wi-fi depends on external factors, because the radio signal can be weakened by environmental influences. Walls, ceilings, floors, and other obstacles weaken the access point signal and the client device signal. The system always displays the signal level in the form of bars. The stronger the signal, the more sticks there are. The signal at 1-2 short points is quite weak and often because of this it is not possible to use the Internet. It happens that the system does not see the signal at all.
If the laptop does not see WiFi, do not be upset, the problem is often very minor. By following the above recommendations, you can easily learn how to correct errors. And the laptop will always be reliably connected to the Internet.