WiFi is a wireless technology that allows you to connect various devices: in particular, computers, laptops and mobile devices (phones, tablets, etc.) into a common network for the exchange of information, for data transfer and for joint user interaction. This technology is now very popular, it is actively used by various manufacturers and many other companies. In connection with this, most modern laptops and other mobile devices are equipped with a WiFi module. That is, a special device that is located directly inside the computer and allows you to use this technology without restrictions.
If we talk about desktop computers, then most of these PCs do not have a wireless network module, except that the latest modern models have it. If your computer does not initially have a WiFi module, you can install it by connecting a small USB WiFi adapter.
Windows XP how to connect to WiFi
In order to connect Windows XP to WiFi, you need a computer with the Windows XP operating system installed, in fact, a WiFi module and for this module to be configured. To configure the wireless network module, a special driver is used, which is supplied on a disk along with the adapter itself. Or this driver may already be built into the USB WiFi adapter and when you connect it to the computer, it is automatically installed and configured. If we are talking about a laptop, then when purchasing it, as a rule, a disk with all the necessary drivers is included. Because without drivers the device simply will not work. How to determine whether a laptop has a WiFi module and whether it works? Very simple.
- On the label " My computer"Click with the right mouse button and select the item " Properties».
- Here we switch to the “ Equipment" then go to " device Manager».
All components of our system, all the equipment that is on our computer are displayed here.
- We are interested in the item “ WITHnetwork boards».

This is the equipment that connects the computer to the network. Expanding the list of network cards, we see several devices. One of them is a standard network card, which is used to connect to the network via cable and a WiFi module. The name of the network card is determined automatically.
If we see that this is an adapter, there is a name, a series, this means that it (the device) is defined by the system. It has drivers installed, it works, and it's turned on. With a missing or incorrectly working WiFi module driver, the device in the " Network cards" will be marked with a warning sign (usually a yellow question mark). This means that you need to update or install the necessary software. To do this, we go to the website of the motherboard manufacturer and download the appropriate driver or install it from the original disk that came with the laptop.
Modern laptops lately, as a rule, do not come with a driver disk, due to the fact that most laptops no longer have a CD— drive, and the manufacturer offers to download all the necessary drivers from the official website.
How to turn on WiFi
Often, to enable or disable the wireless network module on laptops, a special switch button is used (it can be located on the end of the case in older models). 
Or key combination Fn+
(one of the function keys in the top row). On different laptops from different manufacturers, the key may differ, but it almost always shows an antenna. 
In most cases, after installing the drivers, there are no problems connecting to WiFi. If you don’t know how to connect Wi-Fi on Windows XP -
To do this, just click on the network icon in the tray (this is the area of the desktop where programs running in the background are displayed - in the lower right corner of the monitor), select yours from the list of found wireless networks, enter the authentication key (password) and click connect. But this applies to operating systems Windows 7 and higher. With Windows XP, difficulties often arise when connecting to the network.
It would seem that today there is Internet, but tomorrow there is no connection. This is due to the fact that the system automatically detects Internet protocol data and this automation in XP does not always work correctly. In this case, this data can be entered manually. Where can I get them? They are specified in the agreement with the provider. Or you can view them in the settings of your router. Log in to the router settings page and copy them from there.
To manually enter Internet protocol data you need to:
- IN " PanelAndmanagement» select the network environment.

- Here we have a window where we can see several connections, but we are interested in the wireless one.
- On this wireless network connection shortcut, right-click and look at the section “ Properties».
- Open the protocol settings (TCP/IP) then click on “ Properties».

- Switch the marker to the section “ Use the following IP address"and DNS server - we enter the data manually from the router settings page or look for it in the agreement with the provider.

If you forgot your WiFi password
How and where can I see the WiFi password in Windows XP if I forgot it?
- Open " Start", there click on " Control Panel».
- In the List of categories select " Network and Internet connection».


Another way to remember a forgotten WiFi password is through the router settings page. To get into the router settings, you need to enter its address in the address bar of the browser - for example - 192.168.0.1, the default password and login for access are admin, admin (the exact data is indicated on the back cover of the router itself). The router itself must be connected to the computer via cable, then on the settings page in the security section you can see the forgotten WiFi password.
@
These instructions will be useful for those who configure a modem or router in Bridge mode or connect a cable from the Internet directly to a computer using only a network card. The configuration for all cases is made in high-speed connection mode (PPPoE) on Windows XP.
Creating a connection
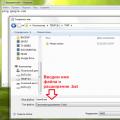
On the desktop or in the Start menu, open My Computer, then select Control Panel. In the window that opens, go to the “Network Connections” folder, as shown in the picture.
Click the “File” menu item (in the upper left corner of the window), select “New connection” or right-click on the empty area of the window next to the icon (if you do not have a menu, press the “Alt” key on your keyboard).

The “New Connection Wizard” window will open, click “Next”.

Check the “Connect to the Internet” option and click the “Next” button.

Check the box “Set up a connection manually” and click the “Next” button.

Check the box "Via a broadband connection that requires a username and password" and click the "Next" button.

In the “Service Provider Name” field, enter the name of the Internet connection; it can be anything, for example, “Rostelecom” (This is the future name of the shortcut for the connection, which can later be placed on the desktop).

In the next window, you need to fill in the most important fields. Be careful when filling out, follow the case (large and small characters are different, write this data exactly as the provider provided it to you).
- “Username” - login for Internet access.
- “Password” - login password.
- “Confirmation” - Password confirmation.
All specified details are given to you by the provider when concluding an agreement; as a rule, these details are indicated in your agreement or on a special access card.

You can leave the remaining checkboxes as default, as indicated above. Click "Next".
Check the box for “Add a connection shortcut to the desktop” and click the “Finish” button.

Internet connection

Possible mistakes
Video on setting up an Internet connection
Found a typo? Select the text and press Ctrl + Enter
Step 1. Connecting GPRS service
Step 2: Connect your phone to your computer
You can read about how to connect your phone to a computer using a cable or Bluetooth in the article “Connecting a mobile phone to a computer”.
Step 3: Setting up a dial-up modem on your computer
Open the "Control Panel" through the "Start" menu, select "Phone and Modem", in the window that appears, select the "Modems" tab.
If the Location Information window appears, enter the area code, set the dialing mode to pulse (needed for other modems), and click OK.
Select your phone modem from the list and click the "Properties" button.
Check that the modem is still connected to the computer. Also, after connecting the phone via cable or Bluetooth, it takes up to half a minute for the modem to appear in the system.
In the “Modem Properties” that opens, select the “Additional communication parameters” tab, in the “Additional initialization commands” field, enter the modem initialization line:
- For the Beeline network: AT+CGDCONT=1,”IP”,”internet.beeline.ru”
- For the MTS network: AT+CGDCONT=1,”IP”,”internet.mts.ru”
- For the Megafon network: AT+CGDCONT=1,”IP”,”internet”
 We specify additional parameters (the image shows an example for the Beeline network)
Click OK.
Step 4. Connection setup
Go to the "Start" menu, "Control Panel", "Network Connections" and select "Create a new connection" on the left. Consistently select the following options: “Connect to the Internet”, “Set up a connection manually”, “Via a regular modem”. Then select your modem and click Next.
- Settings in the Beeline network. Phone number: *99# ; Username: beeline; password: beeline; Password confirmation: beeline;
- Settings in the MTS network. Phone number: *99# ; Username: mts; password: mts; Password confirmation: mts;
- Settings in the Megafon network. Phone number: *99# ; Username: gdata; password: gdata; Password confirmation: gdata;
Step 6. Connect to the Internet
Launch the connection shortcut created on your desktop. Click "Properties", in the "General" tab, disable "Use dialing rules" if installed. Click OK.
In the connection window, click the call button, after 3-5 seconds the computer will be connected to the Internet - just launch the browser.
Liked?
Tell your friends!
Any modern computer is equipped with devices for connecting to networks - local and the Internet, and to simply connect two machines into a network, nothing additional is needed, except for a cable. One computer can be directly connected to the Internet by connecting the provider's cable to the network card connector, but to create a full-fledged local network that has a common Internet connection, you will need something else.
network hardware
If you want to connect several machines running Windows XP into a local network and configure the Internet on each of them, you will need:
- network adapter installed on each of the machines - usually built into the motherboard, but you can buy a separate one;
- to create a wired Ethernet connection - pieces of twisted pair cable of category 5 and higher with 8P8C connectors at the ends;
- to connect a local network to the Internet - a router (router) or another additional network card for a computer that will be used as a gateway;
- To create a network of more than two machines without an Internet connection (or with one computer connected), you can purchase a switch.
Connection
- Make sure that the network adapters of each of the machines being connected to the network are installed correctly, that is, they have a driver and are correctly identified in the device manager. If the machine does not recognize or sees the adapter (it is defined as an unknown device), install the drivers from the disk included with the motherboard, or using a PC with Internet access, download the required driver from the manufacturer’s website.
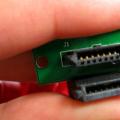
- Connect the cable at one end to the connector of the network card, and the other to the LAN port of the router, switch or computer that will be used as an Internet gateway.
- Connect the provider cable to the WAN or INTERNET port of the router. After concluding the contract, your provider will provide you with settings and instructions for connecting to the Internet.
Wireless equipment (Wi-Fi) is sometimes used to create local networks. To build such a network, each computer must be equipped with a Wi-Fi adapter. “By default,” manufacturers build Wi-Fi cards only into mobile equipment – laptops, tablets, netbooks, smartphones, etc., and for a desktop PC the device will have to be purchased separately.
Setting up a network connection on Windows XP
After connecting the equipment, you need to configure the network. This is not difficult and does not take much time - just assign an IP address to each computer and specify a gateway (access point) to access the Internet. To use shared resources, machines must be members of the same workgroup. Otherwise, it may turn out that one computer sees the network printer, but the other does not.
Creating a working group
- Open system properties by right-clicking on the “My Computer” icon.
- In properties, open the “Computer name” tab.
- By default, all computers are included in the WORKGROUP group. If you wish, you can continue to use it, or you can create your own. To do this, click the “Change” button at the bottom of the tab.
- Here you can assign a new name to the PC (the computer name should not be repeated twice on the network) and create a new workgroup. In the “Is a member” section, check the “Working Group” box and enter its name.
- Repeat the steps on each machine connected to the network.

- To see who is in your workgroup, open “My Computer” - “Network Neighborhood” and select “Show workgroup computers” from the menu on the left.

IP Setting
- Launch Windows XP Control Panel and open Network Connections.

- Select your connection and open its properties (from the context menu).
- Open the “General” tab and from the “Components used by this connection” list, select the “TCP/IP Internet Protocol” command and click the “Properties” button.

- Click “Use the following IP address.”
- In the “IP address” field, enter one of the addresses in the local range. If you are using a router, you should focus on the address assigned to the router. If it starts at 10.0, assign computer addresses from the range 10.0.0.1 - 10.255.255.255, if at 192.168, then the addresses should be within the range 192.168.0.0 - 192.168.255.255. Also in local networks, addresses 172.16.0.0 – 172.31.255.255 can be used. So, if the network consists of two computers and a router, and the router has an IP of 192.168.0.0, assign the address 192.168.0.2 to one PC, and 192.168.0.3 to the second.
- In the “Default gateway” field, enter the IP of your router or PC, which will be used to distribute the Internet to the local network. Leave the remaining settings as default and click OK.

- To check the connection, run the command line (From Start - All Programs - Accessories) and enter the command ping IP, where instead of IP you need to specify the address of the computer with which you are checking the connection. Example command: ping 192.168.0.2. If packets are exchanged, the network is created correctly and the connection is working. If there is no exchange, it means that your computer does not see the “neighbor”, because you made a mistake somewhere.

Printer sharing and network folders
To set up shared access to folders and files on Windows XP, you need to enable the appropriate permissions in the properties of the folder you are going to share.
- Open the folder's context menu, select “Properties” and the “Security” tab.
- where it says “Sharing and security”, check the boxes “Share this folder” and together with it – “Allow modification of files over the network”.

- Now on each PC on the network, go to “Network Neighborhood”, click on the icon of the computer where the shared folder is located, and check access.
To access the printer from all machines on the Windows XP local network, you also need to configure something.
- On the machine to which the printer is connected, open Start and click “Printers and Faxes.”

- Select “Sharing” from the printer's context menu.
- In the properties, in the “Access” window, check the “Share this printer” checkbox, click OK.

- On each PC on the local network, go to the “Network Neighborhood” folder, right-click on the printer icon and select “Connect” from the menu.

Troubleshooting connection problems
The reason that a computer running Windows XP does not see the network is the following:
- faulty network equipment, incorrect connection, poor contact in cable connections, cable breaks;
- missing or damaged drivers;
- incorrect network settings, IP address conflicts;
- if you are unable to connect to the Internet - incorrectly entered provider settings, lack of permission to use the connection by other network devices, blocking by security programs, virus infection or other various failures of the Windows network subsystem.
To troubleshoot, first make sure your PC can see the hardware. If it doesn’t see it, reinstall the network driver and check all connections. Removing the network adapter in Device Manager and then restarting the PC often helps.
- To remove a network card, open system properties (right-click on “My Computer”), go to the “Hardware” tab and click the “Device Manager” button.

- Select the desired network adapter from the list, open its context menu and click Remove.
- Confirm deletion and restart your PC. After rebooting, the device will be re-recognized and reinstalled.

If after these steps the machine still does not see the network, try setting up the connection again. Make sure there are no duplicate device names or identical addresses on the network.
If the local network works but the Internet does not, even though the devices are working and configured correctly, check the following:

If the problem is not resolved - the machine still does not connect to the Internet or does not see the network, open the connection context menu and select “Fix”. After this, restart your PC.

In addition to the above, you can use a third-party application WinSockFix, which can restore and properly configure the network by reinstalling the TCP/IP protocol. To use this tool, you must log in to the system under an administrator account and run the program by clicking the “Fix” button - WinSockFix works without installation.

After fixing, restart your computer. Network operation will be restored.
1. Click Start, select the Control Panel menu item;
2. At the top left, select Switch to classic view;

3. Click the Network Connections icon;

4. Right-click on the Local Area Connection icon; and select the Properties menu item;

5. Uncheck Internet Protocol TCP/IP; and c When connected, display the icon in the notification area; and click OK;

6. Confirm disabling components by clicking Yes;

7. In Network tasks; select Create a new connection;

8. The New Connection Wizard will start; click Next;

9. Leave the Connect to the Internet option; and click Next;

10. Select Set up a connection manually; and click Next;

11. Select Via a broadband connection that asks for a username and password; and click Next;

12. Enter the name of the omkc service provider; and click Next;

13. Enter the username, password and password confirmation given to you (the password and confirmation must match, all fields are filled in case sensitive) and click Next;

14. Check the box next to Add a shortcut to desktop; and click Finish;

15. To connect to the Internet, click the Connect button;