The work of the MS Word program is not limited to a text editor; mathematical operations with a variety of numerical data are also in great demand. In the article we will analyze in detail and clearly show how to put a degree in Word using, for example, superscripts.
Superscript and subscript
The “Main” menu with “superscript” and “subscript” will help you easily and quickly raise a number to a power and write a letter with an index. Initially, you need to open the “Home” tab in the main Word panel. Therefore, it is important to indicate with the cursor the place where the number in the square should be, and then activate the “Superscript” button by pressing (the function will be active if it is lit yellow). All that remains is to enter the required number. We look at the picture below and compare what actions need to be done sequentially.
In order to exit the “Superscript” mode, you just need to press the X 2 button and make sure that it does not light up yellow. Otherwise, this is what happens.

So, the point of how to square X is clear. Now you can easily write any quantities and numbers in a square, such as: m2, m3, cm2, km2.
Let's look at the subscript option if you suddenly need to write a variable with a subscript. For example, like here, a small subscript is needed:

Probably an advanced user has noticed a hotkey for the subscript, but if not, then let's look at this issue. Everything is on the same main Word panel, there is a “Home” tab, on it there are two buttons - X 2 and X 2. In this case, consider X 2. Using this button, you can simply print any variable; the procedure is no different from the variant discussed above. The second step changes, instead of the sign X 2 (which will allow you to write a number above the number or letter) on the main panel, select the sign X 2 i.e. “Subscript” (with which you can write a subscript in a second). Let's look at the example below carefully at each step in turn.

Attention! Be sure to repeat step 2 (see picture), otherwise everything further printed will be written in a subscript. The Subscript button should not glow yellow.
Superscript and subscript in Word 2003
You can place an index or degree in Word 2003 above a number, word or letter using the following steps. The sequence of actions is very important:
1) You need to write a number, or maybe a whole word (number or letter), which should be indicated in a square or simply put an index. Select.
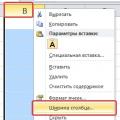
2) Right-click on the selected fragment and select “Font” in the drop-down window.

3) Check the box in the window that opens for the desired mode – “Superscript” or “Subscript”.
4) Don’t forget to go to the “Font” item and uncheck the previously selected mode.
This option will also work in Word 2007, 2010, 2013 and 2016.
Using the "Formula"
In versions of Word 2007, 2010, 2013 and 2016, using the “Formula” button, you can quickly add an index or degree to a mathematical equation or formula.
Go to the “Insert” section and select “Formula”.

Use the left and right buttons to move from square to square; such actions will help you insert the necessary numbers and letters. After all the steps, click on the blank sheet and the equation is ready. Using the same principle, we write a number with a degree at the bottom, all steps are the same, only when choosing an index you need to select “Lower Index”.
There is another way to put a degree in Word, using the following key combination: Ctrl + Shift and + (it won’t work on the number pad).
Not only engineers and mathematicians work with degrees; they are often used in units of measurement, for example, square meters. Many people simply write a number next to the indicator, however, this is incorrect, especially since the office suite has many built-in tools. This article will try to explain, how to put a degree in word.
Using a superscript
This function is available from the font options panel. After clicking on the icon, the characters will be written in superscript style. The main thing here is to type the text carefully, since the error may not be noticeable, and do not forget to turn off the special mode after writing the degree. The best option would be to write the text in a regular font, and then make it superscript by highlighting it and clicking on the button.

Modifying font settings
Editor tools allow you to create your own fonts, you can also use them put the degree in Word. You should use this method if the user does not like the standard style of superscript text, for example, you want to make it underlined or bold. In the menu, you must check the box next to the “superscript” item, only in this case the desired result will be achieved. Most of the parameters do not need additional explanation, it is only worth noting that the size of superscript and regular fonts will be different, even if the value is set to the same.
You can even write a whole sentence this way, but sometimes after pressing the spacebar the font may revert to the original one. In this case, you should add spaces to the whole text after you have completed writing it.
Using the Formula Builder
This is the most functional method and is also suitable for frequent use. You can access the editor through the “Insert” menu, there you should select “Formula”, the following tab will appear, templates allow you to arrange the inscription in many different ways, however, for the average user such broad functionality is unnecessary. In addition, the formula is inserted as a picture, so it cannot be edited; if you need to change the data, you will have to create a new one.
The power can be indicated by numbers or variables (in the form of letters) raised above the formula line, which indicate to what power the corresponding number should be raised. In other words, a degree shows how many times the number it refers to (the base of the degree) should be multiplied by itself. For example, five to the third power tells us that we need to multiply three fives: 5 x 5 x 5 = 125. In Microsoft Word, you can enter the power of a number in one of several available ways: as a symbol, by formatting the text through the "Font" dialog box or using the built-in formula editor. Below you can find all the methods mentioned.
Steps
Using symbols
- In Word 2007 and later, click the Symbol button (which looks like the Greek letter omega) in the Symbols button group on the Insert menu tab. In the pop-up window that appears, click the "More Symbols" button at the bottom to open the Symbol dialog box.
- In Word 2003 and earlier versions of the application, go to the Insert menu and select the Character option.
-
Select the font you want the exponent to be displayed in. In most cases, you'll want to use the same font as the body text, so you can simply leave the "(plain text)" setting in the Font drop-down list. If you need to use a different font for your degree, click the arrow to the right of the "Font" field to expand the list and select the font you need.
- Be aware that not all fonts have superscript numbers and letters. If the font you use for the body text does not support the superscripts you need to add, you will have to choose a different font for the exponent that does support superscripts.
-
Select the degree you want to enter. To do this, you can use the scroll bar to the right of the field with various characters or select one of the following options from the drop-down list next to the “Set” field: “Additional Latin-1” (or simply “Latin-1”) or “Upper and lower indices”. This will give you the opportunity to select a numeric power from “1” to “9” or a letter power “n”, which represents a variable. Click on the symbol you need to select it.
Insert degree into text. Click the Insert button at the bottom of the Symbol dialog box. The degree will be entered in the place where the cursor was in the text, and the dialog box will either close automatically, or you will additionally need to click the "Close" button.
- In Word 2007 and later versions of the program, your most recently used degree symbols will appear in the "Previously Used Symbols" line at the bottom of the Symbol dialog box. If you need to re-enter the same degree, simply highlight it on this line and paste.
- You can also insert a degree using a special code for a specific character. When you select a specific character in the "Symbol" dialog box, a sequence of four keys is displayed at the bottom of the window that should be typed while holding down the key combination "Alt+X" (or simply "Alt"). By holding down "Alt+X" (or "Alt") and typing the appropriate sequence of the indicated keys, you can enter the degree in the future without the "Symbol" dialog box. Note that earlier versions of Word may not have keyboard shortcuts for quickly entering individual degrees. However, using the "Keyboard Shortcut" button, you have the opportunity to create your own keyboard shortcut to insert a specific character into the text.
Using the Font dialog box
-
Select the text you want to convert to a degree. Place the cursor in front of the number or letter that will become a superscript (degree), then hold down the left mouse button and highlight the text to be edited with the cursor, then release the mouse button.
Open the Font dialog box. The Font dialog box not only lets you change the font used and its size, but also format it in a number of different ways, including converting it to superscript characters. How you open the Font dialog box depends on the version of Word you're using.
- In Word 2007 and later, on the Home menu tab, simply click the arrow in the lower right corner of the Font button group.
- In Word 2003 and earlier, go to the Format menu and select Font.
- The previously selected text will appear in the preview area under the "Sample" heading.
-
Check the box next to the "superscript" modification option. The text in the preview area will become smaller and raised.
Click "OK". The Font dialog box closes and the text you selected becomes superscript.
- In addition to mathematical degree signs, this method can be used to place ionic charge signs in the form of a superscript plus or minus after the chemical symbol (with the number of electrons gained or lost, or with the designation of a missing or additional electron). Do not use superscript font to indicate the number of atoms of a particular chemical element in a molecule, as subscript font is intended for that.
- Instead of first typing the text you want to superscript, you can simply open the Font dialog box, select the superscript option, click OK, and then enter the test. Then you'll need to open the Font dialog again and uncheck the Superscript option to turn it off.
Using the Equation Editor (Word 2007 and later)
-
Open the formula editor. Click the Equation button (which looks like the Greek letter pi) on the Insert menu tab in the Symbols button group. Select the "Insert New Equation" option from the drop-down list.
- You can launch the editor in either a new document or an existing document, but it is only available in the new XML-based Word document format (saved with a .docx or .dotx extension).
-
Select the "Indexes" option in the "Structures" section of the "Design" menu tab. The button for this option looks like the letter "e" to the power of "x". When you click the button, a menu will appear with the subtitles “Superscripts and Subscripts” and “Basic Superscripts and Subscripts.”
Select the first option under the heading "Superscripts and Subscripts". On the button with this option, two squares are drawn with a dotted line: on the left is a large square and a little to the right and above is another small square. When you click the button, the same squares will appear in the equation entry field on the page of your document.
-
Enter a number or variable to represent the degree. Enter the exponent in the small square on the right using the keyboard. If you entered a letter designation for a variable, the font will automatically become italic.
- You can also immediately enter the number being raised to a power and the power itself from the keyboard into the formula field. Simply type the number first, then add the exponent ("^") and enter the exponent. When you press the "Enter" key, thereby closing the formula entry field, the exponentiation sign will disappear and the exponent will appear in superscript font.
- The Equation Editor in Word 2007 and later works with formulas like regular Word text, but uses a special math font.
Open the Symbol dialog box. Word allows you to insert special characters into text using the Character dialog box. Exactly how to open this dialog box depends on the version of Word you have installed.
A rather simple question: how to make a degree in Word often drives beginners into a dead end. It is not difficult to cope with this task, since current versions of the program have the corresponding button.
How to make a degree in Word?
Such manipulations are usually required when writing formulas or some mathematical solutions. The question is also very often solved: how to put a degree in Word when it is necessary to make physical and chemical calculations. To do this you will need to follow a number of very simple steps.
In order to make a degree, you need to:
- Open the Word document on the main page (tab at the top of the window).
- Here in the “Fonts” section you can see two options for setting the degree: X2 and X2.
- Both options are set in the same way: click the cursor in the required place, then click one of the icons and the button with the number that needs to be set.
X2 – most often used in mathematical calculations. For example, to write the formula x2 + y2 = z2, you need to press “x”, click the cursor to the right of it, click on x2 at the top of the Word, when this icon lights up in yellow, click on the two at the top of the keyboard. To put a degree at the top in Word, you can do it a little differently and write “x” right away, then put a regular two next to it, highlight it with the cursor and click on x2 at the top of the document.
The x2 symbol is most often used in chemical formulas to indicate the valence of compounds. For example, everyone knows the formula for sodium bicarbonate (NaCO3). To recreate it, you first need to write the Latin letter values. Then, near the last letter, click the cursor, press x2 and put a three. Similarly, you can write a degree in Word by putting a regular number, highlighting it with the cursor and pressing x2 again.
Important! Don't forget to turn off x2 and x2 after application, as otherwise further text will be printed in very small font at the top.
There is another way to put a degree in Word. We write the numerical value in ordinary numbers. For example, 123, where 12 is the base number and 3 is its power. Then select the three with the cursor and press the right mouse button. A sign will appear where you need to select the “Font” item. A small dialog box will appear in which you need to check the box next to “superscript character” and click “OK”. The same can be done with valency for chemical formulas. The only difference is that in this option you will need to click on the “subscript”.
Even earlier we talked about it in general. In the same material we will talk about how to put a degree in Word. Here you will learn three ways to insert a degree in Word 2007, 2010, 2013 or 2016 and one way in Word 2003.
How to put a degree in Word 2007, 2010, 2013 or 2016
If you have Word 2007, 2010, 2013 or 2016, then you can put the degree in several ways. Below we will demonstrate three of the simplest ones.
Method number 1. Button on the “Home” tab.
Perhaps the easiest way to put a degree in Word is the “Superscript” button on the “Home” tab. In order to use this button, place the cursor at the place where you want to put the degree, go to the “Home” tab and click on this button. After that, simply enter the number that should be your degree. To turn off the degree, simply click on this button again.
You can also activate the “Superscript” button using the CTRL+SHIFT key combination along with the “+” key.
Method No. 2. Inserting a formula with a degree.
The second way to make a degree in Word is to insert a formula. To do this, place the cursor in the place in the document where you would like to insert a formula with a degree and go to the “Insert” tab. Here you need to click on the “Formula” button and select the “Insert new formula” option.

After this, an empty formula will appear in your Word document. In order to fill it with numbers, you need to select one of the rectangles and enter the desired number.

As a result, you should have a formula with the numbers you need.

Method No. 3. Inserting a degree using the Alt+X key combination.
In we have already talked about using the Alt+X key combination. This key combination allows you to quickly enter various characters. These symbols also include degrees. For example, to square a number you would do the following:
- Place the cursor after the number you need;
- Enter code "00B2".
- Use the key combination Alt+X.
To cube a number, you need to do the same, only using the numeric code “00B3”.
How to make a degree in Word 2003
If you use the text editor Word 2003, then you can make a degree in the following way. Enter the number that should be a degree and highlight it with the mouse. After this, right-click on the selected text and select “Font” from the menu that opens.

After this, a window with font settings will appear. In this window, you need to check the box next to the “Superscript” function and close the window by clicking on the “Ok” button.

After this, the number you highlight will become a power.
In various Microsoft Word documents, it is quite common to insert icons that cannot be typed directly from the keyboard. We have already dealt with you. This can be useful both in regular text and if you are filling out a questionnaire.
But what to do if in the questionnaire you need to mark the answer not with a tick, but with a cross. Or should it be placed in a square in the text of the document? This is what we will look at in this article. Since most often it is the answer in the questionnaire that you fill out that needs to be marked in this way, we will take them as an example.
Answer options in the questionnaire, opposite which there is an empty square at the beginning, can be made in different ways: in developer mode, through a special form; inserting the corresponding symbol; marker.
How to insert a cross in a square in Word
If in the text for answering a question they were made in developer mode, then by hovering the cursor over the desired square, which is located next to the appropriate answer, it will be highlighted in gray.

Putting a cross in such a figure is very simple - just click on the figure once with the mouse and it will be added.

Add a square with a cross inside through Symbols
If, when you click on a figure next to a suitable answer, it is not highlighted, and the cursor is placed to the right or left of it, it means that such a list was created manually, and special characters were used here.
In this case, you need to delete the empty square and select the crossed out one in its place.

Delete the unnecessary one and leave the cursor in the same place. Next, go to the “Insert” tab and in the “Symbols” group, select a similar button. A list will open with what you have recently used. In the future, you will be able to select the one you are interested in, but for now it is not here, click “Others”.

In the window that opens, select the font “Wingdings”. Scroll below and you will see what you need. Click on the shape and then the "Insert" button to add it to the document. There are two types in the list; in the example they are displayed in "Previously used", select the most suitable one.

When the symbol is added to the document, click the "Close" button to close the window.

If you often have to use such a sign to fill out questionnaires, then you can set a key combination for it. To do this, click on the button in the “Symbol” window "Keyboard shortcut". I described in detail what to do next in the article: how to check the box in Word, the link to which is given at the very beginning.

If you are not used to using hot keys, then insert a crossed out figure by opening the “Insert” tab – the “Symbols” group – a similar button. It will be in the list of recently used.

In the same way, through insertion, you can add a cross to regular text in a document and to a table.

Putting a square and a cross in a bulleted list
Answer options with empty squares in the questionnaire can also be created using bulleted lists. In this case, when you click on a marker, it will be highlighted in blue, and all others will be highlighted in gray. And on the “Home” tab the “Markers” button will be highlighted.

If this is the case for you, then click on the answer option that suits you so that it turns blue. Then click on the “Markers” button to delete the list.

Next, place the cursor at the beginning of the answer; in the example, it is before the word “winter”. Go to the "Insert" tab and click the "Symbols" button. If the one we need is in the last used, click on it, if not, then select it from “Others”, as described above.

This is how our list has changed. To give it a normal appearance, select all the options for this question and on the “Home” tab, click on the arrow next to the “Interval” button. Select from the drop-down list "Other line spacing options".

In the next window you need to uncheck the box, or there may be a blue fill in the field "Don't add spacing between paragraphs of the same style". Click "OK"

The spacing will be the same between lines. And you can indent an answer either using a marker on the top ruler, or by pressing the “Tab” key (two arrows in different directions).

I will end here. I think you managed to fill out the form and mark the options in it using a cross in a square, or you simply inserted a square with a cross inside it into Word.
Probably, everyone has had to deal with filling out forms with test tasks, where you need to select one or more answer points from the proposed options, or enter something of your own in a special field. In this article we will look at how easily and quickly you can create such forms in Microsoft Word 2010. Solutions for both printing alone and a universal electronic printed version are covered.
However, this material will be useful not only when preparing test tasks, but also when developing a questionnaire. The solutions are quite close, so all the material can be attributed to both questionnaires and test tasks, and we will not make special reservations in the text about this.
Closed-ended questions
A closed set of options involves selecting one or more answer options from the proposed list. In this case, you often see a simple bulleted list, which the program includes by default, but it does not look very nice (see Figure 1).
Figure 1 - Bulleted list with default layout
To give the list a more presentable look and slightly increase the ease of use, let’s replace the black circles with cells in which you can put a cross or a check mark. The convenience here is that there is no need to circle or underline long phrases.
In order for the list to be displayed in this form, you need to select the answer options and select the item in the drop-down menu for creating a bulleted list Define a new marker(see Figure 2).
The Define New Marker dialog box will open (see Figure 3).

Figure 3 - Window for defining a new marker
To select a new marker character, click the button Symbol. Another dialog box (see Figure 4) offers a large number of options, but do not rush to select a rectangle from the default set.
A more suitable option for us is a large square. And you can find it in the Wingdings 2 font set (see Figure 5). This font is available on every computer with Windows and Office installed.
Pressing the button OK in both dialog boxes, you will get a modified view of the list markers (see Figure 6).

Figure 6 - List marked with squares
Without removing the selection from the answer options, you can also change the relative position of the elements by moving the elements arranged along the ruler (see Figure 7).

Figure 7 - By bringing the cells closer to the text, we slightly improve ergonomics
If you think that now for each question you will have to carry out a similar operation, then you are mistaken.
Firstly, when further working with the list, Word 2010 automatically uses the last style used. Press the key after the fourth answer option and you will see that the list continues, marked with squares. If this is not what you need, use the key to move to a higher level of the list. The next time we click on we will get question number 3. The key will help to go to the nested list.
This overly detailed description is probably more confusing than it explains, so just take a look at Figure 8. The input cursor is on the last line. If you press now, the square will turn into a three. If you then click, the square will appear again.

Figure 8 - Quickly creating a list
Secondly Word 2010 remembers the bullet symbols you used and then offers them directly in the drop-down menu (see Figure 9).
Our square is available in Last used markers, V Document markers and in Library of markers. This way, you can access it not only from the current document, but also when working on a new one.
You can also give a little hint to test takers by using different markers for questions with one correct answer and those with multiple correct answers (see Figure 10).

Figure 10 - Hint using different types of markers
Here the use of computer-software interface controls is played out, where a checkbox (more precisely, an empty square for it) suggests one or more correct answer options, and a radio button - only one correct answer. But treat this design with caution - not all people are familiar with the software interface. And for the rest, it is better to make a small explanation at the beginning of testing. By the way, the large circle itself can also be found in the Wingdings 2 font set.
Open-ended questions
Open-ended questions require not only rigidly defined positions, but also a field in which the person filling out the questionnaire can enter their own option. Even if you are creating a “hard” test, you should provide fields for writing the first and last name of the respondent or test taker.
You have a choice of a couple of ways to add fields to fill out. The first is classic, using a sequence of spaces with underscores. It seems that everything is simple here, but there is also a trick. Create a “white space” line and click the “underline” text formatting button. Strangely, Word won't do anything. To get an underlined line you will need to put any character at the intended end of the line. Previously, a non-breaking space was used as such a character (inserted using a key combination). However, in Word 2010, you can also use the underscore (_). Why am I talking about this version of the program? The fact is that previously the underscore and, in fact, the line underline were located at different heights and when they were combined, peculiar steps arose. Now this is no longer the case - you are free to use the “_” symbol to create rulers for handwritten text.
The second way to create a fill field is to use specialized computer interface elements. In this case I mean the input field. Go to the tab Developer, if you have it enabled, or first enable it in the ribbon settings, and in the drop-down list Legacy Tools select the “field” ActiveX control (see Figure 11).
You can change its size and position in the same way as when working with an inserted picture.

Figure 12 - “Field” control element
People familiar with computer interfaces should positively accept this element on a paper document.
Electronic-paper questionnaires: for those who own a computer
Since we have started using electronic components, let's consider another option for creating a questionnaire - electronic and paper. It can be printed on a sheet of paper, and then it will be no different from the one discussed above, or it can be filled out electronically, which will be appreciated by avid computer scientists whose handwriting leaves much to be desired. In addition to the text fields you've already learned how to make, you can also use other electronic components, namely checkboxes and radio buttons (also called radio buttons).
Such an electronic form can be distributed via the Internet and printed after filling out, preserving all changed elements.
It is worth mentioning right away that creating an electronic-paper questionnaire will require much more effort and time from you. And it is clearly not worth it if you are creating a document solely for post-printing completion (for example, to distribute forms to students). If you have decided, then go ahead!
Select an ActiveX checkbox from the additional set of elements on the tab Developer(see Figure 13).

Figure 13 - Selecting a checkbox from a set of controls
The checkbox will be automatically placed on the sheet at the current cursor position (see Figure 14).
![]()
Figure 14 - Checkbox placed on the sheet
You won't be able to change the explanation text or font type in the usual way, so click the button Properties tabs Developer(see Figure 13) to access the checkbox options.

Figure 15 - Checkbox properties
The properties window looks terrible from the point of view of the average user (see Figure 15), but nothing can be done. Programmers made it for programmers. However, there is nothing complicated here.
The explanatory text of the checkbox is described by the parameter Caption, font size and type - field Font. Now it says Calibri, but by clicking on the line, you will see a button with three dots on the right, which calls up a standard font selection window (see Figure 16).
The parameter controls the color of the text ForeColor, which also allows you to select from a set.
In addition to the explanatory text, there may also be an image. Click on the button with three dots next to the item Picture and indicate the path to the drawing. It should be taken into account that the currently quite common PNG format is not supported. The position of the picture relative to the checkbox is configured in the item PicturePosition. If the inscription is not needed, erase the text in Caption.

Figure 17 - Checkbox associated with an image and explanatory text
To start working with controls, exit design mode by clicking on the tab button of the same name Developer.
Let's move on to a more complex radio button-switch. The main difference is that a checkbox is independent, while a radio button works in a group. If you do not specify or specify one group, then only one item can be selected in the electronic document at one time. To correct the situation, fill in the field in the properties GroupName. For example, for all elements of the first question will be everywhere Q1, second - Q2(you can set the name yourself, but it is advisable not to use Russian letters, spaces, special characters and not to start the name with a number).

Figure 18 - Specifying the group for the radio button
As a result of the operations performed, you will be able to choose one of the options within each question (see Figure 19).

Figure 19 - You can select one answer for each question
A little trick when working with controls: in order not to change the font for each checkbox or radio button, use the “Copy-Paste” method - duplicate one element, without forgetting to edit the parameters Caption And GroupName.
Word 2010 also includes a new type of checkbox (see Figure 20). It's located to the left of the additional items drop-down list.

Figure 20 - New type checkbox
The new flag is configured not through the “programmer” properties window, but through a regular dialog (see Figure 21).

Figure 21 - Setting up a new type of checkbox
The title is the text displayed above the element when it is selected (currently there are three dots - see Figure 20). The accompanying inscription is represented by ordinary text typed in the editor on the right.
Among the useful things, in the settings it is worth noting the blocking from deletion and the symbols of checked and unchecked boxes. The symbols are selected from the window that you could see in Figure 5 - perhaps this is the only reason why it is worth using the new control. If you are satisfied with the classic “tick”, choose the old checkbox - it is somewhat more convenient to work with it (in any case, when putting a checkmark, an unpleasant frame does not appear as in Figure 20).
And, of course, when drawing up a document, we must not forget about the “text field” element, which we discussed above. It also has its own customizable parameters, the most important of which is MutliLine. Set it to position True to allow text to be entered on multiple lines.
Agree, creating an electronic paper form takes more time, but the advantages it provides are quite obvious.
Multi-column formatting
If the questions and answers contain a very small amount of text or small pictures, it may be advantageous to place them in several columns. The word “several” usually means two pieces, because... a larger number when placing the sheet vertically already looks quite cramped. With a horizontal sheet orientation, you can use up to 3 columns in a regular questionnaire and a larger number in a non-standard one.
There are two main ways to arrange text in two columns. Let's start with perhaps the most obvious.
Go to the ribbon tab Page layout and in the drop down list Columns select Two equal width (see Figure 22).

Figure 22 - Select text formatting in two columns of equal width
As an additional formatting, you can reduce the margins of both the entire page and individual columns.
As you can see, the result is achieved in just a few mouse clicks, but it may not be of very high quality. Look, for example, at Figure 23. Question No. 6 was divided into two columns and its readability, although slightly, decreased.
Even if the text is aligned using paragraph marks (i.e., by pressing a key), it is still possible for tasks that are inconsistent in height (as, for example, now in Figure 23 questions No. 2 and 7, 3 and 8). They can also be aligned by paragraphs, but with further adjustment of the questionnaire, height mismatch may again appear. Another negative aspect of using such a two-column mode is that the text of headings and explanations, which in theory should be located across the entire width of the sheet, will also be placed in columns.
You can avoid most of these “thresholds” with the help of a little trick. Select insert table from the corresponding menu. Even though logic dictates using two columns, I recommend choosing three. There are half as many lines as there should be questions. Why three? The fact is that if you select two columns, then in the future you can only move the border between them, but not change its thickness. The middle column will act as a separator with variable width. In two-column mode, you can also control the indentation from the right edge, but I find this more tedious than managing the “buffer” column.
The formation of table markup should be resorted to after the text of the questions, headings and various comments has, for the most part, already been compiled, because otherwise, problems may arise that are much more serious than with columnar layout (for example, allegedly inconsistent numbering of questions).
The essence of this approach is that each individual question is located in its own table cell. In this case, the height matching of text fragments is performed “automatically”. When finished, all that remains is to hide the borders by selecting the corresponding button on the tab home(see Figure 24). At the same time, the text still retains its “tabular” properties - you can influence, for example, the width of the columns, add new rows, etc.
Conclusion
Using the tools of Word 2010, you can easily create professional-quality documents. At the same time, even such simple features as changing list icons will give many people a subconscious message that the processing of responses will be handled not by a random person, but by a competent specialist. More complex functionality of the program in the form of controls will add ease of use to electronic forms, and can also simplify processing - a computer font in text fields and standardized checkboxes and switches will allow you to quickly understand the essence of the answers without being distracted by handwriting analysis.
Working with typing in the popular editor from Bill Gates' company, sooner or later every PC user will be faced with the fact that he will need to know how to enter a degree in Word. This can come in handy in a variety of situations. For example, indicate the units of measurement of area (square meters), volume (cubic meters), write or mathematical formula, as well as in many other cases. Most novice users think that it is difficult, but in fact it is not at all. There are a couple of simplest methods, once mastered, it will not be difficult to get a degree in Word.
Method one
The described method is universal. It can be used in various versions of Word and even in many other similar text-processing applications created by third-party developers. To begin with, we simply type the text so as not to get confused and switch frequently. Then select the required element. For example, you need to assign a degree in Word to the number 10, write 10 2. This means we type “102”, and then use the cursor or other convenient method to select the number “2”. After that, call up the “Font” menu. This can be done by clicking the right mouse button, calling up or paying attention to the main one located at the top, where you should go to “Format” - “Font”. 
After completing these steps, there is only one simple action left. But before putting a degree in Word, in the window that opens, the user should familiarize themselves with the capabilities of the “Modification” field. By default, all of its items are disabled. By checking the box next to any of them, the user activates it. To get the desired 10 squared, simply use the “Superscript Font” option in the indicated manner. As a result, the highlighted number “2” will take the required position on top.
It should be noted that knowing how to put a degree in Word will help you type, for example, valence in formulas. Let's consider the well-known formula of water H 2 O. By analogy with the previous paragraph, select “2”, open the “Font” menu in any convenient way, where we check the box opposite the “Interlinear font” option. 
Method two
This method is suitable for versions of the Word program starting from 2007. The key difference from the first method is that you first need to open the “Font” section, and only then print. So, having performed the necessary actions, the user opened the desired menu item. Next, he should pay attention to the “X 2” and “X 2” buttons present here, which, respectively, indicate superscript and subscript fonts. When you press the desired key, it will turn yellow. Now, everything that the user types on the keyboard will be placed according to the required parameters. This is convenient when you need to type a little text “as an insert”.
Knowing how to put a degree in Word, the user will be able to quickly and confidently enter this and other similar elements into the text, significantly speeding up typing and making work with office applications more productive.