07.08.2017
Avira Antivirus is a package of antivirus programs that have been produced by the German company Avira GmbH since 2006. Although the manufacturer of this software specializes in corporate solutions, it has a product for private use - Avira Free Antivirus. It works on both desktop platforms (Windows and Mac) and mobile platforms (Android and iOS). Every day, the antivirus protects your computer from 4+ million online threats, including ransomware, which is becoming increasingly widespread.
The developers of Aviara Antivirus created antivirus solutions before the Internet era - when users exchanged files on floppy disks.
What's included in the package:
- antivirus scanner;
- module for anonymous browsing on the Internet Phantom VPN;
- fast intelligent search Safe Search Plus;
- System Speedup optimizer;
- secure password manager Password Manager;
- module automatic update Software Updater;
- Browser Safety web filter.
Installing Avira
You already have installed antivirus? Remove it to avoid software conflicts. Download Avira Antivirus from the official website:
Run installation file, allowing the program to make changes to the system.
On the Avira welcome window, accept the installation conditions by clicking on the appropriate button. If the system asks you to make changes again, feel free to allow it.

Watch the installation process. This is not a quick procedure, but we do not recommend switching to other tasks on the computer at this time.

After installing the program, its icon will appear in the system tray. Launch Avira Antivirus by clicking on it once.

Open your antivirus.

Setting up Avira Antivirus
When the program completes installation, it's time to make custom settings. Make sure your antivirus has received the latest update package and your computer protection is activated. After that, go to settings by clicking on the gear icon (as shown in the screenshot).

The first section that the program offers is called “Computer Security”. In it, go to System Scanner, and then to “Search”. Here select the items marked in the screenshot. Our engineers consider this configuration to be optimal - we are confident that it will ensure maximum computer security. We do not recommend choosing a different mode - this can lead to unpredictable consequences.
On the “When detected” tab, select the “Interactive” mode - this will be the way to respond to detected suspicious objects. This way you will be aware of how things are going with your computer's security.

On the "Archive" tab, you can select some types of packed files, but we recommend selecting absolutely all known archives. The scan may take a few minutes longer, but your safety is worth it!

On the Exceptions tab, do nothing. Objects that are safe today may pose a threat to your computer and your personal data tomorrow.

On the Heuristics tab, select medium or high detection level. This way you will protect your computer as much as possible from new viruses (and there are a majority of them) and ransomware.

In the “Report” section, select which scanning information plan suits you best. Don't abandon the protocol completely - it's better to choose the "Default" or "Advanced" option. This way there will be more chances to understand what is happening, but you won’t have to read the “chronicles”.

In the Real-Time Protection section on the “Search” tab, select scanning all files and separate archives. There is no need to scan network drives - let the immediate owners worry about their protection (except for those cases when we are talking specifically about your external NAS storage).

On the Exceptions tab, again do nothing. Even the most secure application today cannot be trusted!

On the Heuristics tab, select heuristic macro virus detection and set the detection level to medium or high (your choice).

On the “Report” tab, again follow the “golden mean” as described above.

In the Updates section, select how often you want to check for automatic updates. It is advisable that this happens as often as possible - for example, every two hours (this is the minimum possible period of time that the program offers).

On the Proxy tab, make changes only when you use proxy servers to access the Internet. If you don't use it, move on to the next step.
Go to Internet Security settings. On the Network Profiles tab, switch to Private Network. Turn on protection and check the box that prompts you to send notifications when new applications are blocked. Later, you'll create response rules for any new programs that start on your computer.

Go to General settings. On the “Threat Category” tab, select what exactly the antivirus should block. The more restrictions you put in place, the safer your work will be. But be prepared for the fact that after this some (even relatively harmless) programs simply will not start.

On the " Additional protection» enable the Protection Cloud option, which has recently appeared in Avira Antivirus. A comparison of the found objects with suspicious files in the Avira cloud will begin. This allows you to quickly find the latest viruses. We do not recommend manually sending suspicious files - this way you will lose valuable time if your computer becomes infected.

On the “Password” tab, be sure to create a strong password, enter it in the appropriate form and confirm. Now changing the antivirus settings will be available only after entering the password. This is not entirely convenient, but it adds a big plus to security: viruses will not be able to interfere with the operation of the program when they need access to the computer.
Kaspersky, Dr.web, ESET NOD32, Avast are quite popular anti-virus software products today, in the shadow of which Avira Antivirus - the result of the work of the German developer company Avira looks rather inconspicuous. But not for users of low-power computers and budget laptops. The latter are very familiar with the Avira anti-virus product, since this is perhaps one of the few programs that, with sufficient efficiency in detecting threats and high performance during scanning, also has such an indispensable quality for weak hardware as minimal consumption of computer resources.
1. Avira – lightweight, powerful, hassle-free antivirus
The secret to Avira's fast scanning speed lies in its multi-threaded technology, which allows the program to scan multiple files simultaneously. So, for example, during the scanning process on a computer with a single-core 2 GHz processor, you can safely view video, work with text editor, surf the web and perform other non-resource-intensive tasks to avoid boredom.

Avira antivirus in real-time computer protection mode works almost unnoticed, which cannot be said, for example, about ESET NOD32, whose services seriously burden the processor. Avira is updated daily and quite quickly, again, which cannot be said about Avast or AVG antiviruses, where the user of a low-power computer is practically unable to carry out any actions while updating their databases.
Separately, it is worth noting the ease of installation and removal of Avira antivirus. If, to remove Dr.web, for example, you need to download a special uninstallation utility on the Internet, and to remove ESET NOD32, it is not always possible to stop its operation through the manager Windows tasks and to do this you have to run in safe mode, then with Avira everything is extremely simple. This antivirus can be installed and uninstalled simply, without any problems. To remove it, just use a regular removal service Windows programs or special software for “competent” uninstallation, available on the Internet in a huge assortment.
2. Functionality of the free version of Avira Free Antivirus
The official website of Avira presents a number of assemblies of the company's antivirus products, designed both for home use and as solutions for organizations. Let us consider below in more detail the free version of the product - Avira Free Antivirus, intended purely for home use.
What functionality does the free version of Avira antivirus include?
« System Scanner"is a classic scanner that checks local disks and removable media for detection of threats - viruses, spyware and malware, as well as attempts by companies to track user actions for market research. This function has a number of profiles for scanning - a full and quick system scan, a separate scan of local drives and separately removable media, a check of running processes, and a check for malware.

« Real-Time Protection» is a real-time computer protection feature that blocks threats while the user is working. In other words, the antivirus detects and neutralizes viruses, spyware and malware on the fly.

« Scheduler" - This standard function antivirus programs that allow you to schedule antivirus scan computer (scanning).
« Updates"is an opportunity manual update anti-virus databases, in addition to their automatic updating.
« Quarantine"is a repository of files infected and isolated by the antivirus. If desired, the user can check any of the quarantined files again, delete, restore, and also send for verification to the developer - in service center Avira.

Antispam, firewall, parental control - some antivirus products may contain these functions. demon paid version programs. But in the case of Avira, these functions are paid; to enable them, the program must be updated to a paid version in which they will be active. Although for any advanced user it will be obvious that such an investment of money is inappropriate, because an antispam folder is available in almost every email service, a firewall is a built-in function in any Windows versions, and for parental controls There are a lot of separate software products and Internet services, including free options.
3. Avira Free Antivirus: settings and features of the program
The main feature of Avira Free Antivirus settings is its simplicity and minimalism. When compared, for example, with complex settings ESET antivirus NOD32, which only a candidate of high-tech sciences can fully understand, then in the situation with Avira everything is much simpler. There are few settings here, they are extremely easy to understand even for novice users.
Settings " System Scanner"allow you to change the preset list of file formats so that the antivirus scans only files of a certain format. For example, if a user is actively working with .doc documents over the network, he can run a scan to check only .doc files on the computer. You can set a priority for scanning, disable the ability to stop the scanning process, and also enable or disable some of the additional settings.

In settings " Updates» The user can change the preset automatic update interval of the program.
« General"—in these settings you can expand the list of threats from which Avira Free Antivirus can potentially protect your computer. To the preinstalled options, you can add protection against applications and games that could put the system at risk, prank programs such as fire or flood on the desktop, etc.

Avira Free Antivirus is an extremely independent software product; user participation is required only in cases of making important decisions or critical errors.
4. Avira Free Antivirus: interface
Intuitive and user-friendly antivirus interface software product today you are unlikely to surprise users. Since most antiviruses with advanced functionality are paid products designed for the mass buyer. The Avira Free Antivirus program is designed in a single, laconic style, and its ease of use is ensured, for the most part, by the simplicity of settings and uncluttered functionality. Top Menu The program is completely duplicated by a visualized side menu on the left, from where you can go to the most necessary functions and settings of the program.
5. About Avira Free Antivirus in general
As you can see, Avira Free Antivirus contains the standard functionality of an antivirus program intended for home computer use. The antivirus will detect any danger in real-time protection mode, and scanning the system or individual computer segments will quarantine infected files. Avira Free Antivirus, naturally, will not surprise the user with any special functionality, especially in the free version. But for the free version of an antivirus program, effectively performing a narrow but specific range of tasks is more than enough.
Did this article help you?
Installing Avira Free AntiVirus (Personal) on your computer
This section describes how to correctly install antivirus software on your computer. Free program Avira Antivirus. Before you start installing one of the best free antiviruses, Avira Free Antivirus, you naturally first need to download it to your computer. It can be done . Before installation, make sure that other antivirus programs. You can remove your old antivirus standard means uninstall programs via Windows menu, or special utilities to remove antiviruses developed by the manufacturers themselves.. After complete removal old antivirus, you can start installing Avira. If you have installed old version Avira, then a new version It will delete the old one itself, but will save the settings. The installation process is the same for almost all versions of Avira Antivirus. There may be slight window differences depending on operating system or whether Avira was installed before.
This page describes how to do this using the example of Free Avira Antivirus version 12. If you have any installation problems, please follow these instructions.
Select the installation type "Custom", check the box license agreement. Click " Further"
Window 1
| Window 2 It is proposed to install the toolbar in the browser, with the service Web Protection with safe internet search functions, etc. It is worth noting here that everyone treats such add-ons in the browser differently, some are categorically against it, and some are calm, because this service still provides some kind of security in the browser. Let's put it this way: if you surf the Internet a lot, on various unfamiliar and dubious sites and at the same time are not very experienced in Internet safety rules, then this service will probably be very useful to you. If you mostly visit well-known sites, use well-known search engines and don’t follow the first link you come across that some “well-wisher” slips in, then most likely this service will only become a burden for the browser. This service can be removed in a standard way(via the Windows menu) regardless of the antivirus program. Remove (or leave) the checkboxes and click " Further"  |
| Window 3 The installation location is specified by default. Click " Further"  |
| Window 4 Selecting the main components of an antivirus program. Make sure all the checkboxes are checked and click " Further"  Window 5 |
| Window 6 Installation in progress...  |
| Window 7 Welcome window. Click " Further"  |
| Window 8 Next, of the three proposed levels of heuristics, it is better to choose the last one - " High level detection" Click " Further"  |
| Window 9 Proposal to select categories of objects to be checked. Check the box next to "Select all" and click " Further"  |
| Window 10 Launch type. "Normal" - i.e. normal and "Safe" - i.e. early. Early startup may slow down the loading of the operating system. The “Normal” type is quite suitable. Click " Further"  |
| Window 11 A proposal to quickly scan the system after installing the program. It’s better to uncheck this box for now. When we set all the necessary settings, then we will scan the entire system. Click " Further"  |
| Window 12 Basic installation settings have been completed. Click " Ready"  |
| Program window The antivirus should immediately update automatically. If you haven't updated right away, click the "start update" button.  |
| Antivirus program Avira Free AntiVirus (Personal) installed! Now let's move on to setting it up. |

Good day, dear friends, acquaintances and other personalities. Today you will find an article about your favorite antiviruses. Why favorites?
The fact is that, traditionally, very often I am asked a question along the lines of " Which antivirus is the best?". And it would be okay if they just asked, but no - they literally torture, and therefore, lately, I am increasingly writing you articles on this topic, as evidenced, in fact, by the materials about: the well-known and good old AVZ from the material “ “ , beloved by many “ “, already remade 30 times and once loved by me “ “, recently mentioned completely, or that same shareware “Dr.Web“.
Today we are waiting for you material about Avira antivirus, which is available in both free and paid interfaces, and also (at the time of updating the article) received a new interface in the kit.
Let's get started.
Installing, configuring and using Avira antivirus.
Actually, traditionally, this antivirus is absolutely free, like almost everything I write about on this site. You can download it. If anyone is interested in more visual instructions, then at the end of the article there is a video from our channel.
I must say that Avira has for some time now taken a rather strange path, namely, the most automated installation without user intervention, which, frankly speaking, does not make me happy at all. Previously, it was a more flexible and enjoyable process, and not just one button.

Frankly speaking, after something like this, I was somewhat disappointed in this free antivirus, because the user should always be able to choose the installation location, installation components, and all that other stuff. In general, I am amazed by the tendencies of senseless automation of certain processes without user participation, because it turns out that the authors are not so much following the path of user-friendliness, but consider the user to be a complete idiot who is not able to choose the installation path and/or read the description of the components that he is going to install ( I will write a separate article about this later). However, aside from the lyrics.


After pressing the button " Accept and install", which is shown in the first picture, in fact, the installation process will begin for you (provided that you have not messed around with optimization or someone especially smart has not disabled the necessary services for you), which can be determined by the pop-up tips in the tray (near hours).
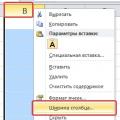
Once the antivirus is installed, you can begin configuring it. For this process, you need to right-click on the umbrella icon in the tray and select " Antivirus management":

From the very beginning, let's move on to the settings, because they are the determining nuance of further interaction with the antivirus. As usual, I will briefly go over the key ones, and then let everyone rely on their own feelings, since the nuances there are not critical:

Let's start with the "System Scanner" tab, where you need to check the set of checkboxes shown above in the screenshot. Basically the above parameters are configured for average speed search, but if you need, you can select "All files" in order to increase the search time (but also its quality) and/or vice versa select " Editable list of extensions" and disable a whole set of checkboxes that are indicated on the right in the screenshot (in order to increase speed, but reduce the quality of checks).

On the tab " General - Threat Categories"(which is higher in the screenshot) I would recommend checking two boxes, namely: " Dialing program for paid numbers" And " Programs that violate the private sphere". The rest is up to your taste, but there may be a fact of unnecessary triggering (it will still occur, but in this case less often).


Well... As for the tab " Internet Security". I beg you very much, turn off what the integrated one offers (especially since de facto they offer Windows firewall) and use at least some alternative solution. You can read about these very solutions under the firewalls tag.
However, that’s all for now. Frankly, Avira was tastier earlier, although it still has the right to a place on the market. As I said earlier, we have a video on one of the versions of the antivirus, which may be useful to you in your household:
Where to buy a license for Avira antivirus
If you decide to purchase full version program (not the free one, which is in the article, but an extended full version of the antivirus), it is recommended to do this not in retail stores(which not only make a significant markup, but also add to the final price the cost of the box with the program, its delivery to the store, the cost of renting the store and other “logistics”), and in online stores that:
- Firstly, it is cheaper (not only for the reasons stated above, but also because the software is purchased/sold in wholesale quantities);
- Secondly, it’s convenient, because you don’t have to go anywhere and you can pay with a credit card or an SMS from your phone;
- Thirdly, it is quite safe, because the license can be immediately checked and activated (fast delivery of keys via email), which cannot be done in an offline store.
For my part, I would recommend, simply because the place is proven (in any case, they still buy software for home/offices there) and have existed on the software market since 2004. In general, you can read any marketing on the Internet or on the store’s website - my job is to recommend it.
By the way, if suddenly, for some reason, you know a software store that is cheaper (and most importantly, better!), then contact us through , my team and I will consider your option... and maybe we will offer it to the readers in this text. Thank you!
It's time to move on to the afterword.
Afterword.
Well, that's probably all. I hope that the article will be useful to you and that you will not use a hacked antivirus, but rather honestly use a free solution or buy a license.
If you have anything to add or want to ask something, write in the comments or using .
You are best!
Stay with us! ;)
After installing the Avira antivirus, it, like any other antivirus application, such as Avast, should be configured to suit your needs. And although some settings have already been described, I think it makes sense to dwell on the Avira antivirus settings in more detail. The settings window opens as usual with the button context menu on the program icon and selecting the “Setting up Avira Free Antivirus” option. The default settings window opens on virus database update parameters. Six hours is the minimum value, leave it there. More often you can’t do it anyway, and less often it’s just stupid.
Avira antivirus scanner settings window
What’s nice is that when you move the cursor to a certain position, you can read specific information about this action in the description.
Setting up the "Files" section
This section groups three methods for checking files. The first “All files” can be excluded immediately. As they say, this is for the paranoid and besides scanning for too long, it will not give anything more. The second and third points are basically identical. The only difference is that by selecting the “Editable list...” item, you can add your own extensions to it. That is, in both methods there is established list file extensions. After all, you must admit that any file, including malicious ones, has its own extension. By choosing the latter option, you can add a new malicious extension that you just read on the Internet.
Let's move on to the additional settings section. Here I would definitely advise not to check just one box “Follow links”. The point about ignoring paths and files on network drives I didn’t mention it, if only because I don’t have these same network drives. If you have it, it's up to you to decide. The checkboxes on the remaining points in this section are logical and quite reasonable. I don’t know whether it’s worth touching on the “Scanning process” section. It seems that everything here is clear and without explanation.
Configuring what Avira antivirus does when it detects viruses

Here we are offered two options. In the first option, “Interactive”, after scanning you will see a window with a list of detected malicious files. In this case, you will make the decision about each file yourself. Well, if you check the “Automatic” and “Copy to Quarantine” checkboxes, the antivirus will respond according to a predetermined scenario.
Let's move on to the settings of Avira antivirus archives

In this window, the types of archives to be scanned are set. By default, the antivirus already detects almost all known types of archives. If this doesn’t seem enough to you, check the “All archive types” option. The remaining parameters set are, in my opinion, sufficient.
Configuring exceptions from scanner scanning

To add to the list of exceptions, click on the “…” button, specify the path to the file and click on the “Add” button. An interesting point is that the exact specified path will exclude from the scan only this file located along this path. Entering only the file name into the list, without specifying the path to it, will exclude all files with that name from scanning. In this case, the location of the file does not matter.
There is no need to change anything in the Heuristics window. These settings are optimal. After this, the scanning settings can be considered configured. Move on to what I think is the most important thing, real-time protection settings. The “annoyance” of the Avira antivirus depends on these settings.
Configure real-time protection

In this window, just like in the main scanner window, you are asked to select which file extensions will be monitored by the antivirus. The difference between editable and base list, similar to the above. In my opinion, checking the “Scanning archives” box does not make much sense. Real-time protection mode also has its own list of exceptions.

Specifying the path and adding to the exclusion list is the same as in the scan settings. But here, in addition to files, you can also add verified processes to the exclusion list.
Setting up heuristics
In the heuristics window, the AHeAD option is enabled by default, the detection level of which you can configure.
/uploads/statik_kontent/antivirus-avira-realnoe-vremya-e`vristika.png
Here, as in the scanner settings, the higher the level of heuristics, the more reliable the protection, but, of course, without a fly in the ointment, the number of false positives will also increase. These internet security settings are optimal by default.
Customizing the General Tab

Open the threat category settings window and add your categories to the default ones. Personally, I added items: programs that are jokes and programs that violate my privacy. I think there is no point in explaining why, everything is already clear. In the same tab, under the “Password” category, you can set your password to access the Avira antivirus settings.
Setting up the Security tab

In this window you can block or enable the autorun function. Protect the host file and the antivirus itself from malicious changes. At this point, the basic settings of the Avira antivirus can be considered complete. Of course, it is impossible to describe everything useful settings antivirus, but in any case, there is a lot of information on the Internet about antivirus settings.