A satellite dish is a common but expensive pleasure. Many of us have often thought about the question: is it possible to make such a multifunctional antenna on our own? Of course, this is entirely possible! Most often, the question of making a satellite dish with your own hands is asked by people in order to save money or by those who like to conduct experiments. Building a homemade TV dish is not as easy as it seems. When installing it, you need to take into account not only the features of a particular model, but also even the smallest nuances: setting up available satellites, reflection angle, and others. Today we will tell you how to make a satellite dish with your own hands from readily available means. Let's look at the most common ways to make such a device.
Method of gluing with a concrete base
When making a homemade satellite dish, do not forget to draw a detailed drawing of the device, taking into account all measurements and calculations consumables to get the desired result. It is thanks to your accurate calculations and values that you will save yourself from the risk of getting the wrong shape and similar unforeseen troubles.
The entire manufacturing process of such equipment is as follows:
- We draw a parabola in the drawing, which a little later will be transferred to a steel sheet 0.05 cm thick.
- We produce using welding machine frame made of metal rods with a diameter of 10 mm. We bend the steel ribs along the knife, and then weld the bearing onto the top of the structure.
- We install the frame on a flat surface. We mount the pipe vertically in the center under the mounted bearing. After securing the part, install the knife on the bearing of the large washer.
- Fill the plate with thick concrete mortar.
- Dry the resulting matrix for 4-5 days (preferably in the open air).
- Now let's glue the antenna. We divide the finished structure into several parts. We got 8 sectors.
Important! This is necessary in order to make the further work process a little easier. Don't forget to ensure equal spacing between matrix elements.
- For the pattern we use special fiberglass fabric, cut into identical strips, and epoxy primer. Apply regular machine oil to the surface of the now dry matrix, and then place the washer in the installed pipe. We lubricate the matrix with resin, onto which we apply a strip of fiberglass. Smooth the applied component with your hands so that bubbles do not appear on the surface of the glued matrix.
- Cover the reflector with aluminum foil.
That's all the work. like this satellite dish can be used for its intended purpose.
Do-it-yourself satellite dish at home from foil
It happens that the location of the house does not allow the use of a parabolic dish, so you can build such an antenna with your own hands. It is extremely important to take into account the following basic requirements for this homemade device:
- The need for a TV tower to be 30-50 km away from your home.
- The signal must have sufficient reception from at least several satellites.
- It is advisable that there is a tall structure next to your home - this will make it easier to cope with the task.
Materials and tools:
- Old umbrella.
- A roll of regular foil.
- Antenna cable (preferably copper).
- Can.
- Amplifier with built-in power supply.
Manufacturing:
- We manufacture a satellite array. We measure the interval between all the spokes of the umbrella, the central angle of their attachment and the height of the segment we need.
- We cut out all the parts from the foil, apply them to the triangular parts of the umbrella and sew them with nylon threads to the existing fabric. Using similar manipulations, we cover the entire inside of the umbrella with foil.
- Let's start assembling the signal receiver. We install it at the focus of the satellite array. To do this, you can use a purchased amplifier, or you can make it yourself. To do this, remove 4 cm of braid from the cable, trim the noise-protective layer and leave one central copper core, which will transmit the television signal.
- We cut out an oval part from a beer can, in the center of which we make a small hole. We insert a ready-made cable core into it and solder this contact. We cover the connections with ordinary plasticine to avoid oxidation and corrosion during the operation of the device.
- We attach the resulting receiving apparatus to the handle of the umbrella with ordinary tape, and wind a 10-15 cm cable so that in the future you can adjust the focus of the mirror.
Important! Be careful not to let the receiver come into contact with the metal handle of the umbrella, as this may cause a lot of noise interference. To protect the device from such troubles, we placed plasticine in the area of possible contact, which will serve as a kind of insulator.
- We have homemade block power supply close to the TV, since our amplifying device will be powered through an antenna cable.
- We secure the plate with a nylon thread or the upper central tip of the umbrella. We direct it to a nearby source (tower), and then select the focus with the receiver, which was received as a signal on our TV.
Do-it-yourself satellite dish at home from a thin metal sheet
It’s not difficult to make such a satellite dish with your own hands; it’s only important to follow the instructions and purchase one sheet of thin galvanized metal, the thickness of which should be a maximum of 1.5 mm, and the dimensions should be 100x100 mm. From such a sheet you can make a homemade plate with a diameter of 80 mm.
Step-by-step algorithm of actions:
- We take the cardboard of the size we need in our hands, and then divide it into 16 identical round parts.
Important! Please note that each sector must be offset from the previous one by approximately 22 mm.
- We draw 4 circles with the following radii: 75, 254, 400, 538 mm. Due to the fact that the last circle extends beyond the cardboard blank, we simply cut off all the excess parts. We will further bend our template using the resulting circles.
- We make cuts along 16 rays, keeping the same distance - C1, C2, C3 and C4. Size C1 - 0 mm, C 2 - 11 mm, C 3 - 29 mm, C4 - 50 mm.
- We transfer the made cuts to a metal sheet using a metal ruler and a sharp scriber.
- Next, use metal scissors to cut out the previously made blank for the future plate.
- We connect all the metal petals together. This is how we got a ready-made mirror for our satellite dish.
How to make a satellite dish at home from wire?
To make such homemade equipment, you will need a large inflatable ball, which will serve as a model for the frame of our future wire antenna.
The manufacturing technique is as follows:
- We mark the largest radius of our satellite dish on the ball with a pencil. The curved surface will be represented by that part of the ball that is separated by a circle.
- We take in our hands a coil of copper (preferably) wire with a diameter of 3 mm (you can take it from an old transformer), and then make circle No. 1 from it, which we place on our ball.
- Now we make wire circle No. 2 a little larger in size so that the interval between it and the previous one is about 20 mm. So we will gradually reach the required maximum diameter.
- We connect the finished circles with rays so that the places where they intersect are twisted with thick wire and soldered using the tin method.
- Leave empty space inside the smallest circle. This is where the antenna stand will be mounted.
- We cover the finished frame with aluminum mesh (possibly foil), observing the rear curvilinearity of the reflective structure.
DIY satellite dish made of plexiglass
Plexiglas is excellent for making a homemade satellite dish, since with moderate heating this material has excellent ductility, thanks to which it can take absolutely any shape. For work, we took one sheet of plexiglass 3 mm thick and with a larger diameter than the diameter of the factory satellite device.
Step-by-step master class on making a satellite dish with your own hands from plexiglass:
- After softening the material under the influence of heat, we level it on the blank, giving the plexiglass a round shape. Now we wait for the material to cool.
- Cover the concave surface of the material used evenly with thin foil. In our case, the foil will be a reflective element.
Satellite antenna ready with your own hands! Now you can tune in channels!
Important! IN this method There are some drawbacks - the high cost of plexiglass and the purchase of a heating chamber with a spacious internal volume.
Setting up and installing a homemade satellite dish
- Finding the correct azimuth angle.
Important! For tricolor TV, you will not need to turn the converter in different directions, since in this case there is circular polarization. To receive foreign channels, connect a linear polarization converter.
- Let's find out the angle of inclination using your provider's online calculator.
- We install the satellite device away from metal gratings and reinforced concrete structures. The most ideal place is the highest part of your house.
Video material
If you decide to try your hand at making a homemade satellite dish, then do not forget to take into account all the nuances of how to manufacture this equipment. In this matter, the most important thing is to calculate your strengths and the possibilities of the location of your home to build an antenna with your own hands. We wish you a successful creative breakthrough, which will result in access to a large number of channels with minimal investment in equipment!
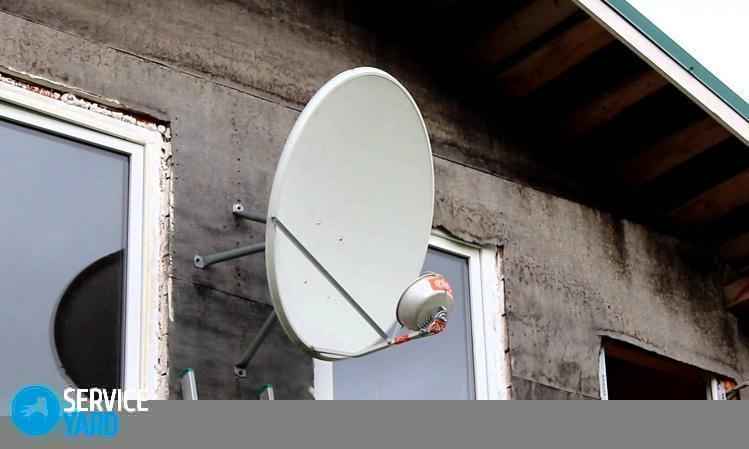
A homemade satellite dish for a TV is a fairly common design in the vast expanses of our homeland. Usually it is a curved metal circle. The signal, reflected from its walls, arrives at a receiver located on a pin extending from the center of the circle. What can satellite dishes be made from?
Of course from scrap materials. Let's explore the options and varieties of satellite dishes using various materials that we can make with our own hands in this article.
General information
Make sure that the finished homemade satellite dish is not adjacent to metal fences, gratings and reinforced concrete structures, which significantly reduce the quality of the received signal. Best choice for its location - the highest place on the roof.
Overview of options
DIY Plexiglas Plate
This method requires relatively significant financial costs, the plexiglass itself costs a lot of money, and you will need a large chamber to heat it, but the result is perhaps the most aesthetic.
Plexiglas is convenient for our purposes because when heated it can take on a given shape. To make a homemade satellite dish, take a piece of plexiglass about 4 mm thick, cut a circle with a diameter of a little more than half a meter, heat it, as soon as the glass softens, bend it into the shape of a plate. Carefully cover the entire inside with foil. The antenna for satellite TV is ready with your own hands.
Satellite dish made from umbrella and foil
Producing an antenna in this way, in addition to an unnecessary umbrella and foil, will require copper antenna wire and... plasticine with a beer can.
The same sectors of the umbrella are cut out of foil according to the size and attached to the umbrella fabric. So gradually the entire umbrella becomes metalized.
For the signal receiver, 3 cm of the protective braiding is removed from the antenna cable with a knife and cut to the copper wire transmitting the TV and radio signal. Here it comes to an empty tin can. An oval is cut out of this valuable material, a hole is punched in the middle, the same copper wire is inserted into it and soldered. To prevent corrosion in the future, experts recommend covering the joint with plasticine.
We have come up with a signal receiver that should be tied to the handle of a silver umbrella with electrical tape, but in such a way that our homemade receiver does not directly touch the metal cane, otherwise noise interference will occur. Plasticine can again serve as an insulating gasket between the parts.
The power supply to the receiver-amplifier occurs via the antenna wire. The resulting antenna must be fixed and also aimed at the source of the television signal.
Satellite dish made of thin metal sheet
We take a thin, no thicker than 1.5 mm sheet of galvanized iron with a thickness of 1...1.5 mm with sides of 100x100 mm. A plate with a diameter of about 80 mm is made from this material. To eliminate mistakes, first cut a cardboard sheet of the same perimeter into 16 equal parts in the form of sectors.
In this case, each next one will shift relative to the previous one by 22.5 mm. We draw 4 circles with the following radii: 75 mm, 254 mm, 400 mm and 538 mm. The largest circle will already extend beyond the sheet of cardboard. The parts that go beyond the boundaries just need to be cut off. Circles will be needed to bend the template along them.
Next, cutouts are made along 16 segments of the circle, maintaining distances of 0 mm, 11 mm, 29 mm, 50 mm. The finished cardboard template is transferred to a metal blank. Using special scissors, cut out and join the segments into a single plate.
Wire satellite dish
For this option, prepare a fairly large ball and copper wire about 3 mm in diameter. An inflatable ball with a diameter of at least 1 meter will play the role of a blank to give the shape of our plate. We mark the largest diameter of the antenna on it with a marker. Twist the first small ring from the wire and place it on top of the ball. Twist the second ring a little wider and place it on the ball.
The second circle should be of such a size that the distance between it and the small top one is 2-3 cm. We connect the rings with wire pieces using solder, or fasten them with thin wire. We continue in the same spirit making and arranging the rings on the ball until we reach the largest diameter of the plate. We will get the frame of the future satellite dish, which then needs to be covered with foil. We complete the product with a constructive solution inside the first smallest ring for securing the plate.
Sheet steel parabolic antenna
For the following home antenna option you will need:
- steel sheet 0.5 mm thick
- metal rods 1cm thick
- welding machine
- bearing
- concrete mortar
- fiberglass
- machine oil
- epoxy resin
- aluminium foil
We draw a parabola on a cardboard drawing, from which we will then transfer it to a sheet of steel. We weld the frame of the product from metal rods. We bend these rods along the knife. We weld the bearing into the middle of the installation. We install a pipe vertically under it. Having secured it well, we place the knife on the bearing of the large washer. Pour a fairly thick concrete solution into the resulting antenna blank.
After pouring, 4 days should pass, the minimum time for the concrete blank (our matrix) to dry. Now let's start gluing the antenna. To simplify our task, we divide the antenna into 8 sectors. Uniform distances between the parts of the matrix are important. For the pattern you will need equal-sized strips of fiberglass and an epoxy primer.
Lubricate the concrete matrix with machine oil and install the washer into the pipe. We cover the matrix with resin, put strips of fiberglass on top and smooth them thoroughly. Then cover with foil. The new product is ready for use as a receiver-amplifier.
The fact that satellite television is one of the peaks modern technology, everyone knows. But there is such a principle: everything ingenious is simple. With subscriber devices satellite television It’s not difficult to handle, and installing a satellite dish with your own hands is quite possible for a citizen who doesn’t know how to use a soldering iron and has completely forgotten Ohm’s law. But accuracy, intelligence, an accurate eye and a faithful hand are required, as well as the ability to use a compass and basic knowledge of astronomy.
Do you need documents for it?
Do I need to get home satellite television approved by some authorities, registered, or get permission? No no need. Satellite broadcasting is free. True, when you “catch” a satellite, set up the receiver and see the list of channels, many will be marked with an asterisk, exclamation point or some other icon. These are paid channels. To watch them, you need to buy a key card. If you know in advance which of the paid channels you need, you can purchase a card for them together with the receiver, or from a satellite broadcasting company.
However, if you live in an apartment building, then installing an antenna on a wall or on the roof will require permission from the owner or organization operating the building. But if the antenna is attached to the balcony fence, and the supporting structures were not touched during its installation, then permission is not needed.
However, in this case the antenna will wobble more in the wind, and in bad weather the reception will be unstable. Therefore, many subscribers order the installation of satellite dishes from specialized companies, and they themselves coordinate all issues with the Housing Office. In Russia, the largest of these is Tricolor.
General information about satellite broadcasting
Broadcasting satellites are located in geostationary orbit, at an altitude of 35,786 km above sea level in the plane of the Earth's equator. The orbital speed at this altitude is equal to the speed of rotation of the Earth, so the satellite hangs over the same point on its surface. The location of the satellite in geostationary orbit is called the station point.
IN reference guides satellite locations are designated by their geographic longitude: angular distance from the prime (Greenwich) meridian. This must be taken into account when orienting the antenna and a correction must be given: from a given point, the Greenwich meridian is “visible” at an angle opposite to the longitude of the location. How some stationary satellites are visible from Greenwich is shown in the figure.
Example 1: The longitude of the center of Voronezh is 39 degrees 15 minutes east. The position of the Eutelsat II F4 satellite is 7 degrees to the east, i.e. from Greenwich this satellite is visible at 7 degrees to the east. If Eutelsat II F4 hovered exactly above the prime meridian, the antenna would have to be rotated 39 degrees 15 minutes towards Greenwich to receive it, i.e. west. And since Eutelsat II F4 is already “shifted” by 7 degrees towards Voronezh, the antenna needs to be turned west by 32 degrees 15 minutes.
From Earth, the stationary orbit is “visible” in the sky in the form of the so-called “Clark Belt”. It should not be confused with the celestial equator. The angular height of the celestial equator varies throughout the year, and the Clarke Belt is “visible” as an arc of a curve that degenerates from a circle at the poles to a straight line at the equator. The Clark Belt “rests” on the horizon exactly in the east and west, regardless of location.

At a particular geographic location, the highest point of the Clark Belt is located exactly in the south, and its angular altitude is equal to the inverse of the geographic latitude of the place: 0 at the poles and 90 degrees at the equator. Therefore, at high latitudes, reception of satellite television is difficult or completely impossible: the Clark Belt “lies” on the horizon, and the satellite signal, even if it “shines” here, “stalls” in the atmosphere.
Example 2: The geographic latitude of the center of Voronezh is 51 degrees 20 minutes north. The highest point of the Clark Belt is seen from here at 90 degrees minus 51 degrees 20 minutes = 48 degrees 40 minutes due south.
Satellites do not emit signals in all directions; that would be too wasteful. The transmitting antennas of satellites are directional and, as a rule, “illuminate” the territory of the owning country, or the region to which the broadcast is carried out. Therefore, all satellites visible from this place, it is impossible to “catch”: it may be visible, but it “shines” in the other direction.
If the satellite “shines” directly downwards, then, in principle, it can broadcast to the entire hemisphere below it, having an antenna with a radiation pattern with an aperture of just over 10 degrees. However, at a distance of 36,000 km, this requires a transmitter power of more than 10 kW, solar panels corresponding area, and the entire satellite must be launched into orbit by a heavy carrier. Therefore, there are not so many broadcast satellites.
Video: Basic Points of Satellite Dish Direction
Satellite TV - at home
Let's say right away: manual adjustment (i.e., orientation to the desired satellite) of a highly directional antenna is a delicate matter. Here it is not theoretical knowledge that decides the matter, but experience, working skills (“muscle memory”) and simply instinct. Therefore, when purchasing a “dish”, at least from Tricolor TV, it is better to immediately order an installation with adjustment. Experienced craftsmen can do this well, so this service is not overly expensive.
However, even if you're not a big fan of doing everything, after a storm or heavy snowfall, your antenna may need to be re-aligned. Therefore, the adjustment procedure will be described below. But before adjusting, the antenna and equipment must be selected, purchased and installed.
What and how will we watch?
The reference manuals indicate the locations and signal parameters of all stationary broadcast satellites. But in a particular locality, the conditions for their reception may vary significantly. An ordinary hillock, especially in the northern regions, can make a satellite invisible, which actually shines here well.
Therefore, when purchasing an antenna, consult with the seller which satellites are well received, select three (up to 3-4 satellites can be received on one antenna), and write down the parameters of their signals:
- Carrier frequencies of satellite transmitters. For example, for one of the most popular satellites - Sirius - it will be 11.766 GHz; all satellites broadcast in the so-called. Q-band with average frequency in the region of about 10 GHz. But don’t try to “catch” the satellite’s frequency – it’s not the 20s, or even the 60s.
- Signal polarization planes. At the same frequency, two signals with mutually perpendicularly directed vectors can be transmitted without mutual interference electromagnetic field. The direction of polarization is considered to be the direction of the electric vector. Polarization can be horizontal "H" or vertical "V".
- Data transfer rates. Satellite broadcasting is digital, using SR (Single Root) technology. An example of speed designation: 27,500 SR or simply 27,500. The numbers mean how many frames (packets) per second pass through the communication channel. Just don’t confuse it with a TV frame: here a frame is a package of data organized in a certain way.
- Converter local oscillator frequencies for selected satellites. They lie in the same Q-band, but differ from the carrier by the value of the intermediate frequency that will go to the receiver. For example, with a carrier frequency of 11.766 GHz and a local oscillator frequency of 10,750 kHz (10.750 GHz), the receiver's receiving frequency will be 1016 kHz (1.016 GHz). This is why frequencies are not “caught”, as radio amateurs used to be: the closer we get to the TV, the greater the error in setting the frequency.
Antenna selection
The choice of the antenna itself comes down to determining its diameter. For home reception in the southern regions, a “plate” with a diameter of 60 cm is sufficient; in places from St. Petersburg and further north, stable reception requires an antenna mirror with a diameter of 1.2 m.
Many people think that it is easier to “catch” a satellite with a large “dish”. Just the opposite. A large mirror provides a signal of greater level and quality, but this is achieved by narrowing the radiation pattern, so that it is more difficult to “catch” a satellite with a large “dish”. Large aperture antennas are used most often as signal sources for terrestrial broadcast systems and other applications where further broadcasting is required.
If you are going to receive several satellites, then you need to purchase a multifit along with the antenna - a mounting plate for installing several converters with the ability to adjust their position individually. As a rule, sellers immediately ask: “Single nest or multifit?” In any case, you can put one converter in a multifit, and then add another; The multifit is inexpensive. So it’s better to immediately buy a “plate” equipped with a multifit.

Converter selection
The next step is choosing a converter. The converter is the same “head” that converts the signal from the satellite, which “pierces” the atmosphere well, into a signal for the receiver, which ordinary electronics can process without much difficulty.
There are three types of converters: circularly polarized, switched H-V and fixed. The first ones are the least sensitive, but can receive any signal. The latter are the most sensitive, but to receive signals with different polarizations they must be rotated 90 degrees. Under normal reception conditions, it is better to use a circular or switchable converter.
Sensitivity, noise level and stability of the local oscillator frequency (on which the level and quality of the signal significantly depend), as well as the protection of the converter from weather influences (after all, it is outside) vary greatly from model to model and from manufacturer to manufacturer. Specific model It is better to choose one that is suitable for the price based on the recommendations of the antenna seller and reviews of experienced subscribers.
Receiver and equipment
But in domestic conditions, the quality and signal level almost do not depend on the model of the receiver. Here you need to focus on service functions and price. There is only one condition: if you are going to watch TV “digitally” with HD quality, the receiver must have an Ethernet output (connector computer network). You don’t have to worry about the compatibility of standards: all are modern network devices“understand” all commonly used data exchange protocols without further explanation.
As additional equipment, you need to purchase DiSEqC - a converter power switch. A household receiver (by the way, in Russian, receiver is a receiver; tracing paper is made from English so as not to be confused with radio receivers) provides power to one converter; To move from satellite to satellite, you need to switch the power to the corresponding “head”.
Antenna installation

What should it be correct installation satellite dish, seen in the figure. An important point: the mounting part (“neck”) of the pipe stand (highlighted in green) must be strictly vertical in two planes. Otherwise, aligning the antenna will turn into a long painful task.
The location for installing the antenna must be chosen carefully. There should be nothing in the mirror frame, not even window glass. The mirror alignment does not coincide with its geometric axis: oblique incidence mirrors are used for satellite reception. Where the mirror flap actually “looks” is also visible in the figure. The fact that the southern part of the sky should be visible from the antenna installation site requires no explanation.
If you live in a private house, do not be lazy to raise the antenna higher. Raising the antenna by 10 m reduces the dust content in the air around it by half, which greatly affects the quality of reception.
First, only the pipe stand is installed. The set of the mirror, its adjustable mount, bracket and converter is assembled at home - this makes it more convenient to first check the verticality of the pipe stand.
Attaching a satellite dish to the wall cannot be done with self-tapping screws in plastic dowels - the antenna will “go away” over time. It is necessary to use collet pins with a length of at least 200 mm and a diameter of at least 8 mm, a base plate is put on them and secured with nuts and locknuts.
Video: example of plate installation
Satellite dish alignment
Engineering compass

An engineering compass makes it very easy to adjust a satellite dish even for a beginner. You can see what it looks like in the picture. The price is low. Its advantages:
- You can take the azimuth with one glance, without moving the compass.
- By rotating the dial with a notch, you can take into account the magnetic declination of the place in advance; Before adjustment, you need to find it out at the local weather station. There is no reference data, because Magnetic declination varies from year to year.
- The compass is equipped with a deflector, which significantly reduces deviation.
Skillfully using an engineering compass, a competent and careful person, who for the first time in his life took up the adjustment of a “dish,” accurately “catches” the satellite within half an hour. If you use a regular Andrianov or tourist compass, you don’t have to think about magnetic declination: the error in setting the azimuth will be greater.
Note: Magnetic declination in mid-latitudes does not vary much from place to place. It is enough to find out what it is like in a regional city.
Adjustment procedure
Immediately you need to take into account the magnetic declination. If it is eastern, it must be subtracted from the longitude of the place; if it is Western, add to it. At first glance it may seem that you need to do the opposite, but keep in mind that the satellites are in the south; Magnetic declination is given for the northern end of the compass needle.
Next, we calculate the true azimuth of the average of the received satellites, as described at the beginning of the article. Then, by turning the satellite location diagram by an angle corresponding to the longitude of the location (we assume that our latitude is not very different from Greenwich), we approximately determine its elevation angle.
Then, aiming at the converter bracket, like at the barrel of a gun without a front sight, using an engineering compass corrected for magnetic declination, we set the antenna to the desired azimuth. Roughly, by eye, we adjust the antenna alignment according to the elevation angle.
To adjust the antenna, we take the TV with the receiver outside closer to it; powered through an extension cord. We don’t connect the power switch yet: the initial adjustment is done using the middle converter. Then:
- We connect the TV and converter to the receiver, turn on the equipment, set it in the receiver menu (“Antenna installation” -> “ Manual search") the required signal parameters, according to the instructions for it.
- Turn on the signal search mode.
- Carefully and smoothly swing the antenna up and down until the receiver “grabs” the satellite. At a 60 cm dish and if all corrections are taken into account correctly, azimuth correction is not required.
- If “it’s not caught,” we check the azimuth again and, changing it in steps of 3 degrees to the right and left, repeat the “swinging” procedure. For a 1.2 m mirror, the step is 2 degrees.
- When the signal is caught, very carefully, “without breathing,” slightly turning and shaking the antenna, we achieve the best best quality and signal level. The priority is quality. At 60% level and 80% quality, reception stability will be twice as high as vice versa.
- Carefully, in a diagonal pattern, tightly tighten the antenna mounting nuts in several steps. In this case, you need to monitor the signal at all times. If, when tightening a nut, the signal “floats”, leave it for now and tighten the diagonal one.
- From the main menu of the receiver, we check whether the satellite is caught. If all parameters were set manually, failures, as a rule, do not occur. But if “suddenly,” we loosen the plate, and start over.
- We turn on “Level - Quality” again and, by carefully moving back and forth and slightly turning the converter in the socket, we achieve the best possible quality.

If you want to use satellite television, but you can’t afford to buy a large-diameter antenna, then this article will help you. It describes several options for how to do it yourself, and perhaps this will lead you to optimal solution tasks.
When starting to design a parabolic antenna for satellite television, it is necessary to take into account the feed element included in the converter and its parameters. There are two manufacturing options: using gluing on a matrix or soldering a mesh, and the first allows for ease of control over the shape during its manufacture, the second has less weight and windage.
The parameters that characterize the antenna are its diameter, the shortest distance from the focus to the antenna reflector (the so-called mirror depth and the aperture angle at which the mirror plane is visible.
Using these values, the antenna parameters are calculated, then transferred to graph paper, and a parabola is constructed. It must be glued to a sheet of steel, the thickness of which should be five millimeters, and cut out. This is how you get a knife, after which you need to select a bearing and a rod. In this case, it is necessary to shorten the knife to a distance equal to half the diameter of the rod and weld it to it. To make a satellite dish with your own hands, you need to make a frame from a steel rod (with a diameter of eight to ten millimeters) by welding. The ribs must be bent along the knife, the bearing must be welded into the top of the frame.
The antenna frame must be installed on a level surface. In its center, a pipe is installed vertically under the bearing. After attaching a washer to the bearing, which is slightly larger than its diameter and equal in thickness to the future parabolic antenna, a knife is inserted onto it. Thick concrete mortar is applied to the frame. The resulting matrix is dried for three to five days.
When starting the gluing process, you can create a satellite dish with your own hands in several ways. To simplify your task, the product should be divided into sectors (from six to eight). For strength, the thickness of the reflector must be increased and reinforced with radial ribs made of steel wire. To glue the parabolic antenna, use fiberglass cut into strips and first apply automotive oil to the matrix. A pipe is inserted into the washer. A washer is placed on it, equal in height to the thickness of the reflector. Then a layer of resin and pieces of fiberglass are applied, which must be smoothed to remove air bubbles. Cover the reflector with aluminum foil.
When creating a satellite dish with your own hands, you can use another option when forming a conductive surface. Why are paints containing metal powder bases applied to the reflective surface of a parabolic antenna? For example, silver. Having formed the thickness of the reflector of the required dimensions, it is secured with nuts.
There is an option to create an antenna from papier-mâché, when newspapers passed through a meat grinder are used as filler. Glue is added to them and the composition is applied to the matrix.
Before you start implementing a project - a satellite dish with your own hands, you should consider several factors influencing its operation. After all, the lower floors of the building and the reinforced concrete with which the windows are equipped can interfere with the functioning of the product.
There are different possibilities for making an antenna with your own hands: from beer cans, from indoor antenna, from copper cable. Or you can use an existing factory satellite dish and add a self-made satellite dish to it.
Glue sheets of A4 paper to the product with tape and place along the concave edge. Cut 5 pieces of coarse fabric for the antenna in the shape of its mirror. Place them on a plate one at a time and coat with glue. A day later, place cooking foil on the resulting frame, treated with glue. Glue the back side with fabric again. A plastic water pipe is suitable for the converter. The antenna mirror must be coated with a thin layer of paint from a can.
A satellite dish at home or in the country has already become commonplace, like an iron or an electric kettle. People are installing their own antenna for a good picture on their TV. The article and video will give you instructions for installation yourself.
When choosing a plate, the key is its diameter. For home reception in the southern regions, an antenna mirror with a diameter of 0.6 m is sufficient. In the northern regions, for a stable signal, the diameter of the device increases to 1.2 m. A large mirror provides a signal of better quality, but it is more difficult for them to “catch” a satellite than for small ones. A satellite dish only at first glance looks like a complex structure. You can assemble and install it yourself. Your plate kit should consist of the following parts:

Attention! Rely on a consultant or seller when choosing a receiver, converter, etc. He will suggest a model based on your needs and price. The entire set can also be purchased as a set.
Antenna installation
First of all, decide on the future location of the antenna. When planning, it is important to leave open space in the desired directions where the antenna will be turned, so that the signal path is not blocked by trees or buildings. There is no need to coordinate the installation of satellite equipment with any authorities. If we are talking about the roof or load-bearing wall of a multi-story building, inform the balance holder of the house about your intentions. Otherwise, conflicts may arise in the future.
During the assembly process you may need the following tool:
- impact drill or hammer drill with a set of drills;
- keys for 10 and 13;
- "nippers";
- screwdriver;
It is better to assemble the plate with all the “stuffing” at home and only then attach it to the wall. The instructions will most often clearly explain what is connected to what, and the tools will help you. After this, you can begin installation.
 Antenna installation
 The metal bracket on the wall must be fixed strictly vertically and held tightly. An anchor or a bolt - it doesn’t matter, the main thing is the safety and durability of the antenna. Otherwise, in windy weather the signal quality will decrease. After installation, you need to fine-tune the heads and connect them correctly to the DiseqC switch so that the settings in the tuner match the connection in the antenna. The disek will last longer if you cover it with a cut-off plastic bottle.
Antenna setup
To set up the antenna, you need to calculate the satellite azimuth and elevation angle. An ordinary compass and formula will help you calculate them. In order not to fool their heads, developers came up with smartphone applications, for example, Satfinder. An azimuth calculator can easily be found on the Internet along with a map of approximate satellite coordinates relative to your area. The search engine will also help you with the exact coordinates of your settlement. All received water data must be entered into the formula, and the program will tell you about the azimuth and tilt angle of your antenna.
Vertical offset plates already have a curvature angle; its value can be found in the instructions. Fix the antenna firmly, but so that it can move with light force, and point it towards the satellite, taking into account the calculated data. A TV is required to tune the antenna. DiseqC is connected to the tuner (LNB IN input) by cable. Most often, this can be done using either a SCART connector or an RCA output (“tulip”). Communication with DiseqC must only be carried out with the power switched off.
Advice. Manual setting Antennas in relation to satellites are a delicate matter. It is inconvenient to raise the TV to a height, so adapt gadgets: a phone, car radio or tablet, which together with the tuner will provide a picture already on the roof.
After connecting to the network, the receiver should show no signal on the screen. To configure, you need to enter the receiver’s menu (usually the code is 0000) and find the satellite you need. You need to tune in to a strong satellite transponder: indicate the frequency, polarization, indicate the symbol rate, fec. A strong one is often the one from which several channels are broadcast. If after these manipulations the signal scales twitch to high levels, you have calculated correctly. Now you just need to slightly adjust the signal by rotating the antenna, no more than 10 mm in azimuth and angle.
 They will help you set up the antenna special programs
 If the quality leaves much to be desired, start searching manually. The sector for this is usually selected in this way: by elevation +/-10°, by azimuth +/-15°. It is necessary to rotate from the extreme corner, pausing for 2-3 seconds. after 4-5 mm. After successfully “catching” all the satellites, do not forget to isolate the connectors from external factors (for example, rubber) and carefully secure the cable along the way to the tuner.