To do general form communities are more aesthetically pleasing and working with them is more comfortable, the best solution will create a group menu. This way you can put all the important elements into one neat list, set each link with its own icon or image, and notify visitors about any changes quickly and clearly. The menu may include the following elements: various links to external sites, discussion bubbles, albums, music and other sections within the VKontakte site, images and simply the structure of your group. Following the instructions below, try to create own menu for the VKontakte community.
How to create a simple menu in a VKontakte group
If you want each menu line to lead to a particular discussion topic, first of all, you need to create these same discussions and give them names. Leaving them closed or open for comments is a purely personal matter, since this option does not affect the display of the page in the menu.
Try to make a simple menu that will represent the structure of your group and contain all the most important sections.
- Keep in mind that menus will appear slightly differently in groups and communities. Therefore, if you want to transfer a group to a community, click on the three dots icon next to the group name and select the line “Transfer to page”. Please note that you will not be able to turn the community back into a group.
- Now go to the “Community Management” link in the same menu.
You will see a block with all the settings for your group, here you can change the name, contact information, privacy, manage participants. Go to the “Sections” category.


- In the “Materials” line, set the value to “Disabled” or “Restricted” so that group members cannot accidentally damage your files that are needed for registration. Don't forget to save your selection.


- Go to the group and go to the “Latest News” window, this is where you will create the menu.

- Click “Edit”.

- First of all, you need to change the name “Latest News” to “Menu” or something else that will make it clear to participants that here they can quickly follow the necessary links.
Switch the entry editing mode to “edit Wiki markup” using the small arrow in the right corner.

Now create the structure:
- It is important that you have discussions, materials or albums in the group whose name you will use in the menu.
- Write all the names of the main sections on a line, framing them twice in square brackets.
- To make the text appear as a list, put asterisks in front of the items.
From this screenshot, we can assume that the group has a material called “Section 1”, a discussion “Section 2” and an album “Section 3”. Click “Preview” or “Save Changes”.

- Your section will change to “Menu”, and it will contain active links to the main categories of the group, neatly arranged in a list.

How to insert links into the VKontakte group menu
To speed up access to your official website, or sections directly within the group, it is better to insert active links.
- Go back to editing the menu section. Copy the desired link and simply paste it into the window in Wiki markup mode. After saving it will become active.


- This is what all the links that you can insert into your group menu look like.


How to create a VKontakte menu with images
If you want the menu to consist of beautiful icons that lead to a particular section, simply follow the instructions below.
- To begin, create a special album in which only technical pictures for group design will be stored.

- Upload images to jpeg format no more than 500 pixels per 500.


- Copy the URL of the uploaded image.


- Now copy the link to the discussion, material, or other external site.

- [[Link to image in your album | size in pixels; nopadding | Link to discussion or website]]
An example is shown in the screenshot.
Click “Save Page”.


- Now a neat link will appear in your menu. You can set the pixel value as you see fit.
To add multiple images, simply enter new links on a new line.


Besides being memorable, .com domains are unique: This is the one and only .com name of its kind. Other extensions usually just drive traffic to their .com counterparts. To learn more about premium .com domain valuations, watch the video below:
Turbocharge your Web site. Watch our video to learn how.
Improve Your Web Presence
Get noticed online with a great domain name
73% of all domains registered on the Web are .coms. The reason is simple: .com is the where most of Web traffic happens. Owning a premium .com gives you great benefits including better SEO, name recognition, and providing your site with a sense of authority.
Here's What Others Are Saying
Since 2005, we"ve helped thousands of people get the perfect domain name
- simple and easy to use. - Nick Collins, 10/25/2019
- I like hugedomains - Bo Pham, 10/23/2019
- I just bought my domain from Hugedomains.com after contacting them about something I was wondering about. They got back to me right away, and answered my question precisely. I chose a paymen tplan for my domain, and it went so smooth! I got everything in a very short time, and explanations about what to do. Thank you, I am very pleased! Best regards Herdis - Herdis Jenssen, 10/23/2019
- More
And again I am glad to welcome you!
In today's article we will talk exclusively about the VKontakte group, although for the most part, I prefer to work with public pages. But when in the last article I touched on the example of my public, many had questions, specifically about the menu for the group.
How to create a menu in a VKontakte group
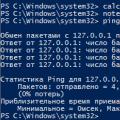
Here's what I got.
I made the menu as an example only. In order to understand it for groups, to consider in more detail all the subtleties for you.
So. Here are the basic steps:
- Think over the main menu
- Select image
- Photoshop (nowhere without Photoshop, as always 🙂)
- Image cutting
- Uploading an image to a contact's album
To activate Recent Entries(for your future menu), you need to go to the community management and turn on the item - “Materials”
After the materials are included, the “Latest News” item will appear at the top of the group, in which you will need to create a menu. Just like with any contact page, we find ourselves in an editor in which we can either manually upload images or menu buttons, or through wiki markup (button in the upper right corner).
As you guessed, the easiest way is to first draw the necessary picture in Photoshop and place buttons on it in advance; in the future they will be links.
In my example, I used a girl's background and placed 3 buttons to the left of her. Each button had its own name.
My menu consisted of the following items:
For implementation finished image into contact, it must first be cut. To do this, we use the “Cutting” tool in Photoshop. I think there will be no difficulties with this. Everything is simple there... Just in case, I took a photo :)
We select this tool and start “cutting”. I got 4 parts. (the simplest thing I came up with :), although you can cut it into pieces)
All necessary work to create the menu has been completed. Now you can start creating a VKontakte menu. To do this, upload images to the contact one by one. Here's what we ended up with:
Now click on each button (or part of the image) and assign the required address (link). To remove extra spaces you need to use the “nopadding” tag (in the Wiki markup menu)
The “nopadding” tag removes spaces between images, that is, it helps to “join” them closely to each other.
As a result of adding the tag, the result was the following:
It seems that everything is clear and there is nothing complicated. And if you suddenly decide to create it yourself, then go for it, you’ll probably end up making it more beautiful... In my example, it didn’t turn out as cool as I would like, but I looked at the working part for you. Surely, if you spend more time, and even turn to freelancers, you can create a very cool menu.
I saw many people making a continuation of the main avatar. It turns out as one whole image. Looks good. But to create something like this, you need to have a better understanding of Photoshop :)
I also noticed that many people are interested in the question - how to make the group menu open, that is, to open menu VKontakte group was initially available when entering the group.
Answer: As far as I know, this feature was removed by Vkontakte administrators. Previously, there was a separate button to make the menu fixed - open. Then this function was removed, and now the menus have to be opened separately.
Although, I have seen some that are open by default... and someone even said that there is some code that copes with this problem. But I wouldn't recommend using it. Judging by the discussions on many forums, the admins do not welcome this!
That's all for today. See you in touch!
Numerous requests from my persistent readers and simply curious users have had their effect. I finally created a lesson in which we will learn how to make a dynamic VKontakte menu with the effect of pressed buttons! By analogy with ordinary Internet sites, when a visited link is marked in a special way (pressed button, underlining, etc.) - we will create the same design on VKontakte, using the created pages and graphic design. To begin with, we will make graphic templates in Photoshop - we will create a menu header and two types of buttons. Then we will create several VKontakte pages, according to the items in our menu. And finally, we’ll do a tricky trick, which, in fact, will create the illusion of following the link. The lesson is quite complex and is suitable for those who feel confident in the functionality of Vkontakte. I will perform all manipulations using an example your VKontakte group, where this effect is realized live. So, let's get to work!
Step 1. Create a menu header in Photoshop
Create a document in Photoshop with a width of 600 pixels. The height can be different, at your discretion. You can place any specific photograph, collage, information banner and other graphic pictures in the header. In this case, I used this advertising banner measuring 600x172 pixels. 
Step 2. Create a navigation bar in Photoshop
Now we need to create a navigation bar. IN in this example I used only text as buttons. But at your discretion, you can create colored buttons and write text on them. We do this - create a 600x56 pixel rectangle in Photoshop and in this case fill it with white. Then we write menu items on the line - about 5-6 items, no more. Large quantity items will look squeezed.
Step 3. Create a pressed navigation bar in Photoshop
Now we need to create active links, as if they were clicked on. I used a regular underline, but you can use a different text or background color to mark the visited link.
Step 4. Cut ready-made pictures
On at this stage we need to cut the pictures from Step 2 and Step 3. We should have two sets of five buttons each - one button without an underline, the other button with an underline. The buttons for each individual item (with and without underlining) must be the same size. The picture below shows all of our graphic design - ten buttons and one menu header. 
Step 5. Create a VKontakte Menu page
Now let's go to VKontakte. Our task is to create a separate page called “Menu”. To do this we will use the following code
http://vk.com/pages?oid=-XXX&p=Page_Name
where instead of XXX we will substitute the id of our group, and instead of the text “Page Name” we will write Menu. Now we need to find out the group id. How to do it? Let's go to home page groups and look at our posts on the wall - right under the “Add post” block it will say “All posts” – click on this link. 
Step 6. Determine the group id and edit the code
We go to the page and see a URL like this https://vk.com/wall-78320145?own=1, where the numbers 78320145 in this example are the group id. We substitute our data into source and we get a record like this:
http://vk.com/pages?oid=-78320145&p=Menu(with your numbers!). Paste this line into the address bar of the browser and press Enter. This is how we created new page VKontakte and initially it looks like this. 
Step 7. Create the remaining VKontakte navigation pages
In a similar way, we create four more navigation pages: Prices, How to order, Technical specifications and Questions. That is, we copy the corresponding code four more times into the address bar of the browser (with your id numbers in the example below, my numbers):
http://vk.com/pages?oid=-78320145&p=Prices
http://vk.com/pages?oid=-78320145&p=How_to order
http://vk.com/pages?oid=-78320145&p=Technical specifications
http://vk.com/pages?oid=-78320145&p=Questions
Please note that in the two-word page title (How to order), the space between the words is replaced by an underscore How_to order. Now we have five ready-made pages for each menu item. We did not create a Portfolio page because it is located on the Menu page
Step 8. Upload photos to the first page of the menu
On the created one, not yet blank page(see Step 6) Menu click on the Edit link or the Fill with content link. After this we see the editing panel. Here we need to click on the camera icon with the Upload photo function. Important! Please make sure that you are in wiki markup mode. Switching modes is regulated by the icon at the right edge of the page. 
Step 9. Result after loading images
We load our pictures that we created in Step 1 and Step 2. After loading, we see the code as in the picture below, and the menu itself looks like this. After each code change, don’t forget to click Save Page, and then click Preview to view the result. 
Step 10. Editing the image code
Now our task is to replace all noborder properties with the nopadding property. And put the real dimensions on the first picture, since VKontakte shrank the picture to 400 pixels when uploading. After all the changes we should get the following code and menu. 
Step 11. Add links to images
Now we need to put links for each picture. The link must be inserted after nopadding| instead of a space before the closing parentheses. For the first image (menu header from Step 1), you can give a link to the main page of the group, or you can use the nolink property (put through; after nopadding without spaces). For the second card, insert the address of the format page page-78320145_49821289. That is, the full URL of the image https://vk.com/page-78320145_49821289, the first part with the domain can be omitted. But for links to external sites, the URL of the link must be specified in full. 
Step 12. Copy the code to the remaining navigation pages
That's enough simple step, we copy the last code from the previous step and paste it onto the remaining created pages - Prices, How to order, Terms of Reference and Questions. We are on the page, click Edit or Fill with content (we are in wiki markup mode), paste the code and click Save. And then also on the next page. That is, now we have five pages, on each of which the menu looks exactly the same. But you can already navigate through the menu - when you click on a link, for example Prices, we will be moved to the Prices page, etc.
Step 13. Making a pressed button effect
Now we have to change one picture on each of the five pages (replace the button without an underline with a button with an underline). For example, on the first page of the Menu we load a new image and then replace the address of the old image in the code with a new one (underlined in red). Then we go to the Prices page, upload a picture with underlined Prices and change it in the code to the address of the new picture. Then we go to the pages How to order, Terms of reference and Questions and do the same operation in the same way. 
The final.
As a result, we got a navigation effect when you click on a menu link and it becomes active. But since the graphic design on all pages is almost the same, with the exception of the active link, the illusion of navigation is created, although in fact it is a transition to another page.
The menu designed in this way is not adapted to mobile devices. When the screen size decreases, the pictures begin to slide one under the other. In order to make a responsive design, you need to use rigid-version tables. But this is another story and a more advanced technique. In the meantime, look at the various options for graphical menu design. 


Hello, my darlings!
Today I will tell you in detail, how to make a menu for a VKontakte group. In my experience menu in the group in contact increases the number of calls and requests by 20%. It is important to take a responsible approach to creating a group menu. Therefore, I have prepared a menu PSD template for you to make your work easier.
Let me start with the fact that today there are two menu options:
Option 1: Closed group menu
Closed menu, opens when you click on the link. In the example below, the menu opens when you click on the “OPEN GROUP MENU!” link.

Option 2: Open group menu (pinned post)
An open menu is essentially a pinned post with an active link.

The second menu option appeared relatively recently, when it became possible to pin posts from the wall to the header of a group or public page. It is now the most effective.
Both options use wiki markup. Wiki markup makes it easy and quick to process appearance groups, creating graphic tables and spoilers, formatting text and working with images, links and anchors. I will not dwell on the markings in detail, because... VKontakte has a built-in visual editor, which automatically translates your content into wiki markup. Here I will give only the basic codes, without which it is impossible to create a menu.
How to make an open menu on VKontakte
We will analyze the process of creating a menu using the example of Option 2, i.e. open menu.
To make it easier for you to navigate, I have prepared for you PSD template menu: [Attention. The design of VKontakte has changed. New layout and other relevant information in my book ]
Group Menu Template PSD
For creating external menu 2 pictures are required: an avatar (on the right) and a central one (action picture).
Avatar dimensions: 200 x 332 px
Dimensions of the central image: 395 x 282 px

Step 1.
Using the group menu PSD template downloaded above, make two pictures of the required sizes.
Step 2.
In your group, go to “Community Management” (on the right under the avatar). Find the “Materials” item (on the “Information” tab) and make them “Restricted”.

Step 3.
Now return to the main page of your group and click “Edit” in the “Materials” block that appears (I have already renamed it to Group Menu).

When editing the page, set the title, you can create sections or any other information using the toolbar. Click "Save Page" and "Return to Page"

Step 4.

In my example https://vk.com/page-42211349_47355854,
The first numbers 42211349 are your group id
The second digits 47355854 are the page id
The trick: you can create additional pages manually. To do this, follow the link like:
https://vk.com/pages?oid=-хххххххх&p=pagename
Where,
xxxxxxxxxx is your group id
pagename – the name of your page
Step 5.

And publish the post.
Step 6.
Now upload the group avatar (picture on the right). A duplicate avatar picture will appear on the wall - delete it.
Step 7
Now attention. Click on POST PUBLICATION TIME (lower left corner of the post).

And click “Pin”. Close this window and refresh your group page (F5).

Step 8
We write the group status (use only 1 line) to align the pictures if the drawing on your avatar does not start from the very top (in my avatar template, option 2). And this is what we got:

RESULT.
The menu is ready! Now, when you click on the central image, your menu opens:

Here you can edit it, post photos, videos, create new sections, and post links.
You can also create a graphical menu (submenu) inside the main menu. Its width should not exceed 600 px. The height is unlimited. Which allows you to create excellent VKontakte landing pages.

But I will talk about this in more detail in the following articles. Subscribe to blog updates to stay updated on new features. Like and share the article with your friends.
Post your questions or opinions in the comments below.
By the way, if you are interested in a step-by-step algorithm for promotion on VKontakte from A to Z, you can purchase my book.
Watch the video version of this question: