Removing virtual hard drives and drives - far from it last point in the list of Windows cleaning activities. And of course you shouldn’t ignore it. Why clutter up the operating system, and indeed the entire computer, with unnecessary images and partitions? And beginners may even get confused in the search useful information among such “heaps”.
Of these step by step instructions you will learn how to remove virtual disk, created using regular funds and in drive emulators (UltraISO, Alcohol 120%, Daemon Tools).
Removing a virtual partition
Method #1: Using the Disk Management option
1. Click Start.
2. In the panel that opens, right-click the “Computer” section.
3. Select “Management” from the drop-down list of options.
4. In the window that appears, in the left block, click “Disk Management”.

5. Right-click on the virtual partition that you want to remove.
6. In the contextual list that opens, select “Delete volume...”.

7. Confirm running the command: in the “Delete simple volume” window, click “Yes”.

Method #2: Using the Command Line
1. Press the “Win” and “R” keys together.
2. In the open line type - cmd.
3. Press “Enter” or click “OK”.
4. In the console window command line enter the command:

For example, subst X: /D (delete section X).
How to remove a virtual optical drive?
1. At the top of the program window, open the “Options” section by left-clicking.

2. Go to the “Settings...” subsection.
3. In the settings panel that appears, click the “Virtual Drive” tab.
4. Click the “Number of devices” drop-down list.

5. Set to "No".
6. Click OK.
After the settings made take effect, the emulated drive will disappear.
1. Right-click in the utility panel the drive you want to remove.

2. In the list that appears, click the “Unmount” directive.
Attention! To remove an image from the catalog, also right-click on it and run the “Delete element” command from the list.
1. In the program control panel (block on the left side of the window), in the “Settings” section, click “Virtual disk”.

2. In the settings window, open the “Number of virtual disks” option by clicking the left button.
3. Set the parameter value to “0”.
4. Click OK.
Successful cleaning and Windows settings!
Last week we asked you to share your favorite disk image tools, then we rounded up the five most popular responses for a vote. Now we"re back to highlight your favorite. DAEMON Tools led the pack by a comfortable margin with 40% of the vote.
Softpedia.com DAEMON Tools Lite is a software solution that will impress you, especially thanks to its advanced features that can deal with virtually all image formats on the market. Reliable application that creates virtual drives on your computer, providing you with the possiblity to emulate CDs and DVDs for instant access.
PCWorld.com If you spend a lot of time swapping and hence waiting on CDs or DVDs to mount, Daemon Tools Lite is worth its weight in gold. Even if you don"t, it"s a program you should download to keep in your bag of tricks--you"ll find a use for it eventually.
Download.com The advantage is that you can burn the images you"re using with DAEMON Tools Lite right away or just test an image before burning it to see if it was created correctly. DAEMON Tools Lite works with most image formats.
Filecluster.com Pros
- Small and highly stable program.
- Low resource requirements.
- Simple and functional interface...
Software.Informer.com DAEMON Tools Lite manages to be more comprehensive and feature-rich than many of its competitors. And that's quite remarkable, especially considering that DAEMON Tools Lite is free while many of its competitors are not.
downloads.tomsguide.com As a disc imaging tool, Daemon Tools Lite"s free nature automatically makes it a lot better than many competing applications simply because it offers most of what they offer at the vastly reduced price of free.
www.techadvisor.co.uk When you have a disc that you know you"ll need to access regularly, then, DAEMON Tools Lite allows you to create an image in just a couple of clicks. This then shows up in its Image Catalog for speedy reloading later, and you can put the real disc away.
techgyd.com Daemon Tools Lite is one of the best software for emulating and organizing your disc images. The software is very easy to use and fulfills all your disc related requirements. The virtual drives support is amazing.
maddownload.com If you are looking for the best software to work with ISO, MDX, MDS, and MDX files? Well, you have come to the right place. DAEMON Tools Lite is an easy and ready to use downloadable software compatible with Windows. It is well known reputable software that gives you the power of having a DVD-ROM emulator right into the comfort of your own home.
GIGA.de Mit dem Daemon Tools Lite Download könnt ihr virtuelle Images erstellen, speichern und einbinden sowie virtuelle Laufwerke emulieren.
Very often, PC users ask on forums the question of how to remove a virtual disk or disable it. Virtual disks do not appear in the system just like that. Therefore, it follows that utilities were installed on the computer to emulate a DVD drive or the command “ Subst" From this material, our readers will learn how to get rid of virtual disks in Windows operating systems once and for all.
Disabling virtual disks using DVD drive emulators
There are now a sufficient number software products, which can create a virtual DVD drive. In our review we will describe the most popular disk emulation programs. If you don’t have the utility in question on your PC, then you shouldn’t get upset prematurely, since the principle of operation of other programs is as close as possible to them. The first utility is called Alcohol 120%. If you have this particular utility installed on your system, then feel free to launch it from a shortcut on the Desktop. After launch, we will be taken to the main program window.
In this window you need to find the menu block “ Settings" and select the item " Virtual disk" These actions will take us to a new window. To disable all virtual drives created Alcohol 120%, set number of drives in position zero, as it shown on the picture.
After this, confirm your actions by clicking OK. Now if you go to Explorer, you will no longer see the virtual disks in the system that the program created Alcohol 120%. It is also worth noting that if you have the utility installed Alcohol 52% from the same developer, then the procedure for removing drives is the same.
The second utility in question is called Virtual CloneDrive. To remove drives in Virtual CloneDrive you need to find the icon displayed in the Taskbar and go to its options.

In the options context menu, select " Settings", which will take us to the settings window Virtual CloneDrive. In this menu you need to find the text block “ Number of disks" and indicate in it that there are no virtual drives, as shown in the image below.

Now confirm your actions by clicking OK. After these steps we will also get rid of virtual DVD drives.
The next quite popular utility is called DAEMON Tools Lite. Launch it from a shortcut on the Desktop.
To remove a drive in DAEMON Tools Lite, right-click at the bottom of the program and select “ delete everything" as shown in the image below.

In the message that appears, we confirm our actions.

That's it for deleting DVD drive ov from DAEMON Tools Lite completed. The removal principle in older versions of the utility is similar.
The fourth program considered in our review is called Ultra ISO. If the virtual drive was created using Ultra ISO, then launch it from a shortcut on the Desktop to go to the main utility window.
To remove a DVD drive from the system Ultra ISO, you need to go to its settings. To do this, in the menu " Options» open the item « Settings" In the window that opens, go to the “ Virtual drive»

In the text block " Number of devices» enter the value « No" as shown in the image above. Once you have completed these steps, confirm them with the OK button. After this, all drives created in Ultra ISO, will be removed from Windows.
It is also worth noting that if you uninstall the applications discussed above, their virtual drives will be deleted along with them.
How to remove virtual disks created by the “Subst” command
If you have virtual disks enabled in your system using the command " Subst", then removing them from the system is quite simple. When executing the command " Subst» appears mounted HDD from a specific directory on the system, but after a reboot this disk disappears.
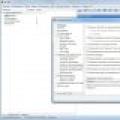
Then a logical question arises - where do virtual hard disks after reboot Windows. The answer to this question is quite simple - a batch file is installed in Windows startup that executes the commands " Subst"at system startup. Usually such virtual disks appear during installation local servers for web development such as Denver. To enter startup, for example, in Windows 10, just open the program “ Execute"and use the shell:startup command in it

This command will open the startup directory.

As you can see in the image above, in this directory there is a batch file " Virtual Hard Disk.cmd" If you look at the contents of this file, it will become clear from which directory the hard drive was created in the system.

To remove this hard drive, just delete this file from the startup directory and to restart a computer.
Let's sum it up
For the examples discussed in the article, the operating system was used Windows 10. If you have an older operating system, then you will see virtually no difference in the utilities discussed and in deleting a batch file, since the operating principle is the same.
We hope our material will help our readers clear the system of all virtual devices in the Windows operating system and answer the question of disabling a virtual disk.
View on topic
DAEMON Tools Lite is one of best programs to create and DVD emulation, creating virtual optical drives from CD image files.
DAEMON Tools Lite is a program that allows you to emulate optical drives (up to four) and play almost any disc image in them (mdx, mds/mdf, iso, b5t, b6t, bwt, ccd, cdi, cue, nrg, pdi , isz). Virtual devices are recognized by the operating system as real physical drives. Added support for APE images. Added new type virtual drive for basic emulation - DT. Includes SPTD.
It is similar to working with real drives and real CD/DVD disks, but the speed of data access is much higher.
Using DAEMON Tools Lite you can create ISO, MDS, MDF and MDX images of original physical disks. Large number supported various types images It also allows you to use images previously created using other programs.
Images can be compressed or password protected.
Integration with Windows, which allows you to mount images directly from context menu conductor.
Ability to use the command line for automation.
Full Windows support 7. Gadget for Vista and Windows 7 for easy access to the capabilities of DAEMON Tools Lite.

DAEMON Tools Lite is free to use at home for non-commercial purposes. During installation, you must specify the activation of the free license.

Modern information Technology impossible to imagine without virtualization. The fashion for creating electronic digital copies has reached its maximum: everything is digitized, from natural phenomena to living beings. The computer components themselves did not go unnoticed: a virtual disk, a virtual audio cable - all this has long become commonplace and familiar. Many people in their daily work even encounter virtual computer implemented by VMware applications, Virtual Box etc.
Despite this, for the majority of users, CD drive emulator programs are the most popular. Previously, there were quite a lot of them: Virtual Emulator from Paragon, Virtual Drive, Alcohol 120% and Daemon Tools. At this time, it can be argued that the invisible confrontation has been won by the Daemon Tools (DT) emulation application. But everything good has a downside, so it’s understandable that novice users began to ask the question “how to disable a virtual disk.”
When installing DT, it creates a virtual drive in the operating system and assigns a drive letter to it. Then everything is simple: insert it into and work with the image as with a regular compact. Everything seems to be clear. But very often, newbies unknowingly create extra virtual drives in the system and begin to look for the answer to how to remove a virtual disk. This does not affect the performance in any way, but if you have a hardware drive installed on several logical partitions, and here a few more virtual ones are added, you can easily get lost.
There are several ways to solve this problem. We will consider them, simultaneously answering the question “how to delete a virtual disk.” The easiest way is to use the tools of the program itself that created such a disk. In our case it is DT.
Click the “Start” button and look for Daemon Tools in the list. Let's launch the application. The main program window appears, divided into two: at the top is the image directory, and at the bottom are the created virtual drives. Click to select the extra one and press the right mouse button. How to delete virtual disk here? Very simple! In the menu that appears, there is an option “Delete drive”. That's all.
The second option differs in the choice of menu item. Go to “Options”. In the “Drive letter” drop-down list, select “Not installed”.
The third option to help you understand how to delete a virtual disk in Daemon Tools. Select the extra one by clicking the left mouse button and click on the icon with the image of the drive and the red cross (a hint appears - “Delete virtual drive”). We repeat the steps for all unnecessary devices. You can remove everything. It’s just as easy to add them later.
If for some reason it is impossible to use the program tools, then you can delete the virtual disk using the tools Windows systems. Right-click on the properties of the “My Computer” desktop icon. If it is missing, go to “Start” - “My Computer” - “Properties”. Next, on the left, select the link to “Device Manager”. Open the list of disk drives and select “Properties - Disable” on the virtual drive (do not confuse it with a physical device). Everything can be returned at any time by clicking “Engage”.
Similar option:
Select the properties of “My Computer” and go to the “Manage” item. Here in storage devices we are looking for the ability to manage disks. Call up the menu (right button) of the virtual drive and go to “properties”. Next is the “Driver” tab and the “Disable” button. It's that simple.
As has been repeatedly stated, with the above methods of shutdown you can (if necessary) very quickly return everything back. But if you completely uninstall from operating system DT, the virtual disk will disappear forever (until the program is reinstalled).