Quite often, users encounter such a problem that when they try to copy some information from removable media, an error appears. It indicates that " Disc is write protected" This message may appear when formatting, deleting, or other operations are performed. Accordingly, the flash drive is not formatted, is not overwritten and generally turns out to be absolutely useless.
But there are several ways to solve this problem and unlock the drive. It is worth saying that you can find more similar methods on the Internet, but they will not work. We took only practice-tested methods.
To disable protection, you can use standard tools in the Windows operating system or special programs. If you have a different OS, it’s better to go to a friend with Windows and perform this operation for him. Concerning special programs, then, as you know, almost every company has its own software. Many specialized utilities allow you to format, restore a flash drive and remove protection from it.
Method 1: Physically disabling protection
The fact is that some removable media have a physical switch that is responsible for write protection. If you put it in the " Included", it turns out that not a single file will be deleted or written, which makes the drive itself practically useless. The contents of the flash drive can only be viewed, but not edited. So first check if this switch is turned on.

Method 2: Special programs
In this section, we will look at the proprietary software that the manufacturer produces and with which you can remove write protection. For example, for Transcend there is proprietary program JetFlash Online Recovery. You can read more about it in the article on restoring drives from this company (method 2).
After downloading and launching this program, you should select the option “ Repair drive and keep all data" and click on the button " Start" After this, the removable media will be restored. 
As for A-Data flash drives, the best option would be to use USB Flash Drive Online Recovery. More details are written in the lesson regarding the devices of this company.
Verbatim also has its own disk formatting software. Read about using this in the article on restoring USB drives.
SanDisk has SanDisk RescuePRO, also proprietary software that allows you to recover removable media.
As for Silicon Power devices, there is a Silicon Power Recover Tool for them. In the lesson on formatting equipment from this company, the first method describes the process of using this program.
Kingston users will be best served by using the Kingston Format Utility. The lesson regarding media from this company also describes how you can format the device standard means Windows (method 6).
Try using one of the specialized utilities. If there is no company whose drives you use above, find the desired program using the site's iFlash service. How to do this is also described in the lesson on working with Kingston devices (method 5).
Method 3: Use the Windows command line

![]()
Method 4: Registry Editor

Method 5: Local Group Policy Editor
Using the program launcher, launch " gpedit.msc" To do this, enter the appropriate command in the only field and click the “ OK». 
Then proceed step by step along the following path:
Computer Configuration / Administrative Templates / System
This is done in the panel on the left. Find the option called " Removable drives: Disable recording" Click on it with the left mouse button twice. 
In the window that opens, check the box next to “ Disable" Click " OK" below, exit the editor group policy.
Restart your computer and try to use your removable media again.
One of these methods should definitely help restore the functionality of the flash drive. If all else fails, although this is unlikely, you will have to buy a new removable drive.
Unlike flash drives, which require a computer to store information, SD cards are used in phones, tablets, video and photo cameras. For this reason, the developers made sure that information from them was not deleted randomly. If your camera or computer refuses to write information to removable media, this article will help you find out how to remove write protection from an SD card.
How can you remove write protection from an SD card?
If you are using a standard size SD flash drive, pay attention to the switch located on one of the sides. If you turn it with the front side towards you, so that information about the manufacturer, volume, class, etc. is visible, then this switch will be on the left side. In order to block writing to the memory module, you need to slide this switch in the direction of the “Lock” arrow, respectively, to unlock it, in the opposite direction.
 The microSD card does not have such a switch for protection, but it is on the microSD - SD adapter, which is usually sold complete with a micro-format device.
 Unfortunately, if this switch fails, you won’t be able to help remove the protection yourself—only a specialized technician can do it for you. service center or replacement with a new one.
Protection is not installed, but recording to the SD card is impossible
How can I solve the problem now? This is the case when we can talk about a malfunction of the memory module or built-in microcontroller, or maybe a problem in the operating system. You can eliminate erroneous settings in Windows by analogy with USB flash drives from. If this does not help, then perhaps the problem is in the flash drive itself, try restoring it in the image.
Nowadays, a lot of users ask how to remove protection from a flash drive.
This need arises at the moment when a person wants to write something to his removable storage device or delete some information from it, but cannot do this due to an error. It says that “The disk is write protected,” so nothing can be done with it.
But there are several ways to solve this problem, and some of them are incredibly simple.
1. Pay attention to the switch
Many drives have a standard switch, which, in fact, is responsible for installing protection.
If this switch is set to the “On” position, the user will only be able to view the contents of the flash drive, but not edit it. He will not be able to copy anything to his computer or write anything new to the drive.
Therefore, carefully inspect your flash drive for this very switch. If you find it, change position and try using the media again.

If after this USB flash drive did not work as expected, you will have to resort to a more complex method of solving the problem.
2. Remove protection via the command line
As you know, Windows has a command line that allows you to very easily and quickly perform various manipulations with the system using text commands. A protected flash drive may also cease to be so if you enter some commands correctly.
In general, you need to do the following:
- Launch this same command line, but, very important, do it as an administrator. To do this, go to the “Start” menu, open “All Programs”, then the “Accessories” folder and right-click on the “Command Prompt” item. In the drop-down menu, just click on “Run as administrator”. In Windows 8.1 and 10 there is no need to do this; there you just need to simultaneously press the “Win” and “X” buttons on the keyboard.

- Now you need to launch the DiskPart shell by simply typing the word “diskpart” into the command line and pressing Enter on your keyboard. The shell will be launched and ready to use.
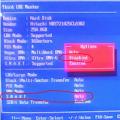
- Then you need to see which disks are available for use (including flash drives) and remember the number of the one that is write-protected. To do this, enter the command “list disk” and press Enter again. The list we need will appear on the screen. You can find out your drive by its size. In our case, this is “Disk 1”.

- Next, you need to select a flash drive to work with. In our case, the command will look like “select disk 1” (since in the previous step we determined that our storage medium was identified in the system as Disk 1).
- Actually, now all that remains is to enter the command to remove write protection. It looks like this: “attributes disk clear readonly”. Do this and wait a little while the system removes the protection.

- To exit, you need to enter the “exit” command.
It's worth saying that this method Quite strong and helps in most cases. But if all else fails, use the Registry Editor.
3. Remove protection through the registry editor
This method is also considered quite effective and efficient.
It involves the following actions:
- Open a registry editor program. The most convenient way to do this is by opening the program launch window. To use this, press the “Win” and “R” buttons on your keyboard. When it opens, enter the word “regedit” in one single field and press Enter or the “OK” button in the same window.

- Next, in the left panel, go to the following folders: “HKEY_LOCAL_MACHINE”, after “SYSTEM”, then “CurrentControlSet” and finally “Control”.
- Right-click on the “Control” folder. In the menu that appears, click on “Create” and then “Section”. This will cause a window to create a new partition in this folder to appear.

- In the "Control" folder will appear new folder Untitled. Enter "StorageDevicePolicies" as its name. This is what will happen new section, which will automatically open in the panel on the right.
- Now in the newly created one, open the function menu (right mouse button), select “Create”, then click on “DWORD parameter (32 bit)” (for 32-bit OS) and “QWORD parameter (64 bit)” (for those , who have a 64-bit OS).

- A new parameter will be created, the name of which should be entered “WriteProtect”. Open it. In the window that appears for changing the parameter, enter 0 in the “Value” field. Click the “OK” button at the bottom of this window.

- Close Registry Editor and try using the drive that was previously not working.
If this method does not help, you can use the Group Policy Editor.
4. Remove protection through the Group Policy Editor
This method involves the following steps:
- Launch the same program execution window that we already opened in the previous method. Write "gpedit.msc" and click "OK" in open window. The editor we actually need will launch.

- Next, open the “Computer Configuration” folder in the left panel. Then open the "Administrative Templates" and "System" sections.
- In the panel on the right you should find a parameter that concerns recording prohibition. Open it.

- In the open window, check the box next to “Disable”. Click on the “OK” button and close all windows.

It is quite possible that this method will not help either. Then all that remains is to format the flash drive. Then absolutely all its parameters will be removed, including write protection. How to do this is clearly shown in the video below.
If you have any problems or questions regarding all the steps described above, write about it in the comments.
I'm sure most users have encountered the problem when . This is not a pleasant phenomenon, since the drive appears to be working, but nothing can be written to it. This may occur if the flash drive was unexpectedly removed during recording or formatting. I myself faced a similar problem. I have a flash device from A-Data with a capacity of 8 GB. One not-so-great day, I was in a hurry and wanted to quickly upload a file for printing. Inserted the drive into usb port computer and attempted to copy... As a result, a not very pleasant window popped up:
What happened did not surprise me very pleasantly, since just yesterday my A-Data was working perfectly and I don’t know what happened, I always removed the device using safe removal and never pulled out the flash drive when copying or formatting... But there is a problem and it needs to be solved !
Reasons why the flash drive is write protected.
Using Google, I found many solutions to this problem and below I will try to present them systematically in order to make the work easier for my readers who are faced with a similar problem.
Step No. 1 Checking the mechanical record blocker.
Some flash drives are equipped with an additional switch (1) on the side surface, which allows you to turn on and off the ability to write to the media. It looks something like this:
Take your flash device out of the computer and carefully examine its side surface; if the switch is in a position that allows recording, or you do not have such a “gadget” at all, then proceed to the next steps.
Step No. 2 Checking the Windows system registry.
Sometimes the flash drive is write-protected due to damage or modification system settings operating system registry.
To find out, you need to follow the following path:
C:\WINDOWS\regedit.exe
Open the file by double clicking the mouse regedit.exe. In the window that appears, click on the tabs below:
- HKEY_LOCAL_MACHINE(2);
- System(3);
- CurrentControlSet(4);
- Services (5);
- USBSTOR (6).
On the right side of the dialog box, double-click “Start” (7). By default, it has a value equal to three (8) (writing is allowed); for you it should also be equal to this value. If it is different, correct it to three and click “Ok” (9).
Is your flash drive still write protected? Then let's move on.
Step No. 3 Formatting the flash drive.
In the operating room windows system There are several formatting options. It can be done through context menu, Explorer, from the disk management point, etc.
Due to a number of problems, formatting a write-protected flash drive using the above methods will not work, so in this situation it would be most effective to format it through the console command line. To do this, click the "Start" menu and select the "Run" tab (10)
A command panel window will appear in which you need to enter a formatting command (11) of the following form:
FORMAT H: /q /fs:fat32
- H is the letter of your drive assigned to it by Windows;
- q – quick formatting parameter;
- fs – file system;
- exfat – view file system To choose it correctly, read my article -.
You don't have to specify the parameter /fs:exfat, then the drive will be formatted to the file system that was on it previously.
Press “Enter” - a black window will appear in which the current process will be written:
You may need to press Enter a few more times until the window disappears.
Step No. 4 Recovering data from a flash drive
If your flash device stored important information, and its loss is very undesirable for you, then you need to restore the data. I won’t describe in detail how this is done, as I wrote about this earlier in the article: . If anyone is interested, read the article above, everything is written there in detail.
That's basically it, the article has come to an end. Of the above methods, step #3 helped me bring my drive back to life. I’m sure this post will help you save a lot of time and fix the problem faster.
PS: If your flash drive is still write-protected, I think it’s worth trying.
The development of storage media has led to the emergence of write protection functions. When you turn it on, it will be impossible to write any information to the flash drive. If you encounter a similar problem, then you need to disable the write ban. This can be done in hardware, via standard features Windows or using specialized software. Each of these methods will be discussed below.
Hardware button
For the convenience of users, some manufacturers include a write prohibit switch on the body of the gadget. Carefully examine the flash drive for the presence of a small switch. Next to it there may be closed and open lock icons or the word Lock. If you find a toggle switch, simply switch it to the opposite state, and then try to insert the drive into the computer again. Writing must be enabled.
Blocking by system processes
In rare cases, a record is blocked due to individual system or user processes. If you know which user process is blocking the flash drive, you can disable it through the Task Manager. It is strongly not recommended to terminate system processes, as operating system files can be damaged. In this case, we recommend doing safe removal and reboot the system. If the problem with the recording restriction is not resolved, move on to other solutions.
Via command line
A fairly quick and functional method to remove the ban on writing data is to use the command line. It may seem complicated to some users, but if you strictly follow the sequence, you will achieve the desired result. The user needs to enable the command line console (by typing cmd in the Run field). After that, follow the steps of the following instructions:

The method allows you to remove protection even without a hardware button. Please note that using the console you can format a flash drive that is write-protected, but all data will be permanently deleted. For proper operation system utility run cmd as administrator.
Through the Windows Group Policy Editor
If previous method seems too complicated or the console does not start for some reason, try using the Windows Group Policy Editor. This editor– a special section of the operating system that changes access settings for various objects. To unlock the flash drive, you need to do the following:

This method is more understandable, since it allows you to deactivate the locked one through standard interface Windows. However, it is not always effective; accordingly, in some cases it is not possible to remove the restriction on writing files for a specific flash drive.
Using the Registry
Many problems with operating system are solved by changing certain parameters in system registry. Only experienced users can work with it, and according to clear instructions, since there is a high risk of damage through the registry system files OS. To remove the write ban on a flash card, follow these simple steps:
- Open the Run window (+R) and then type regedit. It starts editing the registry.

- Next, you need to go to a specific subdirectory. “Expand” folders to the following path.
- Next, find the WriteProtect parameter on the right side of the editor window. If it is equal to 1, then you need to double-click on the line with the mouse, and then replace the current one with zero. Save the settings and restart the system. The defense must disappear.

- If there is neither a directory nor a control, then you need to create it yourself. In the Control folder, right-click on the name and click create partition. Name it StorageDevicePolicies.

- Create a WriteProtect binary parameter. Specify the DWORD type (on 64-bit systems, you may need to specify the WORD type to work). Set it to 0. Restart the system.

When creating a directory or setting, be sure to ensure that it has the right way in the registry, as shown in the screenshot above.
Via Total Commander
A specialized professional can help you remove write protection. file manager. One of the most effective programs is Total Commander. It's free and easy to find online. This software takes up little space on your hard drive. "Total Commander" can remove the restriction from specific file or directory:

A quick and simple method, but it does not always lead to the desired result, even if you run the program as an administrator.
If this does not help, then try opening the “Configuration” section in Total Commander, the “Settings” subsection -> “File Operations”. After this, select the “Automatic selection of copy method” item.
Formatting a flash drive
In some cases, a ban on copying may be caused by failures in the file system of the flash drive itself. There is only one solution - formatting. This is an extreme option when all other methods have proven ineffective. Don't forget to copy important data from the drive first. To start the formatting process, right-click on the flash drive icon in Explorer and select “Format”.
Virus check
There is a huge amount of malware out there. Some viruses steal or encrypt files, others may prevent data from being written to a flash drive. We recommend using an antivirus to scan for unwanted programs. You can use a desktop antivirus (Eset, NOD32, Kaspersky or any other). Effective software can be called a development from Doctor Web (Dr.Web CureIt utility). It's portable, so be sure to load it directly onto your flash drive.
You can download the software for free from the official website. After that, launch Cureit and follow these steps:

The utility will begin scanning the entire flash drive. The duration of the process depends on the number of files on the drive. Please note that upon release new version utilities, the old one becomes inoperable. If the Continue button is not lit in CureIt, this means that you need to download current version Software from the official website.
Using third party programs
Problems with information drives are quite common. Many large companies and third-party developers have created specialized software, which helps you format, enable writing, and more. Below is a list of the most popular utilities that are used to work with flash drives.
JetFlash Recovery Tool
The software is mainly intended for repairing and restoring drives from Transcend and A-Data, but is also perfectly compatible with other flash drives. The standard functionality also includes a menu for removing the recording ban. Also using JetFlash Recovery Tool you can start formatting with preliminary saving of data, fix file system failures and much more.
The software can be downloaded from the official website. Please note that when using connectors on your computer USB standard 3.0, the program may not see the flash drive. To do this, change the drive to USB 2.0.
Apacer Repair
The software is compatible only with Apacer brand products. You can download the program from the company's official website. The software has quite advanced functionality and can deactivate the ban on writing files. Disadvantage - the program is completely English language, while some words are highly specialized. It is strongly not recommended to use it without knowledge of a foreign language.
Kingston Format Utility
The Kingston company is known for the production of flash drives and SSD drives, so the brand has developed its own proprietary software. With its help you can work with products from the DTX 30 model (up to USB devices Datatraveler HyperX). The software weighs less than one megabyte and can be downloaded for free from the official website.
The downside is its limited functionality, since Kingston Format Utility, as its name suggests, can only format the drive. To do this, there are only two lines in the program menu: selecting a flash drive and file system type. After this, you just need to click the Format button. The data will be permanently deleted.
USB Flash Drive Recovery
Specialized software in English for flash drive recovery from Silicon Power. There is no specific function for removing the recording restriction, but the recovery procedure can get rid of the failures and errors that caused the ban. One of the main advantages is that all steps take place in automatic mode, from drive scanning to recovery. All you have to do is watch the process. TO additional functions formatting applies.
AlcorMP
Another highly targeted software that is designed for Alcor storage media. Using the program, you can remove protection, restore functionality and reflash the controller. The user will also be able to create their own protected sections. The software is in English, but requires setting various settings that depend on the specific flash drive. If you have a model from Alcor, we recommend that you first try universal programs, and after a negative result, move on to this software.
Other Possible Problems
Please note that the problem is not always software. There are a huge number of flash drives made in China, the quality of which leaves much to be desired. Such “fakes” are extremely unstable during operation and, accordingly, may prohibit recording information. There is also a chance of failure due to physical damage:
- exposure to high temperatures and controller overheating;
- input voltage surges;
- falling or falling into water;
- exhaustion of all write-read cycles.
The FAT32 file system, which is found on many flash drives, does not support files larger than 4 gigabytes. Accordingly, if you want to download a 5 GB movie onto a storage device, the recording will not be available. There are several options: download a file smaller than 4 GB or split it into several smaller ones.
Rare problems with the USB input itself. A loose contact can result in an unstable connection. We recommend trying to insert the flash drive into a different USB port. Also remember that specific USB ports may simply be disabled by hardware or software. You can enable them in Device Manager, through the registry or BIOS.