Setting up a Yota modem
Yota currently provides . LTE (Long-Term Evolution) technology uses the new kind processing digital signal. This allows you to reduce signal delays, making it possible to achieve uninterrupted network operation at speeds of up to 100 Mbit/s.
Let's look at setting up the modem and .
Both modems use Plug&Play technology when setting up. This means that you do not need to search for and install drivers; when you turn it on, installation occurs in automatic mode.
Setting up the Yota 4G LTE modem
General characteristics:
Type: 4G (LTE) modem
When you connect the modem to your computer for the first time, drivers will be installed automatically. Then, when you open your browser, a settings page will appear where you will need to activate your profile. After clicking the “activate” button, you will be asked to enter a phone number to which you will receive an SMS with a confirmation code. These settings are enough to start working on the Internet. Additionally, you can change the range of IP addresses issued by the DHCP server.
There are three options to choose from: 10.0.0.0, 192.168.0.0, 172.16.0.0. Yota network statistics and device information are also available on the page http://10.0.0.1.
Setting up the Yota 4G LTE Wi-Fi modem
General characteristics
Type: 4G/Wi-Fi access point (router)
Standard wireless communication: 802.11n, frequency 2.4 GHz
Built-in LTE support: yes
Connection interface: USB 2.0
Information security: WEP, WPA, WPA2
Dimensions (WxHxD): 92x13x35 mm
The design and form factor of both modems are identical. The only difference is Yota modem 4G LTE Wi-Fi allows you to connect additional devices to the Internet using Wi-Fi technology.
To set up Yota 4G LTE Wi-Fi, you need to connect it via USB to your computer and launch the browser. On the activation page you will be asked to enter your phone number. Next, you will be sent an SMS with a confirmation code. The only difference is that for the Yota 4G LTE Wi-Fi modem you need to additionally configure Wi-Fi network. It is configured in the same web interface.
You will need to select the network name, password and encryption type.
Possible problems when setting up or operating Yota modems
Sometimes nothing happens when connected and it may seem that the Yota modem is not working. Or the devices cannot connect via Wi-Fi. There are several reasons for such problems:
Faulty or disabled in BIOS USB ports on the computer. In this case, the modem is not detected in Device Manager.
Weak signal or lack of access to the Yota network. This can be determined by the absence of the blue indicator of the Yota logo on the modem, or in the web interface - by the status of the device. If your home is located in the network reception area, then you should use a USB extender to find the location of the best reception.
Some older operating systems (for example, Windows XP SP2) do not see the Yota modem or do not support certain types of encryption, so it may be difficult to connect devices via Wi-Fi. It is necessary to update the OS or install additional package drivers.
In general, if you have problems with connection or setup, you can contact technical support Yota company, where they will tell you how to connect a Yota modem and help you solve possible related problems.
When connected mobile internet from Yota The IP address of the modem is the first thing the user needs to know. Without this, he will not be able to get into the device settings and make the necessary changes. The IP address to access the settings must be indicated in the instructions for the modem or on its packaging.
When it comes to setting up a device, its IP address is the address of the page with its settings on the local network, which is created when this device is connected to a computer. Of all the generally accepted ranges local networks most manufacturers choose 192.168.x.x, and for Yota modems and routers it is 10.0.0.1. That is, when the Yota modem is connected to a computer, it becomes a gateway, and all devices working through it receive “gray” IP addresses from the 10.0.0.x range.
In addition, during the initial connection, this address will be needed to manage the modem: assign or change the administrator password, name and password wireless network etc.

How to access the Yota web interface?
To gain access to the Internet, setting up an Iota modem or router is the first step that needs to be taken. It is performed on the device’s WEB interface page: here the user will need an IP address.
After connecting the modem to the computer, you need to open any working browser, enter the numbers 10.0.0.1 in its address bar and press Enter. A page will load that displays the current parameters of the Yota modem. Alternatively, instead of the IP address, you can enter the host name - status.yota.ru. The result will be the same.
The start page shows the device status and connection parameters. Here you can assign an administrator password for subsequent secure access to the web interface. The router version will also have a second tab - logging into the WiFi profile, where you can change the name, password and other settings of the Yota router.
To access the advanced settings of the Yota modem, after 10.0.0.1 and the “/” sign at the end of the address, enter the following words (without quotes):
- “advanced” - for opening ports, manual settings DHCP, etc.;
- "network" - to change network parameters the modem itself;
- “manualupdate” - for manual software reinstallation, i.e. flashing;
- “dir” - to access advanced device settings.

What to do if you can’t log in to 10 0 0 1?
If, when you enter your IP address in the address bar of your browser, the Yota status page does not load, you need to sequentially check for the following possible problems:
- Make sure that the numbers are entered correctly, there are no spaces between them, and there are periods and not commas. Alternatively, you can try entering literal meaning- hostname http status yota ru and press Enter.
- Disconnect the modem from the USB port and turn it on again after a few seconds, then try to log into the Yota router again. If unsuccessful, try switching the device to a different USB port. If you use a cable as an extension cord for connection, try to exclude it: the fault may lie there too.
- If you receive a message about being blocked by the built-in system when you try to log in Windows security, you can temporarily disable the firewall, which considers the modem software to be a threat to your computer. To do this, press the key combination “Win+R” and enter the command “firewall.cpl” in the “Run” window that opens. In the firewall settings window, mark both lines that disable protection and click OK.
If the above steps do not help and you cannot enter the modem settings, the problem may be network card computer. There will be no access to 10 0 0 1 Yota if an address from a different subnet is manually registered on the network adapter. To check this, you need to press “Win+R” again, enter the command “ncpa.cpl” and click “OK”.
The properties window will open active connection. In the list in the center of this window, you need to find and highlight the line “Internet Protocol Version 4”, then click the “Properties” button under this list. After this, a new window with connection parameters will appear.
If the checkbox is on the line “Use the following IP address”, and the corresponding field contains an address from a different range, you need to change it to 10.0.0.x, where x is any number from 2 to 254. The subnet mask remains unchanged - 255.255 .255.0, gateway - 10.0.0.1, the same value is entered in the “Preferred DNS server” field.

After saving these settings with the “OK” button, you can close the remaining windows and try again to enter the modem settings. If you still can’t log into the Eta modem, you need to open the settings again network adapter and check the box next to “Obtain an IP address automatically”; the same with the DNS server. Save the settings, close and enter 10.0.0.1 again in the browser.
At this stage, it would be advisable to check access to local IP 10.0.0.1 using the "Ping" command:
- Press Win+R and type “cmd” in the “Run” window;
- in the opened command line type the command “ping 10.0.0.1 -t” and press Enter.
If the response from this node looks like a string of values with the number of bytes and response time, then there is an input to the modem, and the problem may lie in the browser. For example, in Internet Explorer a third-party proxy server may be registered, and then problems will arise with opening some pages. In this case, it would be wise to use Google Chrome or Mozilla Firefox.
If the result of the ping is the phrase “The timeout interval for the request has been exceeded,” then there is no access to the device and the search for the problem must be continued - up to replacing the modem or connecting it to another computer.
The wireless provider Yota has come to us, in Saratov. The operator offers unlimited Internet access, and the terms of the tariffs are such that there is no limit at all, the tariffs differ only in access speed. In our area, currently, none of the competitors offers such conditions.
To access the Internet via a computer or laptop, Yota offers three models of modems, two of which have wireless module Wi-Fi is Yota 4G LTE and Yota Many.
By the way, they work with any device that has a USB port due to the fact that they have their own operating system. That is, in fact, this is a small mobile router.
It can be used without connecting to a computer or laptop. That is, we simply plug it into the adapter (for example, a mobile phone charger of suitable current).
The only point is that you first need to configure WiFi on the Yota modem. This can be done through the device’s web interface, which is also called “Personal Account”, at: status.yota.ru. Enter it into the address bar of the browser and click the “OK” button.
If the browser complains with the error “Page not found” or “Cannot access the site,” then try entering the modem’s IP address in the address bar: 10.0.0.1 like this:
The default login is admin and password: admin. After authorization, you need to open the “Settings” menu item:
The default wireless SSID is YOTA. You can change it to your own option in the “Network name” line.
The security type is already set to the most reliable at the factory settings - WPA2.
In the “Password” field, enter your password for the Yota WiFi modem, which will be requested from clients when they try to connect to it.
On latest versions it became possible to install firmware maximum amount Wi-Fi network clients:
This is done simply by moving the slider left or right.
Save the device settings.
Profit! The mobile mini-router is ready for use.
Note: On some models of Internet modems, Yota encountered a different IP - 10.0.0.254 .
As you can see in the screenshot, there is no difference in the user interface itself.
What to do if your personal account is unavailable?!
Most likely the problem is with the IP address. The computer cannot receive it automatically and therefore Login to Yota settings for 10.0.0.1 is not available. The fix is simple. Opening network Windows connections and we find there one of them through which a PC or laptop cannot enter the Iota settings. Right-click on the connection and select “Properties”. In the window that appears, double-click on the item “Internet Protocol IP version 4 (TCP/IPv4)” to get into its parameters:
Here you need to check the “Use the following IP” checkbox and enter the following parameters:
IP address - 10.0.0.2 Mask - 255.255.255.0 Gateway - 10.0.0.1 DNS server - 10.0.0.1
As an alternative DNS you can use public server from Yandex - 77.88.8.8 or Google - 8.8.8.8.
Click on the “OK” button to apply the settings and try to log into the modem’s personal account again.
If after this you cannot enter the Yota modem settings, try plugging it into another USB port on your computer.
Didn't that help either? Then it makes sense to try taking it to a service center and give it for testing.
The Yota company offers many variations of connection via modem. It is possible to work with Windows OS or another system. The Internet is also accessible from a smartphone or tablet. To connect the device without negative consequences, it is important to know the instructions on how to connect a Yota modem.
An antenna or modem from the provider is connected to the computer. The system will begin to automatically configure drivers. The boot disk is inserted into the drive.
Next you will need to install Yota programs Access. After launch, the program will install itself and connect to the WiMax network. You can find out how to activate services on the website or by calling the support service - 8 800 550 00 07 . Usually everything happens automatically, you just need to choose and configure it for yourself tariff plan in the application.
When the Internet connection is paid for, it is better to restart the computer.
Modem settings
To know how to connect a Yota modem, you need to have an idea of the modem's features. The device is inserted into a USB port. After connecting to the PC, drivers will begin to be installed and activation occurs automatically. Setting up any Yota modem does not involve connecting any programs or applications.
When the drivers are installed, you need to see if there is a network. Next, they register, select a tariff plan and top up their account to use the Internet. Setting up the router is quite easy, but you can contact a specialist to find out how to set a password or how to activate the connection.
Login to settings
Setting up any Iota modem requires logging into the interface. To do this, enter http://status.yota.ru And http status yota advanced 10.0.0.1.
If it doesn’t work, you can go to the router’s account and enter the address in the browser: 10.0.0.1 , Further 10.0 0.1 status yota. The web interface should then appear 10.0 0.1 Personal Area.

This area contains detailed information about the current network connection:
- IP address;
- identifier;
- signal quality;
- volume and speed of traffic.
Thus, you can answer the common question of how to set up a modem, because all the data that can be changed is collected there.
Setting and changing passwords for modem and Wi-Fi
When connecting a device, you can enter its settings by typing in the browser 192.168.0.1 , or 192.168.1.1 . There is a sticker on your modem or router that shows you how to set a password.
Can be reset WiFi password router, if you click on it “ Reset"and hold it for about 15 seconds. All network settings and parameters will be restored to their initial state.

The Yota router is similar to all other models of these devices. In the address bar you should write 192.168.0.1 , and press enter.
The initial menu will appear, where you need to enter data to enter the modem settings. In advance set password and login - " admin" If it often turns out that the user has forgotten the password, it is better to leave it the same.
How to open ports
When you have one PC and a connected modem, the problem of how to open all the ports on the Yota modem does not arise.
In other cases, you need to configure the following sequence:
- Torrent client;
- Internet connection parameters;
- Firewall;
- Router.
Other settings
If you have questions about how to set up the Internet on iOS, then you will need to first go to Settings, then to Cellular connection, Data parameters and, finally, “Cellular data network”.
At the bottom you need to find “Modem mode” and enter APN – internet with the password gdata. Then you should reboot or wait until it turns on.
How to connect a Yota modem to a router
You need to understand in detail how to connect the Yota modem to the router. Inserted into the router mobile device, the wire (it was included with the router) is connected to the socket on the computer.

Below we will tell you how to configure the router. To do this, you need to go to the network settings and find the network management section, there select change adapter settings and go to properties. Having selected Internet Protocol 4, you need to check the boxes to receive IP and DNS servers automatically. The setting is saved.
Go to the modem control panel, specify:
- APN: yota.ru;
- Access: *99# ;
- Do not fill in the password and username;
- Some models adjust automatically;
- Apply settings, reboot device.
The Yota modem is connected to the tablet in the same way.
Next you need to open the section with wireless networks. Set the network name SSID and security method - WPA2-Personal, then Encryption type: AES or TKIP, as well as a password for the connection (at least 8 characters). The question of how to set a password was discussed above.
What to do if the modem does not work
If you have lost your password, you can recover it on the company website.
The profile may not work, in this case you need to:
- disable firewall and antivirus software for a while;
- disable third-party networks;
- try to log in using a different browser.
If the signal value is less than 110, then you need to:
- check whether the device is within the network coverage area;
- change the location of the device in the apartment;
- if there are breaks in the connection, you should identify the availability of the status in the web interface;
- checking the device on another PC.
Conclusion
The Eta company offers its customers various Internet packages, both for computers and other devices. The operator supplies various traffic options to suit any customer needs. Before going into any device settings, it is better to visit the official website of the Yota company and read the detailed instructions.
Your first connection to the Internet using the Iota network, you will need to make some settings WiFi router and connection to personal account. An experienced user will cope with the problem in a few minutes, which cannot be said about the average user.
For those who are working with such a modem for the first time, be prepared to spend more than 30 minutes setting it up. But the result: a fast and affordable Internet connection that can be used on the road, at work or at home. 1. First “Iota” connection
The modem is controlled via a web interface. To open this interface and go to settings, enter the following into the URL: 10.0.0.1. Afterwards you will need to enter data, usually by default both the login and password are “admin”. If this is not the case, look at the documentation, everything is stated there. 
Once in your personal account, go to the “Management” tab. Change standard password, make it memorable and reliable.
The interface is full of various settings, judging by their selection in the panel.
2. Connect directly
It is not difficult to connect a modem as a wired connection for a computer. You will need to connect various drivers, which are usually automatically found by the system and installed on the computer.After installing the necessary drivers, the router is not configured for a wireless network, but directly through the settings menu.
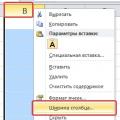
Click on the router icon with LMB at the bottom of the screen, where the clock, date and language bar are located.
Here we configure the same parameters as in the first paragraph, but use the already known address: 10.0.0.1.

This menu will be convenient for less experienced users, since there is practically no opportunity to enter incorrect data. But fine tuning is done through the web interface.
Also, most of the data can only be changed when the computer is connected to the network. At the same time, the router itself automatically finds firmware updates and makes it easier for the user who does not have the time or opportunity to look for these updates and additional settings Yota router.
3. WiFi setup parameters
This must be done immediately after turning on the device and connecting to the PC wirelessly or wired.You should give your network a name and set a password for it. Only knowing the password of your wireless network can you use it. It is not recommended to disable network protection.

In the same section there is an item for the “name” of the wireless network; this name can be hidden in order to increase the level of security. The connection process will be a little more complicated, since you will also have to enter your login (network name).
Confirmation of the entered data and settings is done with the “ Save" After which the device will reboot for the settings to take effect.
4. Problems
Problems are possible when connecting the router to Wi-Fi; the network has a habit of not being created, this is indicated by a blue indicator. This happens due to a lost signal or low speed.Sometimes the reason is an option automatic shutdown Wi-Fi. In Windows XP, Wi-FI is unavailable if the OS is not designed to support WPA2 encryption.

The problem is solved:
- System update.
- Installation of additional RNDIS drivers.
If the Internet connection speed is low, you need to contact the Yota operator directly to solve this problem. Although this is rare.