Computer technology and its components are constantly being improved, so at the beginning of the year it is appropriate to ask what is still relevant and what is losing its objective relevance and will leave the corresponding market segment in the near future. Let's look at motherboards with socket 1151 in this context.
Suitable boards for Intel LGA 1151 processors
Over a long period of time, the developer Intel processors could do whatever he wanted, because there was practically no competition as such in this segment. At least for the consumer sector, this trend is obvious.
Despite this, AMD successfully existed on the market, offering its APUs. However, its products had a rather narrow demand, despite the fact that they did not lose their own positions. At the same time, buyers looking for laptops or gaming computers, chose Intel. Some time later, AMD introduced New Product– Ryzen processors. According to analysts, this stage marked the beginning of active competition or even a “battle of processors” in the market. However, with the advent of a strong rival, Intel processors have by no means lost their popularity. The current generations of Kaby Lake and Skylake processors on socket 1151 are in great demand among buyers, so they cannot be called weak or outdated. If this information has convinced you of the relevance of such processors, we suggest you go to the site to select a motherboard with socket 1151. Perhaps this is the basic answer to the question of whether motherboards of this format will lose relevance this year.
What are the benefits of Kaby Lake and Skylake processors?

If we talk about the advantages of the mentioned processors, they are as follows:
- optimally suited for applications with one or two cores;
- provide more high frequencies and multithreading, which gives them the ability to function much more efficiently.
The popularity of certain motherboards directly depends on the relevance of certain processors on the market. And given the fact that Kaby Lake and Skylake processors are in constant demand in this moment, motherboards with socket 1151 should also not lose their position in the coming 2018. The main thing is to choose the right product, taking into account the popularity and reliability of the manufacturer, technical characteristics and cost. Then your PC or laptop will enjoy trouble-free and efficient operation for a long time.
To connect the computer processor to the motherboard, special sockets are used - sockets. With each new version processors received everything more possibilities and features, so usually each generation used a new socket. This negated compatibility, but made it possible to implement the necessary functionality.
Over the past few years, the situation has changed a little, and a list has emerged Intel sockets, which are actively used and supported by new processors. In this article, we have collected the most popular 2017 Intel processor sockets that are still supported.
Before we look at processor sockets, let's try to understand what they are. A socket is the physical interface connecting the processor to the motherboard. The LGA socket consists of a series of pins that align with the plates on the underside of the processor.
New processors usually need a different set of pins, which means a new socket. However, in some cases, processors remain compatible with previous ones. The socket is located on the motherboard and cannot be upgraded without completely replacing the board. This means that upgrading the processor may require a complete rebuild of the computer. Therefore, it is important to know which socket is used on your system and what you can do with it.
1. LGA 1151
LGA 1151 is the latest Intel socket. It was released in 2015 for the processor generation Intel Skylake. These processors used the 14 nanometer process technology. Since the new Kaby Lake processors haven't changed much, this socket is still relevant. The socket is supported by the following motherboards: H110, B150, Q150, Q170, H170 and Z170. The release of Kaby Lake brought the following boards: B250, Q250, H270, Q270, Z270.
Compared with previous version LGA 1150, USB 3.0 support has appeared here, the operation of DDR4 and DIMM memory modules has been optimized, and SATA 3.0 support has been added. DDR3 compatibility was still maintained. For video, DVI, HDMI and DisplayPort are supported by default, while VGA support can be added by manufacturers.
LGA 1151 chips only support GPU overclocking. If you want to overclock the processor or memory, you will have to choose a higher-end chipset. In addition, support for Intel Active Management, Trusted Execution, VT-D and Vpro has been added.
In tests Skylake processors show better results than Sandy Bridge, and the new Kaby Lake is even a few percent faster.
Here are the processors that are currently running on this socket:
SkyLake:
- Pentium - G4400, G4500, G4520;
- Core i3 - 6100, 6100T, 6300, 6300T, 6320;
- Core i5 - 6400, 6500, 6600, 6600K;
- Core i7 - 6700, 6700K.
Kaby Lake:
- Core i7 7700K, 7700, 7700T
- Core i5 7600K, 7600, 7600T, 7500, 7500T, 7400, 7400T;
- Core i3 7350K, 7320, 7300, 7300T, 7100, 7100T, 7101E, 7101TE;
- Pentium: G4620, G4600, G4600T, G4560, G4560T;
- Celeron G3950, G3930, G3930T.
2. LGA 1150

The LGA 1150 socket was developed for the previous fourth generation of Intel Haswell processors in 2013. It is also supported by some fifth-generation chips. This socket works with the following motherboards: H81, B85, Q85, Q87, H87 and Z87. The first three processors can be considered devices entry level: They do not support any advanced Intel features.
The last two boards added support for SATA Express, as well as Thunderbolt technology. Compatible processors:
Broadwell:
- Core i5 - 5675C;
- Core i7 - 5775C;
Haswell Refresh
- Celeron - G1840, G1840T, G1850;
- Pentium - G3240, G3240T, G3250, G3250T, G3258, G3260, G3260T, G3440, G3440T, G3450, G3450T, G3460, G3460T, G3470;
- Core i3 - 4150, 4150T, 4160, 4160T, 4170, 4170T, 4350, 4350T, 4360, 4360T, 4370, 4370T;
- Core i5 - 4460, 4460S, 4460T, 4590, 4590S, 4590T, 4690, 4690K, 4690S, 4690T;
- Core i7 - 4785T, 4790, 4790K, 4790S, 4790T;
- Celeron - G1820, G1820T, G1830;
- Pentium - G3220, G3220T, G3420, G3420T, G3430;
- Core i3 - 4130, 4130T, 4330, 4330T, 4340;
- Core i5 - 4430, 4430S, 4440, 4440S, 4570, 4570, 4570R, 4570S, 4570T, 4670, 4670K, 4670R, 4670S, 4670T;
- Core i7 - 4765T, 4770, 4770K, 4770S, 4770R, 4770T, 4771;
3. LGA 1155

This is the oldest supported socket on the list for Intel processors. It was released in 2011 for the second Intel generation Core. Most Sandy Bridge architecture processors run on it.
The LGA 1155 socket has been used for two generations of processors in a row, and is also compatible with Ivy Bridge chips. This means that it was possible to upgrade without changing the motherboard, just like now with Kaby Lake.
This socket is supported by twelve motherboards. The senior line includes B65, H61, Q67, H67, P67 and Z68. All of them were released along with the release of Sandy Bridge. The launch of Ivy Bridge brought the B75, Q75, Q77, H77, Z75 and Z77. All boards have the same socket, but some features are disabled on budget devices.
Supported processors:
Ivy Bridge
- Celeron - G1610, G1610T, G1620, G1620T, G1630;
- Pentium - G2010, G2020, G2020T, G2030, G2030T, G2100T, G2120, G2120T, G2130, G2140;
- Core i3 - 3210, 3220, 3220T, 3225, 3240, 3240T, 3245, 3250, 3250T;
- Core i5 - 3330, 3330S, 3335S, 3340, 3340S, 3450, 3450S, 3470, 3470S, 3470T, 3475S, 3550, 3550P, 3550S, 3570, 3570K, 3570S, ;
- Core i7 - 3770, 3770K, 3770S, 3770T;
Sandy Bridge
- Celeron - G440, G460, G465, G470, G530, G530T, G540, G540T, G550, G550T, G555;
- Pentium - G620, G620T, G622, G630, G630T, G632, G640, G640T, G645, G645T, G840, G850, G860, G860T, G870;
- Core i3 - 2100, 2100T, 2102, 2105, 2120, 2120T, 2125, 2130;
- Core i5 - 2300, 2310, 2320, 2380P, 2390T, 2400, 2400S, 2405S, 2450P, 2500, 2500K, 2500S, 2500T, 2550K;
- Core i7 - 2600, 2600K, 2600S, 2700K.
4. LGA 2011

The LGA 2011 socket was released in 2011 after LGA 1155 as a socket for high-end Sandy Bridge-E/EP and Ivy Bridge E/EP processors. The socket is designed for six-core processors and all Xeon processors. For home users, the X79 motherboard will be relevant. All other boards are designed for enterprise users and Xeon processors.
In tests, Sandy Bridge-E and Ivy Bridge-E processors show pretty good results: performance is 10-15% higher.
Supported processors:
- Haswell-E Core i7 - 5820K, 5930K, 5960X;
- Ivy Bridge-E Core i7 - 4820K, 4930K, 4960X;
- Sandy Bridge-E Core i7 - 3820, 3930K, 3960X, 3970X.
These were all modern intel processor sockets.
5. LGA 775

It was used to install Intel Pentium 4, Intel Core 2 Duo, Intel Core 2 Quad and many others processors, up to the release of LGA 1366. Such systems are outdated and use the old DDR2 memory standard.
6. LGA 1156

The LGA 1156 socket was released for the new line of processors in 2008. It was supported by the following motherboards: H55, P55, H57 and Q57. New processor models for this socket have not been released for a long time.
Supported processors:
Westmere (Clarkdale)
- Celeron - G1101;
- Pentium - G6950, G6951, G6960;
- Core i3 - 530, 540, 550, 560;
- Core i5 - 650, 655K, 660, 661, 670, 680.
Nehalem (Lynnfield)
- Core i5 - 750, 750S, 760;
- Core i7 - 860, 860S, 870, 870K, 870S, 875K, 880.
7. LGA 1366

LGA 1366 is a version of 1566 for high-end processors. Supported motherboard X58. Supported processors:
Westmere (Gulftown)
- Core i7 - 970, 980;
- Core i7 Extreme - 980X, 990X.
Nehalem (Bloomfield)
- Core i7 - 920, 930, 940, 950, 960;
- Core i7 Extreme - 965, 975.
conclusions
In this article, we looked at generations of Intel sockets that were used before and are actively used in modern processors. Some of them are compatible with new models, while others are completely forgotten, but are still found on users’ computers.
Latest Intel socket 1151, supported by Skylake and KabyLake processors. We can assume that the CoffeLake processors that will be released this summer will also use this socket. There used to be other types of Intel sockets, but they are already very rare.
With Skylake, Kaby Lake, and Coffee Lake cores having 1151 pins. Not compatible with previous ones processor sockets LGA1150, 1155 and earlier sockets both mechanically and electrically. At the time of writing this article, within the LGA1151 socket there was a division into early boards with 100 and 200 series chipsets and new boards with 300 Series chipsets. The sockets within these platforms are mechanically compatible, that is, any processors with the specified socket can be installed in them, but are not electrically compatible, which is why it is impossible to use Coffee Lake processors on boards with old chipsets, and Skylake and Kaby Lake cannot be used on new ones.
Pin locations in the old (left) and new (right) LGA1151 sockets
Which processors are suitable for installation with the LGA1151 socket?
Core processors of the sixth, seventh and eighth generations are suitable for installation in the LGA1151 socket. For processors of the sixth and seventh generations to work, the motherboard must be equipped with one of the Intel Z270, Q270, H270, Z170, Q170, H170, B250, B150, H110 chipsets. To support eighth generation processors, the motherboard must be equipped with the Z370 chipset, or chipsets that will appear a little later, such as the H370, Q370 or Z390. To distinguish between Core processors of different generations, just look at their markings. The first character in the digital marking of processors indicates the generation, for example, the Intel Core i5-8600K belongs to the eighth generation. Detailed Specifications processors and their comparison can be found by clicking on the button:
Which Skylake, Kaby Lake, and Coffee Lake processors are faster?
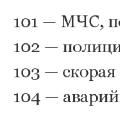
In accordance with the release chronology, processor performance increased. A particularly strong increase in performance is observed in the eighth generation Core family of processors, since the number of cores in them has changed for the first time since the transition to names like Core i. Performance Rating Core processors i7
Intel Core i7-8700K LGA1151, 6 cores, 3.7 GHz 50.6 Intel Core i7-7700K LGA1151, 4 cores, 4.2 GHz 36.7 Intel Core i7-6700K LGA1151, 4 cores, 4 GHz 34.2 Core i5 processor performance rating
Intel Core i5-8500 LGA1151, 6 cores, 3 GHz 37.6 Intel Core i5-7500 LGA1151, 4 cores, 3.4 GHz 24.1 Intel Core i5-6500 LGA1151, 4 cores, 3.2 GHz 22.3 Core i3 processor performance rating
Intel Core i3-8100 LGA1151, 4 cores, 3.6 GHz 24 Intel Core i3-7100 LGA1151, 2 cores, 3.9 GHz 17.1 Intel Core i3-6100 LGA1151, 2 cores, 3.7 GHz 16.4 Pentium processor performance rating
Intel Pentium G5600 LGA1151, 2 cores, 3.9 GHz 16.8 Intel Pentium G4600 LGA1151, 2 cores, 3.6 GHz 15.4 Intel Pentium G4500 LGA1151, 2 cores, 3.5 GHz 12.1
What type of memory does Skylake, Kaby Lake, and Coffee Lake processors support?
All processors with the LGA1151 socket support dual-channel memory mode. Skylake supports LV DDR3 up to 1600 MHz and DDR4 up to 2133 MHz. Kaby Lake supports LV DDR3 up to 1600 MHz and DDR4 up to 2400 MHz. Coffee Lake only supports DDR4 up to 2666 MHz.How many PCI-E 3.0 lanes does the controller built into Skylake, Kaby Lake, and Coffee Lake processors contain?
All processors with an LGA1151 socket support the same number of PCI-E 3.0 lanes – 16 pcs. Additional lines contain motherboard chipsets, due to which there is a fairly large number of boards that support configurations with multiple video cards.
Which coolers are compatible with LGA1151?
The cooler mountings for LGA1151, LGA1150, LGA1155 and LGA1156 are identical, so coolers for old processors are compatible with new ones. Considering that the TDP of processors has remained virtually unchanged, the transition from the old platform to the new one will not require replacing the cooling system.
Remember in one of the articles we talked about? In the mentioned article, we gave recommendations on choosing a processor, but many beginners, after purchasing a processor, will face the problem of installing and reinstalling it. So that this does not become a problem for you, we would like to talk about this process in our article.
The essence of installing a processor
In order to correctly install the processor, you need to understand the configuration of its installation, and it is as follows. The processor is inserted into a socket that completely follows the shape of the legs on the processor, then the processor is securely fixed in the socket, and a radiator with a cooler is placed on top of it.It is important to note that the radiator and cooler perform the cooling function. Since the processor heats up very much during its operation, it needs cooling so that it simply does not burn out. The metal radiator is pressed tightly against the processor, due to which the processor transfers part of its heat to the radiator, which in turn is cooled by the cooler. There should be a layer of thermal paste between the processor and the heatsink, which will create a high-quality connection and good heat transfer between these two parts. Now we will tell you about all this in more detail.

How to install a processor
How to insert a processor into a socket?Installing a processor itself is a very easy procedure and not as complicated as it seems at first glance. Installing a processor will not cause any problems if you have chosen the right processor whose socket will match the socket. It is important to note that if you install new processor to a new one motherboard, then the latter must first be placed on the foam mat that comes with it to protect against static electricity.
In order to install the processor, you need to lift up the metal lever of the processor lock in the motherboard. On motherboards for Intel processors, you will also need to pry off the metal processor cover to gain access to the socket. A plug may be installed in place of the processor or on the lid, which will need to be removed. Motherboards for AMD processors are somewhat simpler in this regard, since to access the socket you only need to lift the latch lever. After the socket on the motherboard is ready to install the processor, we take the processor itself out of the box and continue the installation.
New AMD processors come with thermal paste, so you won't need to apply it. At the same time, do not grasp its upper (flat) part, so as not to erase this thermal paste. You also won't need thermal paste for Intel processors, since it is also already applied, but only to the front of the heatsink.
Look at the location of the processor legs and the grooves that are found among them in order to determine which side to install the processor. You can determine the correct position of the processor by looking at the triangle in the corner; it should be in the same part as the triangle on the motherboard. Intel processors have special grooves in the form of a semicircle, thanks to which you can also determine its correct placement.

When you have determined which side to insert the processor into, lower it into the socket, and the processor legs should fall into the holes themselves, without using the slightest effort.
When the processor is inserted into the socket, check that it fits correctly into it, and then lower the locking lever downwards, sliding it into the grooves (for AMD processors). Then carefully grasp the processor and gently pull it towards you to check whether it is securely fastened. For Intel processors, you will need to lower the metal cover before lowering the release lever.

How to install a cooler on a processor?
Once the processor is fixed, we will need to install the cooler. Installing native coolers for AMD and Intel are significantly different from each other, and we will look at them separately.
The native cooling system from Intel has 4 legs, for which there are 4 holes in the motherboard. As a rule, the processor cooling system is installed in such a way that the power cord reaches the connection connector and does not hang down.
Attach the cooler with radiator to the motherboard so that the mounting legs coincide with the holes for them. We press on the leg from above - and it is fixed in the hole, then repeat this procedure with the opposite fixed leg, and then fix the remaining 2 legs. After this, press again on each of the legs to check the reliability of the fixation. Now, holding the motherboard with your hands, pull on the cooler to check if it is securely seated.

Regarding the mounting of the radiator and cooling cooler for AMD processor then it has a slightly different installation procedure. In the center of the cooling radiator there is a metal strip, which has a hole at the bottom and a latch with a handle at the top. Thus, carefully place the cooling radiator with cooler on the processor so that the radiator mounting handle is on top, then place the lower part of the bar into the mounting grooves shown in the picture. Then we insert the upper part of the bar into the groove and turn the latch to the left to secure the cooling system.

We check the reliability of the fixation and connect the cooler’s power to the appropriate connector, after which the procedure for installing the processor and cooling system will be completed.
How to change the processor
How to remove the processor?It’s also worth saying a few words about replacing the processor. Remember that any work should be carried out only with the system unit de-energized. In order to remove the processor, you need to disconnect the power supply to the cooler, remove the cooling system in order to gain access to the processor itself. Then the processor itself is removed.
In order to remove the cooling system from an Intel processor, you need to turn the latches on the legs counterclockwise and lift them up. In some cases, to remove the cooling system, it is necessary to remove the motherboard from system unit, in order to unfasten the leg clamps from its back wall. In order to remove the AMD processor cooling system, you need to turn the latch in the opposite direction and remove the upper part of the fixing bar, and then the lower one.

When the fasteners are removed, and before removing the cooling system, move it from side to side, as the thermal paste can adhere the processor to the cooling radiator quite firmly. This must be done carefully with minimal effort. When the cooling system is moving, remove it. How to remove the processor - read above. When the processor is removed, be very careful not to accidentally bend the processor legs.
If you need to replace the processor, make sure that its socket matches the motherboard socket, and then insert the new processor into the socket. How to do this - read above. If you want to change the thermal paste on the processor, then below we will tell you how to do this.

How to change thermal paste on a processor
Replacing the thermoplastic on the processor is a fairly simple procedure. To do this, take a cotton pad and apply alcohol to it. Use this cotton pad to remove the old layer of thermal paste. To apply a new layer of thermal paste, squeeze a small amount into the middle of the processor and distribute it evenly over the entire surface of the processor using the spatula that comes with the kit. Another way is to use a syringe to distribute thermal paste in an even layer over the entire surface of the processor. Try not to skimp on thermal paste, but too much of it is also bad. After making sure that the paste is applied evenly, you can install the cooling system.
Before you start installing the processor, you naturally must have a processor itself that fits the socket on the motherboard. We’ll talk about how to choose a processor in another article. In short, I will say that there are several types of sockets and processors, the legs on the processors are located differently, and so, in order to correctly install the processor on the motherboard, you need its legs to coincide with the holes in the socket.
Since the processor gets very hot (), it needs cooling. In this article we will also touch on the topic of installing a cooler and radiator on the processor.
How to install a processor.
How to install a cooler and radiator on a processor.
The processor cooling system is an integral part. Because without it the computer will not start. Cooler and radiator mounts differ between processor manufacturers. Let's consider installing a cooler on a processor from Intel and AMD.
Intel.
- We attach the cooler with the radiator so that the wire from the cooler reaches the power connector.
- Intel processors have 4 screws located around the perimeter. We insert them into 4 holes that are located around the perimeter of the socket.
- Apply a little pressure on the cooler and secure it with nuts on the back side of the socket.
- Connect the cooler's power to the motherboard.
- Our cooler has been successfully installed!
AMD.

How to remove the processor from the motherboard.
To remove the processor we take the following steps:
- Disconnect the cooler power supply from the motherboard.
- To remove the heatsink from an Intel processor, unscrew the legs from the motherboard (4 pieces).
- To remove the heatsink from an AMD processor, turn the upper latch, remove it, and then the lower one.
- We remove the processor carefully, since the thermal paste could stick to the heatsink, we shake it a little.
- Now we lift the metal latch that presses the processor to the socket.
- Carefully remove the processor so as not to bend the legs.
- The processor has been removed!