Good day everyone!
When searching for and updating drivers, it happens that the new driver begins to work unstable: it causes conflicts, errors, does not perform some functions correctly, etc.
In this case, it is recommended to roll back to the old previous driver, which previously worked in normal mode. I note that even if you didn’t make a backup of your drivers (or restore points in Windows), in most cases you can still restore everything (since Windows does not remove old driver, and it remains in the list of available on PC) .
In this article I will show you with several examples how this can be done.
Addition!
You might find this article useful on how to remove old (or unnecessary) drivers -
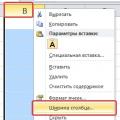
1) Via device manager
Option #1
There are two ways to roll back a driver through Device Manager. I like the first one because when you rollback, you can manually select the driver version that you need. I’ll show you with an example how you can restore an old working driver to a video card. So...
First we open device Manager . To do this, go to the control panel, enter “devices” in the search and among the results found there will be a link to the desired manager (see screenshot below).


After which a menu will appear with the choice: produce automatic search or manually on this PC. We choose the second option (see example below).


If you had several versions of drivers on your PC, you should now see a list of them. Be guided by dates, versions and title. By choosing any of the versions, agree to the installation.

All! The screen should blink, and then you will see a message indicating the successful (or unsuccessful) completion of the operation. An example is presented below.

Option No. 2
You can roll back the driver in another way: by finding required device in the manager, open it properties.

In properties, open the "Driver" tab - at the bottom of the window there should be a button "Roll back". I note that it is not always active (even if you recently updated the driver). Therefore, I recommend first trying the first rollback option (described above), and then this one.

Roll back the driver (if the device does not work after updating)
2) Using System Restore
If you have system restore points (and according to Windows default makes them (except for dozens)) , then you can try to roll back to the old driver using system restore.
How to see if there are restore points and run System Restore:

Addition!
3) Using special Driver backup utilities
I couldn’t help but mention this method in this article. True, in order to use it, you need to make a backup in advance (perhaps someone will find this method useful in the future).
The essence of the work is approximately as follows:

Addition!
This post will tell you how to create a backup step by step and subsequently restore drivers from it:
That's all.
Thank you in advance for any additions on the topic.
You will find the answer to the question of how to roll back device drivers in the Windows operating system in this instruction. Windows OS, no matter what version is installed on the PC this moment time, automatically installs general drivers for devices to ensure the functionality of your system. Sometimes they are updated during an OS update, and in other cases you can always do this manually or using specialized utilities on your computer.
Auto-updates are usually a normal process and mean that your hardware manufacturer is still actively supporting it. Hardware, which continues to receive fixes and improvements, will work longer. Unfortunately, it also happens that the updates received do not always interact well with latest version operating system or other hardware components.
You may find that the latest auto-update broke something, rather than improving its performance. In this case, you should roll back the driver file to its previous working version.
HOW TO ROLL AWAY DRIVERS
The process itself is not complicated, but for this you need administrative rights. If you have multiple accounts on your Windows computer, it's best to sign in with account administrator. Otherwise, nothing will work.
After that, open Device Manager. It doesn’t matter which way you do this, through search or through the Start button menu. The fastest option is to open system utility combination Win keys+ R and enter the following file name:
Devmgmt.msc
then click the “OK” button.
In the Manager window, locate the hardware component that you want to roll back. Double-click on it to open “Properties”. Go to the “Driver” tab, find and click on the “Roll Back” button, provided that it is not greyed out.
YOU CANNOT ROLL AWAY THE DRIVER
If the button is grayed out, it means there is no version of the file that the OS can revert to. In this case, there are two ways out. The first is the selected component and updating the hardware configuration with the corresponding button on the Toolbar. The OS will reinstall itself necessary files and it might work.
The second is downloading from the official website of the developer the version that worked before the failure. Then, on the same tab, click the “Update” button and in the step-by-step wizard window, select the “Search on your computer” section and indicate the folder into which the downloaded files were uploaded using the “Browse” button. You may need to reboot your system for the changes to take effect.
As you already know, every device on your computer needs a driver. It may be a built-in driver in Windows system 10, driver installed from the Center directory Windows updates, or manually installed by the user from the hardware manufacturer's website.
A new driver version usually improves the functionality and performance of your device, usually fixing bugs that were present in previous version drivers. But sometimes, a new version brings more problems and may make the device unusable, thereby normal operation your PC will not be possible.
In this situation, you can return, working condition computer - roll back the problematic device driver, returning the driver that worked without causing problems. This will allow you to remove it and restore it earlier installed driver, which worked as expected, and you can wait for the next driver version when it becomes available. The driver rollback feature was introduced in XP and is present in every edition of Windows to this day.
Rolling back a non-working driver in Windows 10.
Step 1: You need to open device Manager. You can open it as follows.
Right click on the button Start or press the Win + X key combinations on your keyboard.
One of the menu items will be - device Manager. Click on it.
Press the Win + R keyboard shortcuts and type in the dialog box Execute:
devmgmt.mscStep 2: In the Device Manager that opens, go to the desired device group and expand it.
For example, if you want to roll back your video card driver, then you need to expand the group called " Video adapters", if you need to return the old driver for the audio card, go to the section – audio, gaming and video devices.
Right-click the device in the list and click Properties in the context menu.

Step 3: In the device properties dialog box, go to the Driver. There you will find a button Rollback. Click on it.


Step 4: In the next dialog box " Rollback"To help developers, you can specify the reason why you are rolling back the driver. Select the appropriate reason and click the button" Yes" to confirm the operation.

You may be prompted to restart your computer to switch to the previous version of the driver.
After you are done rolling back the driver, you may want to disable automatic installation drivers with using Windows Update.
How to roll back a driver for a video card What if, after installing a new driver from the official website of the video card, the laptop does not work normally, games crash and the error “The video driver stopped responding and was successfully restored” constantly appears? Unfortunately, I can’t use it because it’s disabled. On the official website of the video card there is only a new version of the driver! operating system
How to roll back a driver for a video card
Friends, the method below is universal in its way and can be used not only for a video card, but also for any other device.
Imagine the situation: your laptop worked perfectly without problems, it had all the latest games, but one of your friends advised you to install the latest driver on your video card from the video card manufacturer’s website, they say it will be even better. Knowing that good is not sought from good, you still listened to this man and updated the driver for the video card. After installing the new driver, the video card behaved in a way that you did not expect, instead of even better, it became even worse.
System Restore may not be working for you. In this case, many users go to the laptop website and download the only, old and stable driver, and install it on top of the buggy driver, but the installation may well end in error, then you need to completely remove the video card driver from the system and then install a new one, and sometimes you have to reinstall drivers for the chipset.
All these problems can be avoided, you just need to roll it back after installing the wrong driver. How to do it.
Right-click in the lower left corner of the desktop and select Device Manager.

For example, in my Device Manager, in the properties of the video card, the driver version is: 9.18.13.3165 dated 10/23/2013.

Me, version 9.18.13.3165 dated 09/13/2014 and the video card with this driver is unstable. So I can very simply roll back the video card driver to previous version.
Go to the Driver tab and click on the button Rollback.

Do you really want to install a previously installed legacy driver? Click YES