An operation such as recovering deleted files in Linux is rarely required. But in order not to be left without important data at the wrong moment, you should be prepared in advance and be able to quickly take the necessary measures.
Recovering deleted Linux files
There are 2 options for data recovery in a Linux system - directly from hard drive system and from a flash drive.
Linux Hard Drive Data Recovery
File systems used in all operating systems, not just Unix-like ones, are organized in such a way that they do not allow a deleted file to disappear without a trace. That is, if a file was created and located on the hard drive, it means that it occupied some space and was included in the list of links among other objects.
When the user deletes it, the link to the file is deactivated, signaling to the file system that the occupied space can be marked as permanent. In fact, the deleted object still exists and is located on the clusters on which it was. Its complete erasure will occur only after its trace is overwritten with other data.
From which it follows that as long as the space where the file was located is untouched, it can be restored. Accordingly, after detecting data loss, you need to immediately stop all recording processes (downloading files, creating documents, updating the system and programs, installing software) and begin restoring it.
Recovering data from a Linux flash drive
Since the Recycle Bin works slightly differently in Linux than in Windows, the first thing you should do is test it. Files deleted using the usual method, without emptying the recycle bin afterwards, are stored there. To restore, just connect the drive, go to the trash and restore the object.
But if the data is erased from both sources, you will have to resort to built-in or third-party software recovery. Before doing this, it is recommended to do backup copy the partition on which the file was located. To do this, you must follow the instructions below, with the caveat that to create a copy you need an amount of free hard disk space equal to the capacity of the flash drive. If attempts to recover data on the drive itself fail, you can contact a more experienced technician, providing him with virtual copy section.


File recovery programs for Linux
The simplest and most obvious way out is to go to a specialized data recovery service. But there is a huge disadvantage - the price. The extraction procedure is very expensive, and no one will tell how difficult this process was. There is also no guarantee for the return of all objects, especially since equipment that can restore a file after several overwrites is supplied only to special services. So, before you despair, you should try to carry out the operation on your own.
Recovering Linux Files with GParted
The most common program for working with partitions in Linux. However, not all distributions come with it. Not the most reliable assistant in such operations, but it’s worth trying as an option.


Recovering files with Scalpel
Scalpel Linux is a small tool that specializes in recovering deleted files from EXT4 partitions and other file systems. It has in its arsenal a database of file system types and data formats, which makes it universal. After all, during scanning, it checks the remaining records on the hard drive or flash drive with its own list, and if a match is found, it begins to restore the deleted Linux files.
Installation and use are simple:

The process can be seen more clearly here:
Recovering Ubuntu Data with TestDisk
TestDisk can also help you recover files from Linux, but in a slightly different way. The fact is that this software is not aimed at extracting data from drives, but at testing and restoring the functionality of the partitions created on them.
There is also a program in Ubuntu - PhotoRec. First of all, its functionality is designed for restoring multimedia files and archives. This software completely ignores errors, missing or formatting file system, thereby scanning the data without any problems.
Now it comes with TestDisk, and because of this combination of efforts, the final utility is considered the best among recovery programs Ubuntu files. To avoid problems due to user inexperience, during basic settings and manipulations, the utility uses the “everything in the system is read-only” approach.
By identifying information errors, TestDisk can recreate lost partitions in various file systems, such as FAT, NTFS and EXT4. Even if the partition was previously deleted, by finding traces of it, the program will be able to fix dependencies that prevent the file from being accessed correctly. The program is available in the official Canonical repository. To begin recovering data from a hard drive Ubuntu disk, you need to follow the instructions:


Linux data recovery with Safecopy
Safecopy is a simple tool for interacting with partitions and data. It does not help in recovering data from an Ubuntu flash drive, but it will be able to copy objects from damaged media to healthy ones. Its advantage is that it completely ignores errors that occur when reading and copying files. What can best affect your attempt to save multimedia files.
Pair broken byte It will do little to harm a photograph or video, and a text document will most likely just need to be corrected a little. But working with archives, especially if they are password-protected, can be disrupted.
To work with the program you need:

How to delete a file on Ubuntu
There are many ways to delete a file in Ubuntu. But it also all depends on whether it is a system file or a user one. This is easy to understand. Everything before the /home directory is system files, inside it there are custom ones.
I think each of us has encountered a problem when, due to a glitch in the firmware of a camera, camera, PDA, smartphone, or simply because of a special device /dev/hands, the card was formatted and the data was deleted. At one time I solved this problem quite simply, using the Portable version of Ontrack Easy Recovery, but since I have been a user for several years now linux systems, then using this unlicensed application through wine seemed not entirely kosher, and besides, the thirst for research and adventure required finding a free native analogue for Linux systems. The research ended before it even began, since the first line in Google search led to a set of TestDisk utilities, which I will discuss in more detail later.
And so, TestDist consists of two utilities:
testdisk and photorec; Official website of utilities.
Short description:
testdisk is a powerful utility designed to recover deleted partitions and restore boot records mbr after software errors, the actions of some viruses, human errors (for example, when a partition was simply deleted).
Testdisk features:
Fixing the partition table; recovering deleted partitions FAT32 recovery boot sector from backup Rebuilding FAT12/FAT16/FAT32 boot sector Fixing FAT tables
Rebuilding the NTFS boot sector Restoring the NTFS boot sector from a backup Fixing MFT using an MFT mirror Finding ext2/ext3 Backup SuperBlock
Recovering deleted files in FAT, NTFS and ext2 file systems
Copying files from FAT, NTFS and ext2/ext3 remote partitions.
photorec– data recovery utility such as video files, documents, archives with hard drives and cdrom disks, as well as photos (hence the name of the program Photo Recovery) from the built-in memory of cameras. The list of file types for recovery is very impressive and you can familiarize yourself with it.
Both utilities are open source, distributed under the GNU General Public License (GPL). Versions are available for Linux, Unix, and Windows platforms.
Most Linux distributions are already included in the standard repository. For debian-based distributions, install with the command:
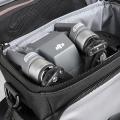
In my case, I needed to recover photos from a camera card after the camera accidentally formatted the card. Having inserted the flash drive into the card reader and launched photorec as root in the console, the utility prompted me to select the disk on which I wanted to restore the data.
In my case it will be /dev/sdb.
Next, select the type of partition table on the disk; for most users it will be Intel/PC.
And then select the entire partition or disk to search for deleted files. Since I needed to recover all deleted files after formatting, I chose to search the entire disk.
After this, photorec is required to indicate the type of file system in which the deleted files were stored. In this case, everything is simple, select the second item.
And then on another drive we select the directory where the utility will save the recovered files.
Next, press Y and the program begins its work. For a 32MB card it took her less than a minute.
Now about the results of the work:
To be honest, at first I was very doubtful about the program’s abilities. But having opened the directory with the results of the utility, I was surprised to find that not only the required 10 recently taken photographs were restored, but also 110 others, the earliest of which was taken 3 years ago and was not overwritten with further use of the card, although it was formatted card repeatedly.
As a result, we have another victory of good over evil, a happy smile from the owner of the camera, another proof that there is a sea of useful and high-quality opensource utilities.
An acquaintance came to me with the following problem: I need to recover deleted files from the camera’s flash card. I work in a store that sells and configures computers, and naturally, we only have Windows there. I had one trouble-free program in stock that helped me out, and not only, more than once - Zero Assumption Recovery. Good program in fact, but paid for Windows too. In short, she scanned a 4 gig flash drive for 2-3 hours and found something. I tried to restore, but in the end there was nothing in the restored folder. It was a shock for me! This was the first time this happened with this program. I decided to try some magic with a memory card at home, but on my native Ubuntu 11.10.
To do this, I called a program for recovery specifically from memory cards or flash drives called PhotoRec from the TestDisk package. If the program is not installed, then install:
sudo apt-get install testdisk
Now, without closing the Terminal, call the program with the command
and enter the user password

Next, we will see all sorts of connected drives on our computer. The flash drive I needed was the third one. Using the arrows up or down, right or left, we will move around the Terminal. Select the desired disk/card/flash drive, in our case UDF 2.0 Silicon-Power 8G and press Enter.

If you need to restore all files, then press Enter, and if you need to restore files of one or more types, then use the Right arrow to go to the File Opt item and then press Enter.

By default, all file types are selected for search and recovery. Use the letter S to remove all selections. Use the Up and Down arrows to look for the desired file type and select it with the Space button. Press Enter.

In the lower menu, go to the Search item.

Select FAT32. Press Enter. From all options we choose Other, because Our flash drive has the FAT32 file system.

If you select the FREE item, the search will be performed in empty space and in this case only deleted files will be recovered, and if you select WHOLE, the search will be performed on the entire surface of the flash drive or disk.

Now we need to specify the directory where we will save the files we need. Select the desired folder and naturally press Enter.

Short description: This article shows you how to recover deleted files in Linux using a command line tool Test Disk. It is an easy to use tool that almost anyone can use to recover lost files in Ubuntu or other Linux distributions.
Have you ever gotten that terrible feeling? The one you get when you realize you accidentally deleted files and it's not even in the trash? Often it is immediately preceded by a refusal: I know that I have another copy.
But don't go through all the stages of grief, don't worry. And remember that you are not alone; sooner or later everyone does it.
By the way, do you know? We have already written about this. You can follow the link above.
But after the phrase “Don’t worry,” you’re counter: “I just deleted the only copy of my resume!” and what to do?
No, don't worry all yours files in place. All that happened was that the file was knocked off the list. As long as you don't install large programs or other files on the disk, it absolutely still exists. In fact, depending on the file size and the available space on your drive, deleted files may persist indefinitely, even if you overwrite and format the drive. Recovering deleted Linux files can be done through command line, we will tell you about this method.
How to Recover Deleted Files in Linux
“Yeah, okay,” you say, “I’ll take comfort in knowing that my file “exists” in some abstract sense. But as far as I'm concerned, if I can't open, edit or print it, it doesn't exist in any practical sense. What would really help would be a way to recover those files that were deleted from the disk. And one that doesn't require an IT forensics lab.
In fact, don't worry—you don't need a lab to recover deleted files. Also, if you can get past the primitive GUI, it's actually easy to do! I'll show you how to use TestDisk to recover deleted files.
How to Recover Deleted Files on Linux Using TestDisk
Let me give you a simplified example: I took a blank flash drive, added a few files, and then deleted one. My system now has a feature that will directly delete files from removable media, bypassing the Recycle Bin altogether; that is, if I select "right" click on the file and then select "delete". It still presents a warning, but click the Yes button once and the file is gone forever. Or it seems.
But this time I didn't understand this terrible feeling. And no, not because it’s a prepared script. I knew that all I had to do was open a terminal like " testdisk" and press "enter". The first time I did this I had one of my "Linux moments". Because if you don't have it - and I don't... this tells you how to get it! Just enter " sudo apt install testdisk" and press Enter and you'll get it in about 10 seconds.
Step 1
Recovering deleted Linux files is very fast. First you need to install TestDisk. Most Linux distributions already have this tool in their official repository. On Ubuntu and other Ubuntu-based Linux distributions such as Linux Mint, elementary OS, etc., you can use the below command to install TestDisk:
sudo apt install testdisk
Users Arch Linux can install it from AUR. You can download it for other Linux distributions from the link below:
Although I'm using Ubuntu in this tutorial, it doesn't mean that I can only recover deleted files in Ubuntu Linux. The instructions presented here also work for other distributions.
Step 2
Run TestDisk in a terminal using the following command:
Step 3
When you open it, you will see something similar to this. Be patient! The interface is actually simple, but you need to read the text carefully. Use the arrow keys to navigate and "enter" to select.
The additional command screens will tell you about this. Also note that TestDisk 7.0 tends to highlight the next smart step. This is almost always correct, but read the screen because it can't read your mind. In any case, when he wants you to create a log file, indulge him. This is going to get you out of the hole.
Step 4
Now, at this point, if you are lucky, you should see your disk. And you can move on to the last steps. But let's assume you didn't, you have, say, a machine with multiple loads. In this case, the owners may be blurry and Testdisk needs your permission to open them. You'll see something like this:

Select "sudo" and enter your password. Press "enter" and "enter" again on the next screen to create another log file.
Step 5
This time Testdisk will display all your disks. Arrow key to the appropriate drive and press enter.

Step 6
Testdisk selected again correct setting. This makes sense since simple storage is rarely shared. Press enter again:

Step 7
We have covered the main points when it comes to Recovering deleted Linux files. And finally, we have to think a little. If you read the first screen, and I'm willing to bet you didn't, this program isn't just about recovering deleted files. This is a powerful disk utility. But if we remember that we're trying to make a choice, it's pretty obvious: we're not trying to fix the disk, we're trying to repair the file. Select Advanced and press Enter.

Step 8
At the bottom of the page, select " Undelete" and get ready to see your file!

Step 9
Testdisk will check the files and create a list of deleted files highlighted red color. Arrow down and read the options below carefully.

Step 10
Again, keep in mind that Testdisk is a feature-rich tool. Most of these options relate to groups of files; we just want our file that was deleted to come back! So press "c".

As you can see on the scoreboard, we won 1-0. After pressing "c" there are options where you may want to restore the file, but the default is your home folder. Again this is usually the best. Navigating Testdisk is a bit tricky, and dragging and dropping after the fact is a breeze.
That's all! Recovering deleted Linux files is complete. Now you can learn about general tips for recovering files. There will be answers to many questions regarding this topic.
Some tips for recovering deleted files on Linux using TestDisk
First, if you find yourself somewhere you don't want, press "q" to exit. This will not close the program, instead it will act like a back button in a full GUI program and return you to the page. And just like repeating the back button will eventually take you back to the beginning.
Secondly, as with anything, the fewer distractions, the easier it is to find what you're looking for. In other words, physically disconnect all other drives. In graphically simple environments, simplicity is your friend.
Finally, Testdisk can also help you recover files that have become inaccessible for other reasons. In fact, that's why I started using the program in the first place. I tried to save files from damaged disk, which could not be made to boot. It's usually just a matter of removing said drive by plugging it into a USB adapter. You can then connect it to another PC and copy files whenever you want.
But what if The disk is formatted in LVM? This was my problem because the installed LVM drive doesn't look like a regular Linux OS. None of the normal files appear and hunting around just doesn't help. This is, among other things, due to the fact that most file Linux managers can no longer read ext.2 file systems.

However, after several false starts, I was able to find and save missing files. Note, however, that the sequence of steps here will be slightly different, you may need to use "analyze" for Testdisk to understand the drive, and you may need to push a little to find the "home" folder once done. Additionally, the files you are looking for will not appear in red because they were never deleted in the first place. But once you find them, the copying procedure is basically the same.
With Testdisk and a little luck, you will never lose your files and videos again, as you can always recover deleted files in Linux.
This guide is an instruction for beginners in the world of distributions based on the well-known kernel. We hope that for you Recover Deleted Linux Files it was fast.
conclusions
Recovering deleted Linux files is very fast and straightforward. Even a beginner Linux user will be able to figure it out with the help of our guide. If the article was useful to you then share it on your pages in in social networks Google+, Facebook, Twitter, VKontakte and Odnoklassniki. This will help us a lot. Let's develop our community together.
Also, if you have any questions on the topic “Recovering deleted Linux files”, write them in the comment form.
If you find an error, please highlight a piece of text and click Ctrl+Enter.
Sometimes it happens that we delete, as it would seem Not necessary files(images, videos, text documents etc.), and then suddenly we regret it, because... Among the deleted ones, the necessary ones turned out to be. It's good if we delete files in Cart, from where it is very easy to restore by pressing the key combination Ctrl+Z and then all the files that are in Cart will be restored to their previous folders or you can selectively by right-clicking on the desired file in Cart and in context menu - Restore.
But what to do when we deleted files with the function - Delete permanently? Many people believe that the data is lost forever. But that's not true. In this case it will help us console utility Scalpel.
Scalpel is a simple, highly effective file recovery tool.
Scalpel is a quick file recovery tool that reads the beginning and end of files of known formats from a database and tries to find them on disk. The uniqueness of this software is that it does not depend on the file system. Therefore, restoration is possible with both FATx, NTFS, ext2/3, so with "bare" (raw) sections. The tool can be used for both digital information retrieval and file recovery.
Scalpel available in the repositories of almost all distributions Linux. IN Ubuntu and derivatives you can install it from Application Center or run the command in the terminal to install:
sudo apt-get install scalpel
After installation you will not find it in the system menu Scalpel, because I mentioned above, this tool is launched from the terminal with a specific command. But before you run the command to search for permanently deleted files, you must in the configuration file scalpel.conf uncomment the line (remove the hash sign) with the extension of the desired file (All file types are commented out by default). Run the command in the terminal to open configuration file scalpel.conf:
sudo gedit /etc/scalpel/scalpel.conf
Note. In a team gedit(Ubuntu; Linux Mint Cinnamon) change to name text editor your distribution installed by default.
For example, I chose to search for lost image files with the extension JPG and uncommented this line in the editor that opened with the file scalpel.conf:

You can select any other file. Save the modified file ( Ctrl+S) and close the editor.
And now you need to run a terminal command with the tool
scalpel to find lost files:
sudo scalpel /dev/sda8 -o /home/vladimir /JPG /output/
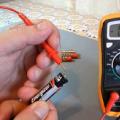
sda8- this is a partition on the hard disk of my current system. To determine your partition and change it in the command, run the command:

The terminal should display all partitions of the hard disk. As shown in the picture, the mount point of my partition is marked with an arrow, slash or slash - sda8, which I entered into the command. You must have yours marked.
/home/vladimir- that's my name Home folder. Change vladimir on your own.
/JPG- this is the name of the folder in the command that will be created by your Home folder, where all recovered files will be saved, which you can also change to your own.
So, we execute the command and wait for the restoration to complete:

As you can see in the picture, the process of searching and restoring image files with the extension JPG on my computer will happen in two steps, as well as time, depending on the size of the specified partition (GB) and the number of images located on it.
I want to say right away that the process is not fast.
Once the recovery is complete, open Home folder with administrator rights:
sudo nautilus
Instead of nautilus indicate the name file manager your distribution (for example: Linux Mint - nemo or saja; and so on.).

Open the folder with the recovered files, select and save the files you need, and then you can delete the folder permanently, because... it will only take up precious space in the hard disk partition.
Conclusion. I would like to note that the tool scalpel finds all files with specified extension, even those that were previously on this partition, when others were once installed on it OS. This utility is also used by intelligence services in different countries to search for compromising information on the user's computer if necessary. So no matter how we delete files permanently, they still leave their mark on the hard drive.
Only physical destruction of the hard drive will save the computer user from compromising files .