Surface cleaning should be done once a month. It will get rid of dust and crumbs (for those who like to chew something tasty in front of the monitor).
Flip and shake the keyboard a little. Some of the debris will disappear already at this stage.
Take a small brush or paintbrush and brush away any dust and crumbs that get stuck between the keys.
To get rid of dust in hard-to-reach places, you can use a special USB vacuum cleaner for the keyboard or cans with compressed air, which are sold in digital and household appliances stores (cleaning products department). A regular hair dryer is also suitable, but only if the keys are tight and there is no chance that the debris will simply clog deeper.
The keyboard can only be blown out with cold air.
To remove grease from the keys, run over them with a paper towel or microfiber.
During preventive cleaning, never use wet rags: no liquid should get into the keyboard. Maximum - wet wipes for the computer.
Deep cleaning
Disassemble and wash every three months. You will have to do the same if you spill something on it.
Method 1. Standard
This method is suitable for cleaning the built-in laptop keyboard.
Remove the keys. Usually the buttons are fastened with latches. It is easy to pull them off with a paper clip, flat screwdriver or knife, starting from the side edge of the key. This must be done very carefully, because thin plastic is easy to damage.
Tech Profis / youtube.com
Pay particular attention to long keys like Shift, Enter and Space. They are usually held in place with metal clips, making them harder to remove and reattach. If you are not confident in your abilities, it is better not to touch them. On some laptops, this option is not provided at all.
Clean the attachment point. Use a flannel cloth, damp cloth, or paper towel to rub over the seams. You can blow out the inside of the keyboard with a can of compressed air or a cold hair dryer.
Remember to take a photo of the keyboard before disassembling it.
Rinse the keys with plain water, soapy water, or antiseptic. Alternative method: fold all the buttons into a clean sock, tie it up, soak in detergent, and then hold it under running water.
Dry the keys. If you don't feel like waiting for the moisture to evaporate, use a hairdryer.
Secure the large keys first, then all the others. This is where the photo you took before cleaning will come in very handy.
Method 2. Complete disassembly
Take a photo of the keyboard, and then turn it over and unscrew the screws with a screwdriver. Open the device and place both halves on a table with the inside facing up.
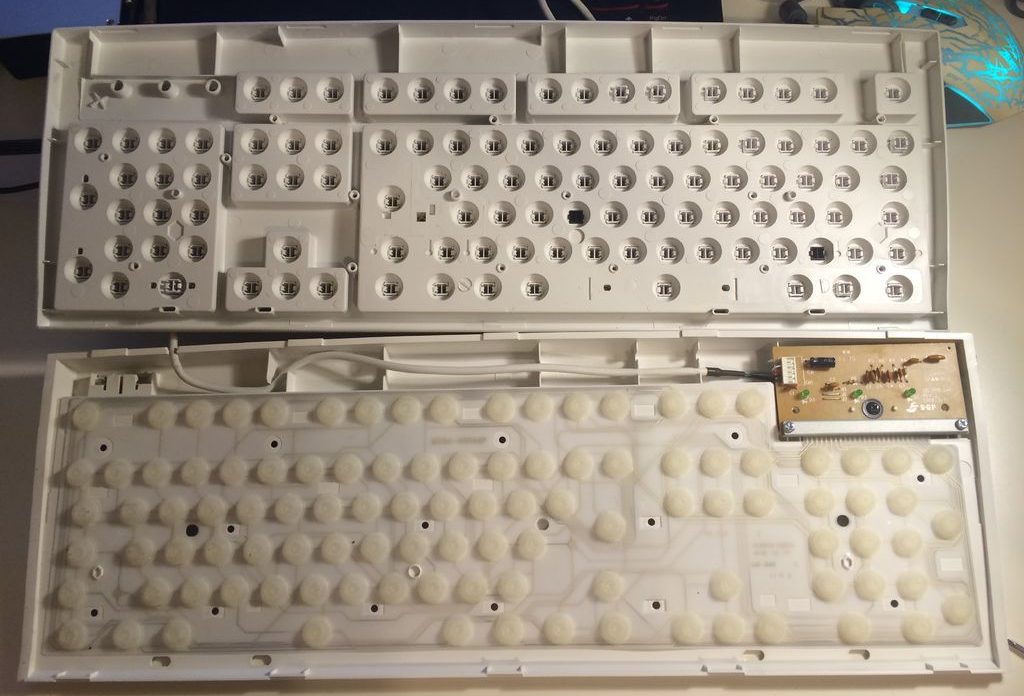 instructables.com
 The lower part can be set aside as there is no need to clean it.
Gently press the keys out. Note the space and Shift, which can be additionally secured with metal pins. Do not remove the Enter key: usually it has a very complex mount, so it will be very difficult to put it back.
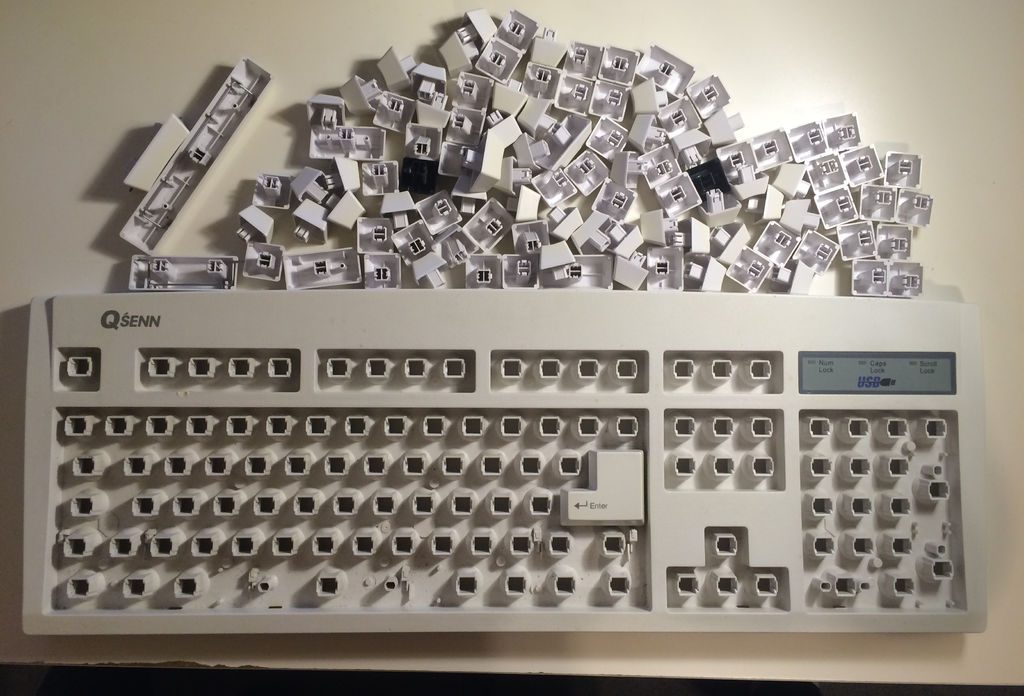 instructables.com
 Place all keys in a sink and rinse under running water or leave in a disinfectant solution for a while. If the plastic is heavily stained, brush over it with a soft toothbrush. Then dry the keys.
Rinse the top of the keyboard under running water, using a toothbrush to remove dirt, especially at the corners and joints. Then let it dry.
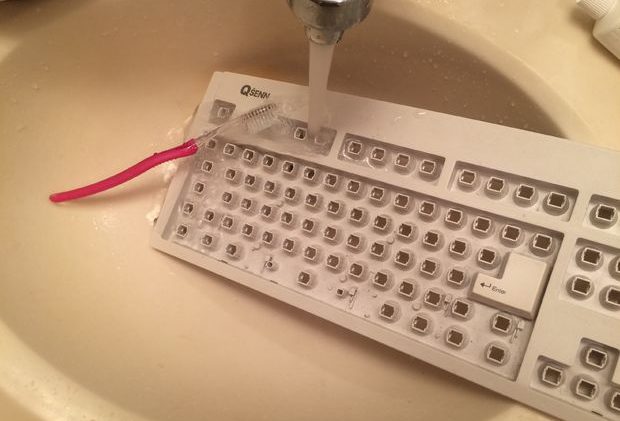 instructables.com
 Fasten the keys in their original position. If you hear a click when pressed, everything is in order: the button is firmly attached.
Connect the top and bottom of the keyboard, tighten the screws.
Connect your device to and make sure all keys work.
Method 3. Cleaning after liquid spills
If you spill water, hot coffee, or any other beverage on the keyboard, turn it over and shake it well. Wipe with a dry cloth.
Leave it overnight to dry the keyboard. If the next day some of the keys stick or do not work, use the first or second cleaning method.


