The review is a continuation of the story about the practical use of a laser engraving machine with a working area of the A3 format at home. Last time we were talking about a DIY kit equipped with a 2500mW laser. This time I will talk about replacing it with a laser with a declared power already at 5500mW. From the review it will be possible to find out how many passes such a laser can take to burn through 3 mm and 4 mm plywood, what is needed for this and, most importantly, what to do with it. Further - a lot of letters and photos.
So, many probably remember this review in which I tried to talk about the use of both the machine itself and about working with the BenBox software. At the end of the review, I mentioned that the owner of the device had an idea to upgrade it and install a more powerful laser.
The main message for the modernization was the desire to cut out plywood crafts. Although initially, before purchasing the first version, there was a need only to cut figures out of felt, which, by the way, the previous laser coped well with, during the testing period it turned out that it also cuts plywood, but this requires a relatively long time.
The idea of replacing it was not in the air for very long and soon it was embodied in a real order.
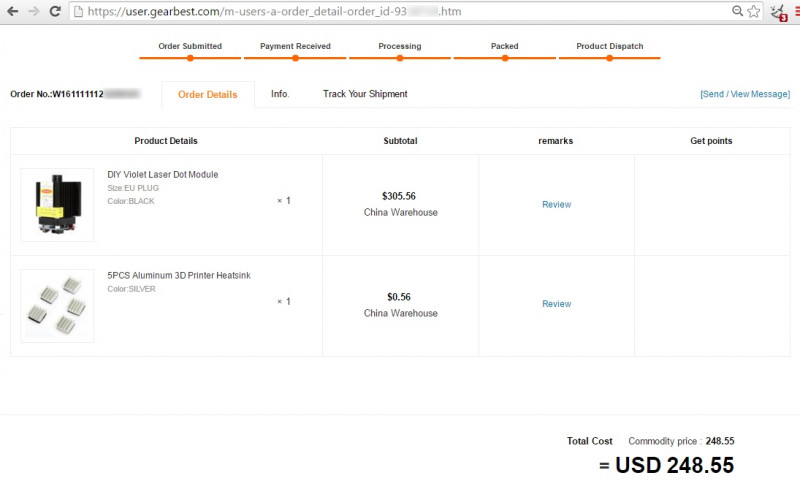
Order screen
The laser is supplied complete with a power supply.
On the laser body, which is essentially one solid heat sink, there is a sticker indicating the voltage required for it and the output power.
The power supply is rated for 12v and 5A.
You can use the laser "out of the box", because The control board is already built-in and is located above the heatsink cooler. To turn on, you just need to connect the power supply. The laser will then turn on at maximum power. To enable the minimum mode, there is only one button on the board.
According to the characteristics, the laser wavelength is 450nm and the beam color is blue.
Unfortunately, I did not take a joint photo of the new laser with the old one, but if in general, then, first of all, the difference is clearly noticeable in size. Most likely, this is due to the size of the radiator, which looks much larger and more impressive.
In addition, the size of the adjusting part of the focal lens has also become approximately twice as large.
This is how the installed laser looks like. It can also be seen here that an additional cooler that prevents the deposition of smoke on the laser lens was nevertheless fixed to the carriage and now moves with the laser. Its weight is insignificant and so far this has not negatively affected the operation of stepper motors.
For fastening, a detail from a children's iron constructor was used. With sufficient rigidity, it is quite flexible, so you can easily select the required angle of inclination of the cooler for a specific situation.
Together with the laser, we ordered these (10x10 mm) on a self-adhesive base.
Radiators were purchased for installation on two microcircuits of the laser board, because when the device is in operation, they heat up quite noticeably and there were concerns about their condition.
The first tests showed that the laser is indeed more powerful than the previous one, this taking into account the same approach to the cutting procedure. That is, oddly enough to state, but "by eye" the power is actually increased by about two times.
Those. what was cut on a 2500mW laser in 6-8 passes is now cut in 3-4. But this is for now ... (more on that later).
The first sensible handicraft, at the request of friends, tried to make the so-called "medal". Those. it's like a themed medal hanger. Since the machine can only handle the "troika" plywood so far, we decided to make two blanks and then, by gluing them together, to achieve the required strength.
The photo below shows that the first attempt was not very successful, and this is all because it is not always clear whether the whole figure was cut through or not, moreover, this is greatly influenced by the bending of plywood, which is not always perfectly flat.
In the end, on the second try, the desired turned out, but the point is not in this case.
And the fact is that every time you got tired of looking for what to put the workpiece on, so that you can see from below how well it cut through, it was decided to use some special device for these purposes.
Machine modernization
Based on the design features of the machine frame, the use of two long guides, along which the movement of the mechanism is not provided for, seemed an excellent option as a basis for this. In addition, these guides have a recess for which the device can be fixed.
The distance between the centers of the rails was 41.5 cm.
The wide drywall profile, which had stood idle in the corner for a long time, was perfect for the intended purposes. To do this, a piece of the required length was cut from it and cut lengthwise - thus, two corners with a stiffener were obtained.
Cut off the "extra" pieces so that one edge of the corner fits freely between the guides, and the other falls on them.
We bend a part of the corner under the groove of the guide on both sides so that the corner can move and at the same time not jump out of the guide.
It turns out that now we have two crossbars that can be freely moved inside the working area of the machine and thereby place any piece of plywood on them.
If necessary, they can simply be moved to either side so as not to interfere.
This is how you can now place the plywood, while the distance from its surface to the laser lens is about 36 mm.
But perhaps the most important thing with this approach is that now the plywood can be pulled to the resulting guides in the right places with self-tapping screws or clamps and thereby ensure its "evenness" along the entire perimeter of the intended craft.
Well, this is how it turns out, you can observe during the operation of the laser how well the part is cut and whether or not additional passes need to be made.
Having practiced, even on the previous laser in cutting flat crafts, I have long wanted to try to make something really useful and interesting, for example, something from the category of boxes-boxes. But this matter, as you understand, is not entirely simple, that is, of course, the principle is the same as always - it is necessary to cut the parts and then connect them, but since there are a lot of parts, the accuracy of the drawing should be sufficient so that at the end work did not have to be thrown away, tk. it is impossible to dock them. In addition, returning again to the number of parts, the question of automating cutting arises from the point of view of the need to perform several passes.
If you read my previous review, but probably remember that the BenBox program I use is deprived of the ability to set the number of necessary passes over the picture and you have to press the start button after the end of each pass yourself as many times as required.
So that's it. It turned out that after all, with this program, not everything is as bad as it seemed at first glance. No, of course I did not find in it a secret field for setting this parameter, everything is a little simpler and more complicated at the same time.
BenBox is able to receive tasks not only in visual mode by selecting a picture with a figure outline, but also loading a special sequence of commands - G-code into a special window, and in this very mode you can set the necessary commands as many times as necessary. Those. in a simple way - you need to draw a circle three times, set these commands three times and the machine obediently draws a circle three times. True, as always, "there are a couple of nuances ...".
Firstly, these commands can be set only either by entering manually or by immediately pasting in a block from memory (clipboard) by copying them from the desired file.
Secondly, oddly enough, there is no mode of loading from a file directly, i.e. only in the way described above.
Thirdly, despite the fact that this very code also provides for setting the speed of the laser, in BenBox these commands are completely ignored and the only value is used - set in its own special field.
This is about Benbox. But it is necessary to remember that this set of commands (G-code) still needs to be obtained somehow. And this is not quite easy. Those. the principle itself is very simple - you need to convert the image necessary for cutting / engraving into commands, which then feed Benbox. But to find a suitable program for this from a large number of existing ones, and even so that the desired set of commands is obtained at the output - this is already difficult.
One wonderful person who also owns a Chinese laser engraver helped me to figure this out, with whom we corresponded as part of the exchange of operating experience, for which he would like to express gratitude and say a big human "Thank you".
So, for the above described correct and fairly convenient conversion of pictures into a set of commands for cutting / engraving, the VCarve Pro program is well suited. I will not tell you where you can download it - I think this is not a problem for most readers.
Such a construction immediately attracts attention by the fact that in it "something that, by definition, should not bend freely". That is, here the upper and lower sides of the box are integral with each other, and the part connecting them bends and does not break with the help of specially cut slots, which form a kind of book binding.
I have long wanted to see how it will look in practice, besides, the dimensions of such a box are relatively small, so it shouldn't take too much time to cut it out.
In the original version, as in the picture, the box is supplemented with engraving and has a strange-looking, but very interesting latch-lock. I simplified the design a little and prepared on its basis such a drawing.
Getting the G-code with VCarve Pro
Launch VCarve Pro, load our image into it and select the top menu item, as shown in the picture. This is necessary in order to get a "trace" of our image (vector outline).
In the window that appears (2), select the (Quick Engrave) button and then window 3 will appear. A little about its elements.
1 - the button for selecting the virtual instrument with which we want to work.
2 - switch of the engraver operation mode (outer contour or filling).
3 - by checking the box, you can specify the required number of passes (yes, this is the same!).
4 - any semantic name for the task being created.
5 - button that starts the mode of calculating the path of the laser movement along the specified contour.
6 is one of the most important elements of the post processor selection menu. Those. this is where the type of code we need is chosen.
And now, in order. First, we need to set the parameters of the virtual instrument that we plan to work with (button 1 in the picture above).
In the window that appears, you must enter a name that we understand (1), select the type of tool - engraver (2), set the maximum (or desired) laser power (from 0 to 255), specify the units of measurement exactly as mm / min (4), and also enter the required speed of the laser movement for this task (the depth of cut depends on this) and save the "tool".
Further, in the main window of the program, on the image it is necessary to select the contours with respect to which the task will be formed. Those. in this case, you can, for example, select the inner contours for engraving, and then the outer ones for cutting. If this is not required, then using the specified menu item, you can simply select all the contours that are with the right button.
Next, you need to specify the required number of passes (1) and select the required post-processor (2). As for the post processor, the program does not contain a suitable one for working with Banbox. It can be downloaded and then placed in the program folder at "C: \ Users \ All Users \ Vectric \ VCarve Pro \ V6.0 \ PostP \".
After that, you need to press the render button (3) and finally you can immediately save the received code to a file, if you do not need to generate several tasks, or close the window with the "Close" button.
The generated tasks are displayed at the top of the window (1). To save, it is necessary to mark the necessary checkboxes and press the button 2. Then make sure that the checkbox on point 3 is checked, check the correctness of the choice of the post-processor and save the tasks to the file with the button 4.
As a result, we get a file with the .nc extension that can be opened with a simple Notepad. This is how our set of commands looks like, which must be selected from the first to the last line and copied to the clipboard.
Then, in Banbox, you must specify the required speed of the laser movement in advance and press the button, as shown in the picture below.
And using the key combination Ctrl + V or Shift + Insert, paste the code from the clipboard into the field indicated in the picture (the menu for pasting with the right mouse button does not work). After clicking on the blue checkmark button, the program should start sending commands to the machine.
So, as a result, we get the following set of elements.
And this is how a solid piece of plywood can now bend.
There is no need to use glue when assembling, because all parts fit very tightly.
The internal storage space is sized to match standard plastic cards.
I have never done this, but for testing I covered the box first with a dark stain, and then with varnish. Given the lack of experience in this direction, I think that it worked out well for the first time)).
In general, the box-casket turned out, it was cut out in 5 passes (the fifth is just in case, to fix it so to speak). But for some reason the feeling that I was doing something not quite right did not leave. I still wanted more performance.
After a little reflection, I came up with an interesting idea. Perhaps I will say a long-accepted fact, but so far I have not personally met such an approach, so I ask you to excuse in advance.
Focus about "Focus"
So, let's remember by what principle the focusing lens of a laser is usually adjusted? When the laser is turned on at the minimum power, it is necessary to rotate the lens focus adjustment to achieve the minimum size of the laser spot on the surface intended for processing and turning it, ideally, into a point.
In this case, the minimum spot size guarantees us the maximum laser power, everything seems to be correct. But watching the cutting process, I was very embarrassed by the fact that the almost perfect cut at the beginning of the process, towards the end, became somehow weak, in places without even cutting the plywood from the bottom.
So, if you haven’t guessed what I’m leading to, I’ll explain.
When the laser is deepened into the plywood, it turns out that with each pass, the distance from the laser to the surface increases, and what happens at the same time? - defocusing of the beam with an inevitable drop in its power at the end point.
And so it turns out: the deeper, the worse. If so, then on the contrary, by focusing the beam slightly below the cutting surface, we should achieve an increase in the laser power closer to the opposite surface.
To test my theory, I tried to focus the beam not on the plywood itself, but on the surface under it, assuming in advance that nothing good would come of them, because the stain on the plywood should have turned out to be not very small and the cut, therefore, should, in theory, be heavily charred. But a miracle happened!
Three plywood is cut in two passes until the state of "self-pouring", while the cutting speed, according to Banbox's parameters, was 150.
But as always what? There were some nuances.
The main one is that the plywood must lie absolutely evenly in the entire plane of the cut, so it must be attracted.
As an example, here are two circles that were cut with the same parameters.
In the first case, the plywood, even with a relative "evenness", did not attract to the guides and such a horror turned out.
On the same piece, but already pulled with a clamp, it turned out like this. By the way, this process is shown in the video, which will be at the end of the review.
Satisfied with the finally obtained result, I wanted to continue my experiments in the field of casket construction, the purpose of which is to create some kind of beauty. But this path, I must say, is very difficult and thorny.
After making the box-book, I tried to prepare a drawing for the dimensions I wanted for myself, but I quickly realized that although this task is quite feasible for myself, I didn’t like the time spent on this at all.
The fact is that it is necessary to very carefully approach the dimensions of all the details of the drawing so that later they dock in the right places and do not fall out at the same time, well, all this plus depends on the complexity of the design itself. In general, after tinkering for a couple of days, I realized that laziness had once again won and began to look for ways to automate this process.
Among people who are engaged in cutting on powerful laser CO2-machines (from 40W), the development of drawings in Corel Draw is very popular for which there are specialized macro programs that can build various drawings of boxes according to user-specified parameters. There are both free and paid developments.
Having set myself the goal of creating a beautiful carved box, I quickly realized that there is nothing especially to catch among the free programs, since almost all of them are sharpened only for simple models of boxes. As a result of the search, I came across a very good development called "Box Designer".
The Box Designer is a macro for Corel Draw for quickly designing various volumetric structures from sheet material (mainly wood).
A specialized forum is devoted to this macro, in which the developer himself takes an active part.
Speaking of the developer, we must give him his due. such a detailed and comprehensible, I have not seen for a long time. It is enough just to read it carefully and the impression is already beginning to form that you yourself have been using this program for a couple of weeks. Further, I will not tell you in detail what is intended in the program and for what purpose, since to do it better than already described in the manual will still fail.
Select a macro and a list box and click the "Run" button.
If everything went as it should, then such a window will appear on the screen.
For the first time, I decided to try to make a simple box, but with a lid that opens on hinges. To do this, you need to select the desired type of product from the proposed list.
Making a box with a lid
Go through the tabs, filling in the fields with the required dimensions and a bunch of other parameters that characterize the product you want to create.
After that, returning to the first window of the program, you need to click on the "Create a drawing" button and voila - get / sign a "drawing for an individual project."
Then I export to .bmp format and process the drawing as I need. For example, I fill it with black for easy cutting.
Everything is going very tightly, I even had to resort with a small hammer.
Well, it's finally time to swing at something beautiful and carved - let's start making the box.
Making a carved box
For all its perceived complexity, the process of creating a drawing is not much different from creating a simple box. In the list of products, select a carved box.


