Today, there is an electric iron in every home. He is an indispensable assistant for almost any housewife. With its help, any housewife can quickly and easily iron wrinkled clothes. Like any other type of electrical equipment, the iron can also break. Repairing an iron is a fairly simple process, and after reading the article, you will understand it.
In this article, we have described in detail all the reasons that can be associated with a breakdown of the iron. We have posted here only the best tips to help you get a quality electric iron repair. You will also learn how to repair the iron yourself.
How the electric iron works
Today, the electric iron circuit is more like a kettle circuit. If you look at it in more detail, then you really can understand that it has practically no differences.
In order for your iron to start heating up, you need to apply voltage to it. For rapid heating, manufacturers usually use powerful heating elements. And the wattage can range from 1000W to 2200W. If this power is applied regularly through it, then its sole may turn red. In this case, it will simply become impossible to use an iron for ironing things. For example, for ironing nylon items, you need a temperature of 95 to 110 degrees. That is why many manufacturers install a regulator on the iron to regulate the temperature. 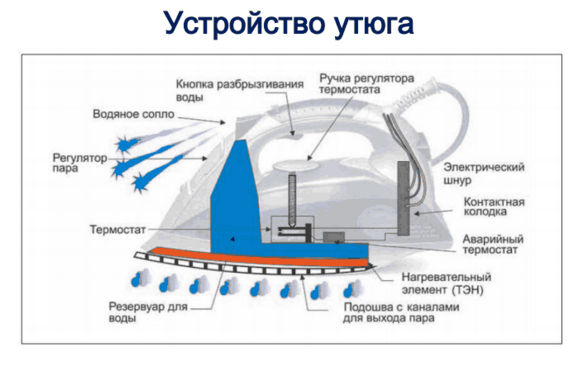
You can control the temperature control with a round knob, which is located on the central handle of the iron. If you turn the knob clockwise, then the temperature will increase significantly.

Rotation from the handle to the thermostat assembly will be fed through the sleeve adapter. In order to remove the thermostat from the iron handle, you just need to pry it off with a screwdriver.
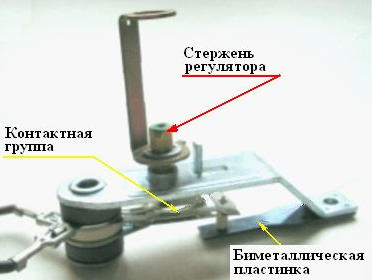
The Philips iron thermostat works in a similar way. Its design has a built-in special bimetallic plate. It is she who provides temperature control. When the temperature starts to rise, then the plate begins to expand. When it expands to a certain size, then the plate will give a signal to the regulator, and it will stop heating the iron.
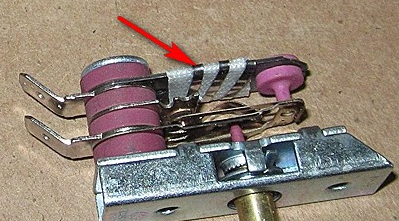
In the thermostat on the iron, this plate will automatically communicate with the bistable switch. They have a fairly simple principle of operation. When the iron is heated to a certain temperature, the plates will begin to expand and eventually close. If they close, then the heating will automatically stop. When you turn on or off the regulator, the iron will automatically make a click, which has a characteristic sound. Do-it-yourself iron repair may be required if the thermostat breaks. If, then its thermostat can become a possible cause of breakdown.
To avoid this problem, you need to install a fuse on the iron. If the temperature in your device exceeds 240 degrees, then the fuse will automatically break the circuit. In this case, in what position the iron handle will be located does not matter.
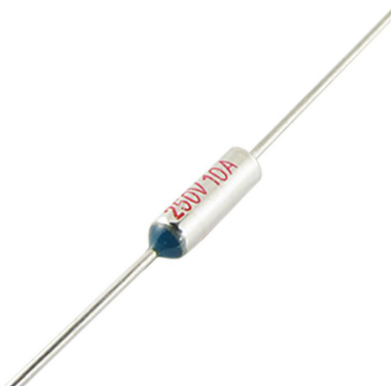
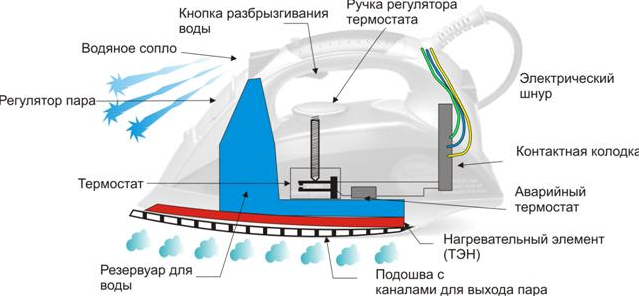
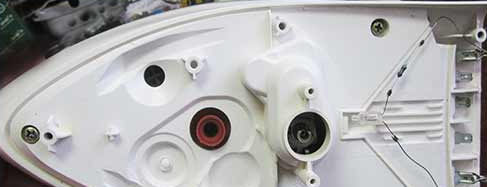
Today, thermal fuses can have three types of design. If the light on the iron shines, and its sole will not heat up, then the problem lies in the breakage of the heating element winding. Here is a photo showing a diagram of an electric iron. Thanks to her, you can understand how your device works.
Power is supplied to your device through the power cord. If your iron is not supplied with electricity, then it needs to be repaired.
DIY iron repair
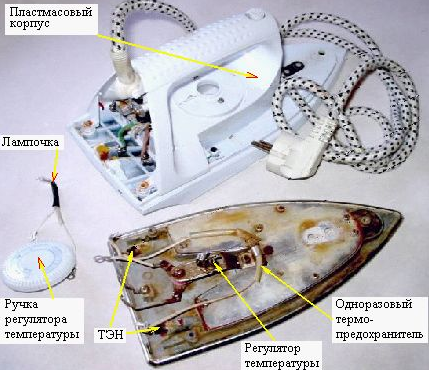
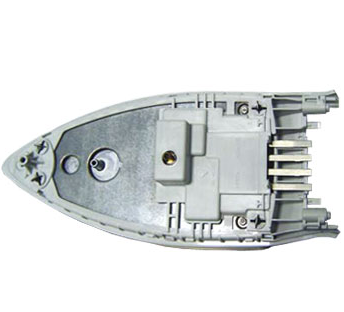
Almost everyone can carry out an independent repair of the iron. Any iron has a small amount of parts. That is why, after reading our article, you can easily figure them out. Here is a photo that shows the device of the iron. Sometimes it is much more difficult to disassemble the iron. That is why in this article we looked at the disassembly of the Fhilips and Braun iron.
Here are the main reasons why irons stop working:
- Broken power cord.
- Damage to the thermostat.
- Bad contact of terminals in the iron.
- Oxidation of contacts in the thermostat.
- Thermal fuse defective.
Checking the health of the power cord on the iron
When ironing the laundry, the power cord is constantly bent. The greatest bend will always be at the junction of the cord with the iron structure. This is where the power cord will fray. This malfunction begins to manifest itself much earlier before the breakdown. If it heats up normally, but the indicator lamp starts blinking, then this is a manifestation of future breakdown.
If the insulation of the wires that are inside begins to fray, then a short circuit of the device may occur. If this happens, then you need to unplug the iron from the outlet and start repairing it yourself. If the iron stops heating up then you need to check the voltage at the outlet. If the socket is working properly, then you need to move the wire at the junction with the iron. If the indicator lights up, then the cause will be a wire break in the power cord.
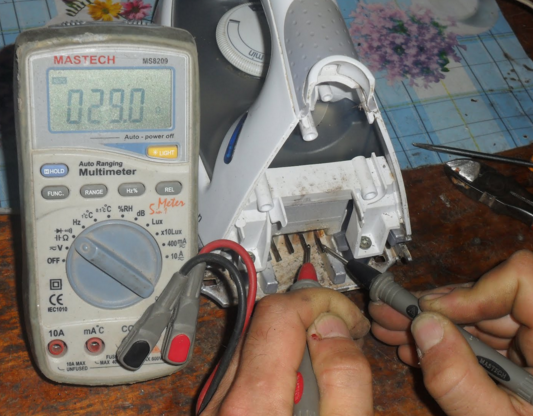
Checking the health of the electrical cord using a multimeter
If you have a multimeter in your house, then you can check the functionality of the iron using it. You need to check the cord without connecting it to the mains. If the iron is in good working order, then its resistance will be about 30 ohms. If during the measurement you move the cord and its resistance fluctuates, then this may indicate a malfunction of the cord.
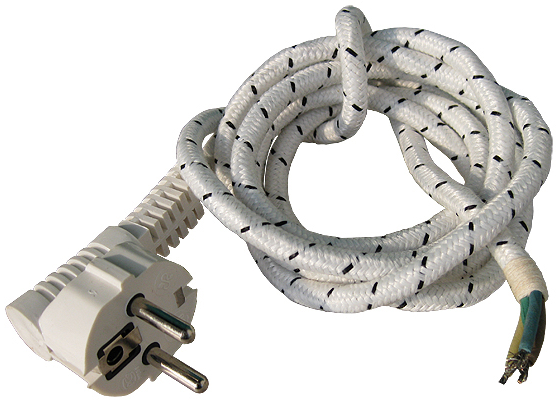
If the cord of the iron is frayed in the place where the power plug is located, then you just need to replace the plug of the device. We have already written to you how to do this. If the power cord is frayed at the point of connection to the iron, then the device will have to be disassembled. After you remove the cover, you will see the power cord contacts.
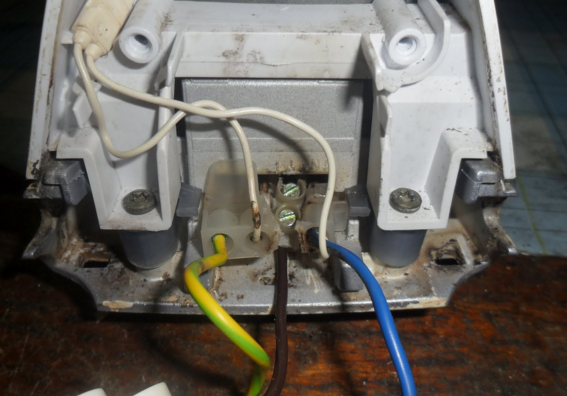
To date, there is no specific marking of wires for irons. That is why now we will consider the marking of the power cord for irons:
- The green-yellow conductor is ground.
- Brown is a phase.
- The blue wire is zero.
Repairing an electric iron involves replacing the power cord. Be sure to be careful when repairing your iron. When doing it, you also need to check the functionality of the electrical cord.
Checking the power cord of the iron using a table lamp
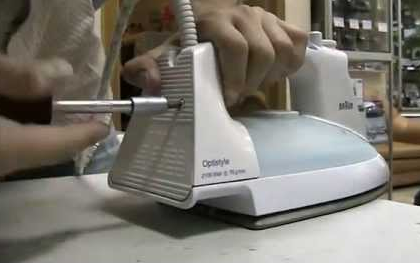
You can check the power cord on your iron in various ways. Everything will depend only on what you have in stock. If you do not have any appliances in your house, then you can check the iron using a table lamp. To do this, you need to squeeze the latch, as shown in the photo.
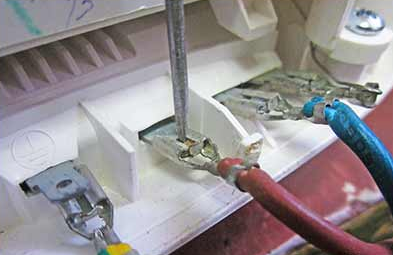
Now you need to clean the contacts to a shine. If your terminals will fit effortlessly, then you need to tighten with pliers. It is possible that this was the problem. If everything is in order, then the table lamp plug must be connected to the blue and brown wires. The switch, which is located in the table lamp, must be in the on position. If the table lamp shines steadily, then the device is fully functional.
Checking the health of the power cord on the iron using the phase indicator
Iron repair cannot take place without an indicator screwdriver. It will help determine the health of your device. In order to check the terminal with an indicator screwdriver, you must first provide access to it. If, when you touch one of the wires, the indicator shines, but does not shine to the other, then the wire when touched to which the indicator is shining is working. If it shines in both cases, then the wire that is connected to the phase in the outlet is working and the entire iron circuit, including the thermostat, fuse and heating element, too.
Checking if the cord on the iron is working with another cord
If you have another power cord in your house, then you can use it to check the functionality of the iron. To do this, you need to connect it to the terminals of the iron and plug it into an outlet.
If the indicator that is located on the iron lights up, then the problem is in the power cord.
Repairing the power cord on the iron
Quite often, a malfunction of the iron may lie in a faulty power cord. It is best not to repair it, but simply replace the cord. You should also remember that sometimes a cord is used for irons, which has increased strength. Also, its plastic insulation must be covered with a fabric base.
If you do not have the opportunity to go to the store and purchase a new cord, then you need to do some repairs.
Checking the tubular electric heater on the iron
Usually, the heating elements that are in the iron rarely fail. In order to check its performance, you need to remove the back cover from the device. Usually, on an iron, the terminal of the heating element is connected to the extreme terminal of the device. If the indicator on the device shines, but heating does not occur, then the reason may be associated with a break in the spiral.
Sometimes you can find devices in which the thermostat is included in the break of one output of the heating element. In this case, the thermal fuse may be defective, but this conclusion may be erroneous.
Checking the health of the thermostat on the iron
Before repairing it, you will need to completely disassemble your iron.
The attachment point for the body is usually at the nose of the iron. After you unscrew this bolt, the cover can be easily removed. Sometimes the mounting bolts can be hidden under the body. Be sure to inspect the entire iron before unscrewing the bolt. The second attachment point for the chassis is usually located in the area where the power cord is attached.
You need to be careful when removing the case. Otherwise, you may damage the case. Sometimes the iron body can be attached using special latches.

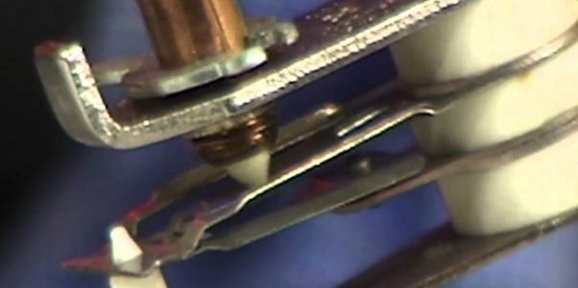
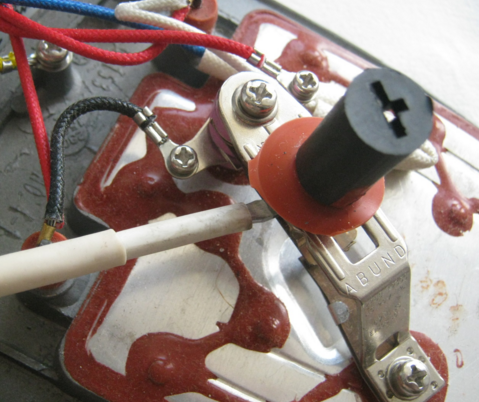
After removing the lid of the iron, you can easily reach the thermostat. In order to repair the thermostat, you should inspect the condition of its contacts. In a cold state, its contacts will be closed.
If the appearance of the contacts does not arouse any suspicion, then it should be checked with a tester. When checking the thermostat with a multimeter, it should show a zero value. If it shows the number 1, then the fault will be in the contacts. You can also check the contacts using an indicator screwdriver. If the indicator is on when you touch the contacts, then the device is working.
If you do not have these devices, then you just need to strip the contacts. You can use sandpaper for cleaning. Also, if you want to extend the life of your device, then you need to clean the contacts regularly. Your Braun iron can be repaired much less frequently by regularly cleaning the contacts.


