Tweet
The D-Link 2500U modem is very common among ADSL Internet users. Cheap, unpretentious even with poor phone lines, it is quite suitable for providing a computer with Internet access. Although there are modern, cheap Wi-Fi modems on the market, the legacy 2500U with no wireless support still works in some homes.
You can find dozens, if not hundreds, of instructions on how to set up this modem on the Internet. However, clear instructions for quick setup and there is practically no connection to the world wide web. I will try to fix this situation.
Connecting the modem to the telephone line
Any ADSL modem is connected to a telephone line through a wire with connectors (plugs) such as RJ-25, RJ-14 or RJ-11, that is, the most common telephone wire. How they look and which fit is well told.
This wire is not connected directly to the telephone socket, as its predecessor did - a buzzing and squeaking, terribly slow Dial-Up modem, but through a special filter - a splitter.
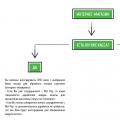
So that there is no noise when picking up the phone, so that the Internet works stably and quickly, you need to connect a splitter. This is a box that filters the signal separately for the modem and separately for the phone. Click on the picture below, there I drew two options for connecting the splitter:
As you can see from the text in the picture, you need to connect the splitter necessarily. And not just connect, but connect correctly - both the modem and the phone are connected through it to the appropriate connectors.
Common cause slow, unstable internet - in wrong connection this little box.
Connecting the modem to the computer
Everything should be simple here. We take the blue cord from the box with the modem, insert one end into the yellow connector of the modem (the color may be different, it does not matter), the other into the same port on the back of the computer. Don’t you? Very rare, but it happens. Then you need to go to the store and buy any network card, any cheap one for 10/100 megabits is enough. Then it needs to be installed in the PCI slot of the motherboard. How to do it is written
If you have Windows Vista or Windows 7, at some stage a window will appear with the choice of the network type. Choose "Public Network". At the same time, touch the settings network card no need, everything will be configured automatically. After correct connection on the modem the lamp with the inscription "LAN" will be on (or blinking). Read the fourth part of the article if you have any problems, there is a solution to common problems.
Configuring a modem to connect to the Internet
There are two types of ADSL modem connection - bridge configuration and router configuration. The difference is that when connecting with a "bridge", the computer itself connects to the Internet, using the modem only for the actual data transfer. When connected by a "router", the modem connects itself, without the help of a computer, and then "gives" the Internet to the computer.
The advantage of connecting with a "bridge" is that the modem will not have a heavy load during data transfer. This is useful for high speed (6 megabits and higher) and frequent torrenting. Minus - the Internet will turn on only when the computer is running.
The advantage of connecting a modem with a "router" is that it is not necessary to have a switched on computer to connect to the Internet. This is convenient, because to connect to the Internet, you just need to turn on the modem.
Of course, I greatly simplified the explanation, I told only the very essence. Since I prefer to connect "Router", further it will be about him.
To connect the D-Link 2500U with a router, do the following:
1) Turn on the modem, wait 20-30 seconds. The "Power" light should come on
2) There is a small round hole on the back of the modem between the connectors. This is the reset button. Press it with something thin (a match, for example) and hold it down for 10-12 seconds. The modem must be turned on during this procedure.
3) Wait 30-60 seconds.
4) Open any browser (Internet Explorer, Chrome, Firefox, Opera - it doesn't matter), enter the address 192.168.1.1
A login and password window will appear. Enter admin in both fields. A page like this should open:
The page may be blue, it doesn't matter. There are many versions of the D-Link 2500U modem, but the settings are always the same. However, like other modems.
If the page does not open, try entering the addresses 192.168.0.1, 192.168.2.1. If a message appears about wrong password, try entering Admin instead of admin.
5) Click on the left Quick Setup (the Wizard button in some versions of the modem). You will see the following:
6) Uncheck "DSL Auto-connect". Then the window will look like this:
Only the VPI and VCI values need to be entered here. Each provider has their own. You can find out these values by calling the technical support of the provider or looking for them on the Internet. Naturally, you will have to look for a computer with the Internet or go through the phone. Here the decision is up to you.
The provider "Rostelecom South: Kabardino-Balkarskiy branch", which I use, will have VPI and VCI values of 0 and 67, respectively, I enter them and click Next.
7) In the next window, select the router mode - PPP over Ethernet (PPPoE) and click Next.
It is also necessary to tick the boxes that I marked in the picture. The "Enable KeepAlive" setting may be called simply "KeepAlive", but "Retry PPP password" may not be present at all.
Advice to those who use the provider Rostelecom Yug: Kabardino-Balkaria Branch (formerly UTK Kabardino-Balkaria) - if the Internet does not work after setting up, reset the modem parameters and re-configure it by adding the letters “@” at the end of the login without spaces and quotes pppoe ". Perhaps this advice is also useful for other branches of Rostelecom.
Click Next.
9) On the next page there will be settings, which should be left as is:
The only remark: I have come across versions of the modem where some of the settings of the previous page are transferred to this one. So the values "Retry PPP Password on authentication error" and "Enable keepAlive" might be right here.
Click Next.
10) You will see the settings that are strictly not recommended to be touched if you do not know what they are for:
Press the Save / Reboot button and wait. You can close the page, it is no longer needed. After about a couple of minutes on the modem a light will blink with the inscription "i" or "Internet" - this indicates that the modem is configured correctly and the Internet is working.
Congratulations, you've set up the internet!
If something doesn't work - problems and solutions
Yes, it happens, unfortunately. I will list the most common problems, and also answer the questions that have been asked to me many times, asking for help:
Problem: The LAN lamp is off.
Solution: check if you have firmly inserted the cable into the connectors of the modem and the computer.
Problem: the address 192.168.1.1 does not open.
Solution: check if the LAN lamp of the modem is on. Turn off antivirus, firewall - they may be blocking work. Also take a look at the network card settings:
A) In Windows XP - Start - Control Panel - (Network and Internet Connection - if there is such an icon) - Network Connections - right-click on the "Connect by local network"- Properties, select the line" Internet Protocol TCP / IP "(the checkbox should be ticked), then click the Properties button - put the checkboxes on Obtain an IP address automatically, get the DNS server address automatically, OK, OK. The network status should be "Connected" as in the picture below:
B) In Windows Vista, go to Start - Control Panel - Classic View - Network Control Center and general access- Management network connections- right-click on the "Local Area Connection" icon - Properties, select the line "Internet Protocol version 4 (TCP / IPv4) - Properties - put the checkboxes on Obtain an IP address automatically, get the DNS server address automatically, OK, OK. The network status should be "Network" or "Connected" as in the picture below:
Go back to the Network and Sharing Center and make sure that next to "Local Area Connections" is "Public network":
If there is "Private network", click on the "Settings" label and change the network type to "Public".
C) In Windows 7, go to Start - Control Panel - View: Small icons - Network and Sharing Center - Change adapter settings - right-click on the "Local Area Connection" icon - Properties, select the line "Internet Protocol version 4 (TCP / IPv4) - Properties - put the checkboxes on Obtain an IP address automatically, get a DNS server address automatically, OK, OK. The network status should be "Network" or "Connected" as in the picture below:
Go back to the Network and Sharing Center and make sure that next to "Local Area Connection" is "Public Network":
If it costs " home network»Or something else, click on this label and change the type of network.
Note: in the case when after setting the settings to "automatic" you still have some error written, look for its solution in Google or Yandex.
Question: how to reset the modem settings?
Answer:
A) Full reset modem settings - press for 10-12 seconds the button in the hole on the back panel of the switched on modem. Then wait a couple of minutes - the modem will turn on with the factory settings.
B) Deleting only Internet settings: open the modem page at 192.168.1.1, the password and login are admin, go to the Advanced Setup - WAN section (or just WAN in some models) - check the box next to the settings line and then click Remove, Save in turn / Reboot:
Question: I set everything up according to your instructions, entered VPI and VCI correctly - my provider, but there is still no Internet, what should I do?
Answer:
A) Check if the modem is connected correctly. In 90% of cases, the reason is inattention.
B) If the Internet light on the modem is on, but there is no Internet on the computer, something is wrong with the computer. There can be so many reasons and they are all varied, I can only advise point 2 of the fourth part of this article - put the settings in auto mode.
V) Look at the DSL light on your modem. If it is off, then the telephone line is not connected. Check the connection of the modem to the telephone line. The splitter must be connected correctly!
G) Configure the modem, then go to the modem settings again - 192.168.1.1 and look at the page that opens. If you have empty lines in the "Line Rate - Upstream" and "Line Rate - Downstream" lines, you have problems with telephone line or it is not connected at all. Call the provider's technical support.
D) Reset the modem settings and re-configure, only after login in the settings add "@pppoe" without quotes and spaces. This is exactly what helps with my provider, Rostelecom Yug.
E) Perhaps your ISP is using some specific settings. Look for instructions on the Internet, on the provider's website.
Question: when someone is on the phone, the internet goes off.
Answer: the splitter is not connected correctly. Or not connected at all. Don't kill your modem, plug it in correctly! This is described at the very beginning of the article.
Problem: the Internet turns on for a long time - more than 5 minutes after turning on the modem.
Solution: call the provider, the problem is on his side.
Problem: the Internet often turns off by itself (the Internet light goes out)
Solution: the problem is either on the side of the provider, or you have poor-quality telephone wiring. This issue is resolved with the provider and the telephone company. Call the provider's technical support.
Problem: the modem often turns off, freezes, the Internet “disappears” (the Internet light is on at this time) or the Internet speed periodically drops dramatically, you cannot go to 192.168.1.1
Solutions:
A) The D-Link 2500U modem, like many other D-Link modems, often overheats. If you touch the top case cover, it will be hot. The situation is solved by installing a heatsink on the chip and / or installing a cooler. Examples once, examples two. You can also remove the top of the case and put the modem on the floor - it can help, though not as effectively.
B) If you use uTorrent or a similar program, in its settings, reduce the number of simultaneous connections up to 50-70 (I posted a screenshot of the settings). This will reduce the load on the modem.
V) The power supply unit may be damaged. If you do not have the necessary tools (a multimeter or voltmeter with an ammeter) to determine the malfunction, look for those with similar characteristics - 15 + 3 / -2 V, current at least 0.7 A (the advice was taken from here), connect it and check the operation of the router.
G) The problem could be viruses. Check your computer with Dr.Web CureIt.
D) Problems can be in antiviruses too, as well as in firewalls (they block access to the modem address). Disable them and check the Internet.
E) A red "Power" LED indicates a power problem or some other hardware problem. There is only one way - to the service center for diagnostics and repair.
Conclusion
The settings I have given will help you connect the D-Link 2500U modem and similar models (D-Link 2600U, 2650U, etc.) to the Internet relatively quickly and without much hassle. Setting up the modem with a "router" will allow you to connect it to any computer that has an Ethernet connector (and this is almost all modern computers) without any settings on the computer side - the modem will configure everything itself thanks to the DHCP protocol. But there are many subtleties when connecting ADSL modems, it is simply impossible to cover them in one article, so do not blame me if something did not work out.
I also want to note that my article is primarily suitable for connecting one computer. If you have several computers at home and you intend to connect all of them to the Internet at the same time, then the D-Link 2500U modem will not work for you. Of course, you can buy a second network card and connect the two computers with a network, allowing the connected modem to distribute the Internet to the second, but in this case, you need to keep the first PC turned on, which often annoys or interferes. Ideally, you need either an additional router in addition to the modem (a difficult option, I do not recommend it), or another modem with several Ethernet ports for organizing a local network between computers (the option is much simpler). For example, D-Link DSL-2650U. In this case, after configuring the modem with a router, you can connect computers through the same Ethernet ports (connectors) to the modem, everything should be configured and work on its own. About connecting to such modems using a wireless Wi-Fi technologies I will not tell you now, because this does not fit into the scope of the article (the 2500U does not have Wi-Fi).
---->
---->
---->
Repair of ADSL modem DSL-2640U version C1.
P. V. KrylovIn that sample of modems,
Which I came across, about 80% of the faults were of the following kind:
periodic blinking of all LEDs
periodic reset of ADSL connection
periodic LAN reset
The assumption that these are bad electrolytes in the PSU of the modem, in principle, was confirmed. So, let's open the modem. We tear off the four rubber bands from the bottom and unscrew the screws.

General view of the modem board in the next photo

In the next photo, there are capacitors that you should pay special attention to. They are outlined with white lines. These are 2 electrolytes of 2200 microfarads at 25 volts and one 470 microfarads at 16 volts. They are usually swollen, rubber bands are squeezed out.

If you have an oscilloscope, you can see the level of ripple at the output of the secondary power supply 3.3 volts, just there there is a capacity of 470 microfarads at 16 volts.

Here is such a not very happy picture. At 3.3 volts, the ripple is about 0.5 volts. We change the capacity by 470 microfarads unambiguously.

The result of the work.

Conclusions.
The technique is not the worst, modems very rarely die from external influences, but for round-the-clock work not adapted. Have worked - turn off the modem, unplug the adapter from the socket, and it is better to pull out the ADSL line.
At home, I use home Internet using ADSL technology via D-Link modem. I will say that Internet access is not reliable. I don't know who to blame more: either the provider; either a modem with a communication line; or maybe the user is to blame :). Only I have always noticed that the modem gets very hot during operation. Thoughts to disassemble it and somehow improve the cooling of very hot elements arose a long time ago, but somehow all hands did not reach. And then one day, on a spring day, I took it apart. 
 Turned on, disassembled, watched about twenty minutes online video, began to grope for hot items. I immediately found the culprit of global warming, this is a large BGA (microcircuit).
After palpation, he burned his index finger quite badly. That is, in fact, the entire modem, together with the case, heats up only from it. On the reverse side, at the location of the microcircuit, I found darkening printed circuit board.  Although I know that the operating temperature of some radio elements is rather high, and the temperature of 70-105 ° is normal, I felt sorry for the poor thing and all her surroundings, so I decided to mount a radiator on her. I found a suitable radiator on the old motherboard from the computer that was glued to the microcircuit.
  With the help of a screwdriver, he took the radiator away from the rightful owner. He decided to place it on a modem microcircuit using hot melt glue. I ran around the shops, found hot glue only in the TV workshop, gave 150 rubles for it.
  Hot glue in our small town is a very rare thing, so I immediately developed a backup option: we glue the radiator on superglue, applying it (in small dots) to the four corners of the microcircuit, we smear the center with KPT-8 thermal paste, which is sold in every computer store for 30 rubles.
  Here, it is important to calculate everything correctly so that the paste spreading over the microcircuit does not mix with superglue. Since the radiator did not fit completely into its intended place, we had to cut it off.
  In my case, the screen of another, large microcircuit (not heating), but on the exact same modem of a friend, interfered with the placement of the whole radiator, this screen was absent, so I glued the radiator to it completely. To glue the radiator, apply a thin layer of glue to the microcircuit, after degreasing the surface.
  We press the radiator to the microcircuit, and drive it a little from side to side, so that the layer of glue becomes more even and thinner.
  After thinking, I decided to glue the rest of the radiator. We glue it to the screen, and the fins of the main radiator, aligning them. Maybe the heat transfer will be small, but it will not get worse for sure.
  I was convinced of this by the heating of a small part of it and the screen. According to the instructions, the drying time of the glue is 24 hours, but if you do not move the radiator, then the product can be used earlier, because the glue is thick enough and does not even dry, it holds well. Putting the modem together and we know: overheating now definitely does not threaten us. Well, and of course, we note the significantly increased speed and stability of the Internet connection :).
The router is used to connect to the Internet several devices, computer, laptop and others, via wired or wireless technology and creating a local network between these devices. At the same time, the router implements a barrier between the local network it has created and the Internet. Basically, routers work using NAT - Network Address Translation. Sometimes providers provide routers with the connection, the router can be inside a DSL modem or cable, or purchased separately. But like any electronic device, routers can fail and many malfunctions can be eliminated at home on their own. Consider some common router malfunctions and methods for their elimination, repair of a d link router.
Most often, the following reasons lead to router malfunctions:
- large voltage surges in the network,
- overheating of the router,
- glitches software router (firmware crashes),
- high-frequency interference electromagnetic radiation during a thunderstorm (in this case, the wan port most often burns out if the provider does not install lightning protection on its cable),
- human factor.
If the router malfunctions, it can lose data packets, work on the Internet and the local network is disrupted, the firmware gets lost, the router can turn off, all the indicators blink.
Solving a malfunction related to the impossibility of entering the settings of the router at its network address 192.168.0.1
If after dialing in the address bar network address the router settings page will not open, then to eliminate this malfunction, the following operations should be performed:
- First, check that you have set in the settings of the network card to automatically obtain for the IP address and DNS address (a direct connection to the router is used).

- If the settings of the network card are correct, then you must use the Run command (press the key combination Win + R), then enter - cmd and press enter. Now in command line you need to enter ipconfig.

Command line “ipconfig”
In the displayed settings, you need to see what value is opposite the inscription - Default gateway. This address is used to enter the settings of the router. If the value of this address does not match the standard value, then the router may have been configured for a specific network with its own requirements. In this case, you need to reset this value to the factory settings. Sometimes this field may not contain the address value at all, and you also need to reset the router. To reset the router, you need to press and hold the Reset button on the router for a while. Usually five or ten seconds are enough. The button hole is narrow enough so you can use a ballpoint pen, needle, or paper clip to press it.

If resetting the router does not help, disconnecting the ISP cable from your router may help. Pull out the provider's cable from the router connector and configure the router without a cable connected. After that, you can reconnect the cable to the router.
Also check the firmware version installed in the router. Check the latest firmware version on the manufacturer's website and update it if necessary. You can also check the drivers of your network card on your computer and reinstall them if necessary.
If the router settings are not saved
To troubleshoot the problem with not saving the settings of the router or if it is impossible to restore the settings from a separate file, you can try to carry out these operations by opening another browser. This method can help with other router malfunctions.
The computer (laptop, etc.) does not see the WiFi network
There can be many reasons for such a malfunction, and they are all approximately equally common. Let's consider the main possible causes.
If the network of your router is not displayed on the laptop in the list of available networks, then you need to check that the wireless network module is turned on. This can be done by looking at the adapter settings in the Network Sharing Center on your laptop. The wireless connection must be turned on. In the off state, it will be grayed out and you will need to turn on wireless connection... If you cannot turn it on, then you need to check if your laptop has a Wi-Fi switch and turn it on.
If, despite the fact that the wireless connection remains on, but shows the status - No connection, then you should check if the correct drivers are installed for the Wi-Fi adapter and, if necessary, install them. The drivers must be downloaded from the website of the manufacturer of your equipment. This avoids possible problems driver incompatibility.
In addition, you can try to go to the router menu and change the value for the settings there and change the b / g / n parameter to b / g. If this change helps, it means that the 802.11n standard is not supported. You can also see how the channel is specified in the same settings wireless network, and if there is - Automatic, then select a channel from the list.
Other malfunctions
If you have frequent connection breaks during work, it is recommended to update the router's firmware. In many cases, this procedure will solve the problem.
Sometimes when working with some Internet providers to access local resources (torrent trackers, game servers), you need to configure static routes in the router settings. Such settings can be found on the forums of the provider that provides you with the Internet.
Malfunctions of power supplies in routers
Surely, many have already come across the fact that the weakest point of many routers is their power supplies. They often break down due to large voltage drops in the power grid and the failure of individual elements as a result of long work.
Defective or low-quality elements, a scheme that is not designed for some margin, can also lead to breakdowns. Some typical malfunctions power supplies. In this article, we will consider repairing a power supply for D-Link router... Power supplies such as JTA0302D-E and the like are used for Asus and D-Link routers, designed for an output voltage of 5V and a maximum current of 2-3 A. The appearance of such power supplies can be seen in the figure below.

If we consider the circuit and design of similar power supplies, then this is a diagram of conventional single-ended switching power supplies. In such circuits, a PWM controller is used for control, which controls the operation of a field-effect transistor, which is connected to its output. As a result, the voltage is reduced to the desired value and rectified and it is supplied to the output. A schematic diagram of such a power supply can be seen in the figure below. In this diagram, depending on the model of the power supply, there may be some minor changes in the ratings of individual components. The power supply delivers a voltage of 5 volts. This voltage should not drop significantly under load (with the router turned on).
To repair the power supply, you may need to use a soldering iron, solder, multimeter, knife and electrical tape. To open the plastic case of the power supply, you need to cut the glued seam of the case. This operation can be done with a knife, but it is more convenient to use a small bur-machine for these purposes.
If you look at the power supply circuit in Fig. 2, you can see that a 2 ampere fuse, a choke, a thermistor and a rectifier bridge of four 1N4007 diodes are installed at the input. If there is a large voltage surge in the network, then all these elements can burn out. They can be easily checked with a multimeter by measuring their resistance. To smooth the rectified output voltage, a capacitor is placed after the diode bridge large capacity- C1 (22 or 33 μF). This capacitor should be 400V, no less. If he is out of order, then this can be determined by his appearance, it swells.
In addition, a positive voltage from the diode bridge is applied to a PWM microcircuit, in this case UC3843B. This microcircuit is used to control the opening and closing of the field-effect transistor P4NK60Z. Often the power circuit of this microcircuit contains a malfunction. In this circuit there is an electrolytic capacitor C6 and a zener diode ZD1, which is designed for a voltage of 20 volts. This capacitor must be of a certain capacity so that during operation the voltage supplying the microcircuit is always within the permissible operating limits. Therefore, the recommended capacitor capacity is 100 μF. If the capacitor is dry, then the capacity will not be enough to start the microcircuit,
It is quite difficult to determine by external signs such an inoperative capacitor. The small size does not allow you to notice some bulge on its lid. You can measure the capacitance of a capacitor, but there is often a large drop in ESR with normal capacitance. To check the ESR, special measuring instruments are needed, this cannot be checked with an ordinary multimeter or tester.

In case of voltage drops, the zener diode ZD1 may fail. This can be seen from the darkened (charred) body of the zener diode.
In rare cases, the P4NK60Z field operator may fail. This transistor is supplied with a voltage of 13-15V. from the PWM output. The efficiency of the field-effect transistor can be checked with a multimeter (tester) switched to the diode test mode. On the drain-source channel, the voltage drop is 0.6-0.8 V.
If the voltage at the output of the power supply is 5 V, and when the load is connected, it drops to about 2 V., then most likely the electrolytic capacitors at the output of the power supply (C9 and C11) have dried up. To eliminate this malfunction, it is necessary to replace the dried electrolytic capacitors with working ones with the same characteristics.
In general, the main repair steps can be identified. If there is no voltage at the output of the power supply, then it is necessary to check for breakdown by measuring the resistance F1, TR, rectifier bridge. To provide some starting margin, it is desirable to use the capacitor C6 of 10 μF and rated for 50V, and not 47 μF and 25V. as usual in the diagram.
In cases where the output voltage drops, unstable operation of the power supply is observed, it is necessary first of all to replace the electrolytic capacitors C1, C9, C10, C11.
In addition, you can recommend several recommendations to improve the performance of the power supply. At the output of the power supply, a 220 Ohm 0.125w resistor is usually installed, filled with a special sealant. This resistor operates at its limit values and therefore gets very hot. Heating causes the condenser C9 to dry out. It is advisable to put a 300 Ohm resistor and a power dissipation of 0.5 W instead of a 220 Ohm resistor. If a capacitor C9 for 10v is installed in the circuit, then it is better to put the same one instead, but designed for 16v.
After repair, the body must be assembled. But you do not need to glue it, but fasten the two halves, for example, with a coupler, so that in the future, if repairs are needed, it can be easily disassembled again.
The DSL 2500U modem from D-link is another DSL router that looks little different from its older brother, but is significantly inferior to it in terms of technical characteristics.
D link dsl 2500u router specifications
With a detailed list technical characteristics router d link dsl 2500u can be seen in the following illustrations:


D link dsl 2500u router at a glance
Like most routers, on the front panel of the d link dsl 2500u router there are a number of indicators that inform the user about the following aspects of their device operation:

- "POWER" - the presence of power supply on the router;
- "STATUS" - the status of the router and possible errors in the system (if the indicator is inactive or, on the contrary, is constantly on);
- "LAN" - connection and activity of network devices;
- "DSL" - DSL synchronization status;
- "Internet" - informs about the presence of an Internet connection and possible errors (if the indicator is red).
There are four elements on the back panel:

- "DSL port" - to connect the router to a telephone line;
- "LAN port" - for connecting network devices;
- "Reset" - a button to reset the settings of the d link dsl 2500u router to the factory settings;
- "5V = 1A" - battery connector.
Installing and connecting a Rostelecom modem
The principle of installing and connecting the d link dsl 2500u router is elementary and no different from other models:
- in a well-ventilated place away from heating elements, protecting the modem from direct sunlight;
- the switched off router (dsl port) connect to the Internet line (telephone cable or cable coming from the splitter);
- to the "LAN" port;
- plug in the power supply and turn on the router.
Setting up an Internet connection on a d link dsl 2500u router
To gain access to the web interface of the router, use the address 192.168.1.1, which must be entered in the address bar of any Internet browser (the default login and password are “admin”).

The illustrations below correspond to latest version firmware 1.0.50.
When you first enter the router interface, a window will appear prompting you to carry out the initial settings of the router.

You can use either the "Setup Wizard" - in order to configure the d link dsl 2500u router in semi-automatic mode and select only the basic parameters, or "manual configuration" - in order to "accurately" set all the necessary parameters.
Within the framework of this article, we will consider in detail exactly manual setting modem - in order to have a more complete picture of the network created by the router.
Configuring the d link 2500u modem using the "Configuration Wizard"
Sequence of actions for automatic tuning the router is shown in the following illustrations:


Advanced settings for the d link 2500u router
To create an Internet connection manually, open the "Network" menu, the "WAN" section and click "Add".

You will see the "Create WAN Connection" window: here, in the "Connection Type" line, you need to select one of the proposed options, based on the data specified by the provider in the contract (the same applies to filling in the username, password and atm interface).
"Bridge"

- enter the value "VPI" and "VCI" - depending on the region and service provider;
- check the boxes "NAT" and "Firewall".
PPPoE or PPPoA

Here, in addition to the parameters described above, you should specify:
- "Username" and "Password" (twice);
- if desired and necessary, enable the "Dial on Demand", "PPP IP Extension", "PPP Debug" or "PPPoE Forwarding" options.
"Static IP"
"Dynamic IP"
You do not need to specify anything for this type of connection.
Save the settings when you finish entering the data.
IPTV setup
Since the d link dsl 2500u modem offers only one "LAN port", you have to choose for what to provide Internet access: a set-top box or a computer.
In the "Execution days", "Execution start time" and "Execution end time" blocks, it is necessary to set the time interval during which the prohibiting rule will operate.

Go to the next section "URL filter" and check the box next to "Enable / disable url filter".
You can block both individual addresses and all addresses except for those allowed.
Choose one of the options and click "Change".

The next window contains two lines:
- "URL address" - here you need to specify the address of the site that will be blocked by the router (or, conversely, added to the allowed ones, depending on your choice).
- "Port" - for the "http" protocol, port 80.

Thus, this model is not equipped with the ability to create a wireless network - this fact and rather weak technical capabilities have long ago sent "2500U" to a well-deserved "pension" and removed this model from production.